Supplies:
-1 piece white matte card stock (this is your background, so you can actually use any color you want - you'll see later some examples)
-Various ink pads
-Black ink pad
-1 piece white matte card stock (this is your background, so you can actually use any color you want - you'll see later some examples)
-Various ink pads
-Black ink pad
-Embossing powder (you definitely want clear, and perhaps some other colors to dab on)
- Stamps (any kind you wish - seasonal, collage, sentiments. Just keep in mind this will be cut up)
Now - this is the fun part.
color, scribble, mark, paint with all your colored ink pads. You want this
to be a mess - with no rhyme or reason - be bold - use colors outside of
your comfort zone. Use gel pens, markers, Pearl Ex, anything you want to.
When you are satisfied with your colorful mess, go to step 2.
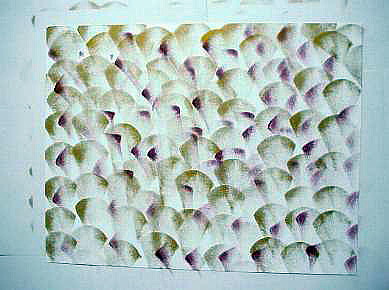
black ink pad. Again, there needn't be any theme or pattern, in fact, I
think the less structured the better. Once you are happy with the amount of
stamping, select your embossing powder and emboss the entire sheet. There
will still be "wet" spots of ink and the powder will stick there. I always use clear, but I may put some gold or another color in a few spots. It takes a while to emboss the whole sheet - I give my embossing gun a rest between sheets if I am doing more than one. Once this is done, go to step 3.


to use. I typically use 1" x 1", but you can use bigger if you want. I
certainly wouldn't go any smaller. You can also cut your squares with
decorative scissors. Once you are done with your sheet you'll have more squares than you need, so you can always stash them away to use later, or keep making cards until you run out.
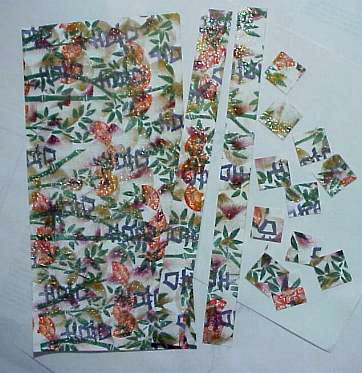
It is really fun to see what color card stock goes with your squares - Some of the combinations I would have never thought of. You can arrange your squares prior to gluing, or just start gluing. As you can see from the different cards I made from the squares I cut from this sheet, the background card stock color can really make a difference in how the squares look. The pattern you put them in can make them all look different, too.


Then I took some of the squares I had left over from eons ago and placed them around the circle - I think it came out kinda cool & I'll use it as an embellishment on a card or something.


Here is a picture of all four embellishments/cards I made - all with just these squares!! This is a VERY easy technique and if you decide to try it I'd LOVE to see some of what you come up with - and if you'd like I'll post your creations for all to see. I hope you enjoyed my little tutorial & I would appreciate it so much if you'd share your thoughts with me. Enjoy your day!

No comments:
Post a Comment
Thank you so much for your comments! I read each and every one :)