Followers

Showing posts with label Versamark Ink. Show all posts

Sunday, January 24, 2021

A Couple of Prickly Animals

I was originally going to make a post for these cards separately but they look so cute together I just couldn't separate them! I made these cards quite a while ago and I was happy to have finally gotten them on the blog so you all could see them.  I had originally made these for a color challenge but they never made it there; but here they are now!


What I Used to Make Both Cards:
Hero Arts Cactus Animals Bundle #SB199 {retired but is available online}
You can also look for the products separately; the animals are #CM267, dies #DI512
Watercolor Paper {I use this}
Ranger Archival Ink in Jet Black

I stamped, colored, and cut both the turtle and cat.  As you can tell from the cards I colored each of the images quite carefully.  I layered greens over browns with a bit of orange and yellow thrown in, as well as the colors for each image, such as the plant container for the cat.  It actually took a few days to complete them as I had to wait for each color to dry completely before I added another layer of color.  If you don't let them dry completely, you end up with a mud puddle of brown! Don't forget if you want to see all the details in the pictures, just tap the image and it should show you a larger one.

It's easier to show each card and the items I used to make them separately at this point, so here we go!
What I Used on the Turtle Card:
Kraft Card Base                                                                                  
Simon Says Stamp Fine Detail White Embossing Powder

I attached the turtle right to the card base and took a leap of faith by stamping the sentiment and embossing it right on the card.  I typically try to do this but end up creating a huge mess and cutting the sentiment out and layering it over the huge mess.  But this time it worked like a charm! 


What I Used on the Cat Card:
White Card Base
Kraft, Green, Light Blue & Blue Cardstock {stash}
To add some interest to the cat card, I started with cutting the chain circles out of blue and green card. Once they were glued on and dry, I added the prickly kitty.  Finished this card off by stamping the sentiment in black on Kraft card, cutting it with the stitched rectangle die, and gluing it on.

These cards were really delightful to make; layering the colors was so much fun!  It isn't something where I have a lot of experience since most of what I color is just one color.  They pushed me out of my comfort zone and I hope they inspire you to get a little crazy! What else is there to do? Might as well make a bunch of cards :) I sincerely hope that you and yours are well during this trying time; to me it makes it even more special that you have popped in as I am sure you have other things on your mind.  I appreciate you taking the time to read my posts :)  Fondly, Christi


I am entering my cards in the following challenges {found on Challenges for Days}:
CAS on Friday, #197 - Animals {hope my faux animals count!}
Krafty Chicks, #543 - CAS
Scrapping for Fun Challenges, #184 - Anything Goes
Little Red Wagon, #585 - Die-Ing to get Crafty!
The Male Room, #146 - Animals {hope my faux animals count!}
Creative Knockouts, #385 - Anything Goes


Wednesday, May 27, 2020

Floral Thank You Cards

I can't seem to stop making more than one card and these cards are no exception!  The floral panel is SO pretty {and I just got the stamp, first time using it!} I had to cut it in two to make double the cards.  Plus, super easy cards are fantastic and I can never have too many thank you cards {the trick is actually sending them out!}


What I Used to Make my Card:
White Card Bases
Gina K. Amalgam Ink in Obsidian 
Watercolor Paper {I use this}
Zig Clean Color Brush Markers 
Water Brush
Simon Says Stamp Pretty Peonies Background Stamp, #SSS101961
Simon Says Stamp Thanks & Leaves Stamp Set, #SSS101894 
Simon Says Stamp Fine Detail White Embossing Powder
VersaMark Ink 
Matching Dark Pink Cardstock

I stamped the peonies onto a piece of water color paper, using the Obsidian ink and used my Zigs to water color the image in.  I cut the paper in half, attached
One of the cards

each piece onto white card bases. Then, I was lucky enough to find some dark pink card that I think matched the peonies very well, so I used that to emboss the sentiment on.  I attached the sentiment and now I have 2 more pretty Thank You cards to add to my stash.

And the other card

As I am trying to use up the cards I make I think I will fill this out with just a Thank You saying on the
inside and put it in my purse so that the next time I go to the grocery store, or to get gas, or anything where I depend on others to work so I can get what I need and give them the card.  Maybe it will bring a smile to someone's face.  Thanks so much for visiting and I'd love to visit you back - leave me a comment so I can pop over to your crafty space and leave you some love ~ Fondly, Christi

I am entering my cards in the following challenges:
NBUS - Challenge 14
TTCRD - Anything Goes
Addicted to Stamps and More, #391 - Anything Goes
Arty Divas, #22 - Anything Goes
Stamping Sensations - Say it with Flowers


Saturday, April 11, 2020

A Trio of Lawn Fawn Shadow Box Cards

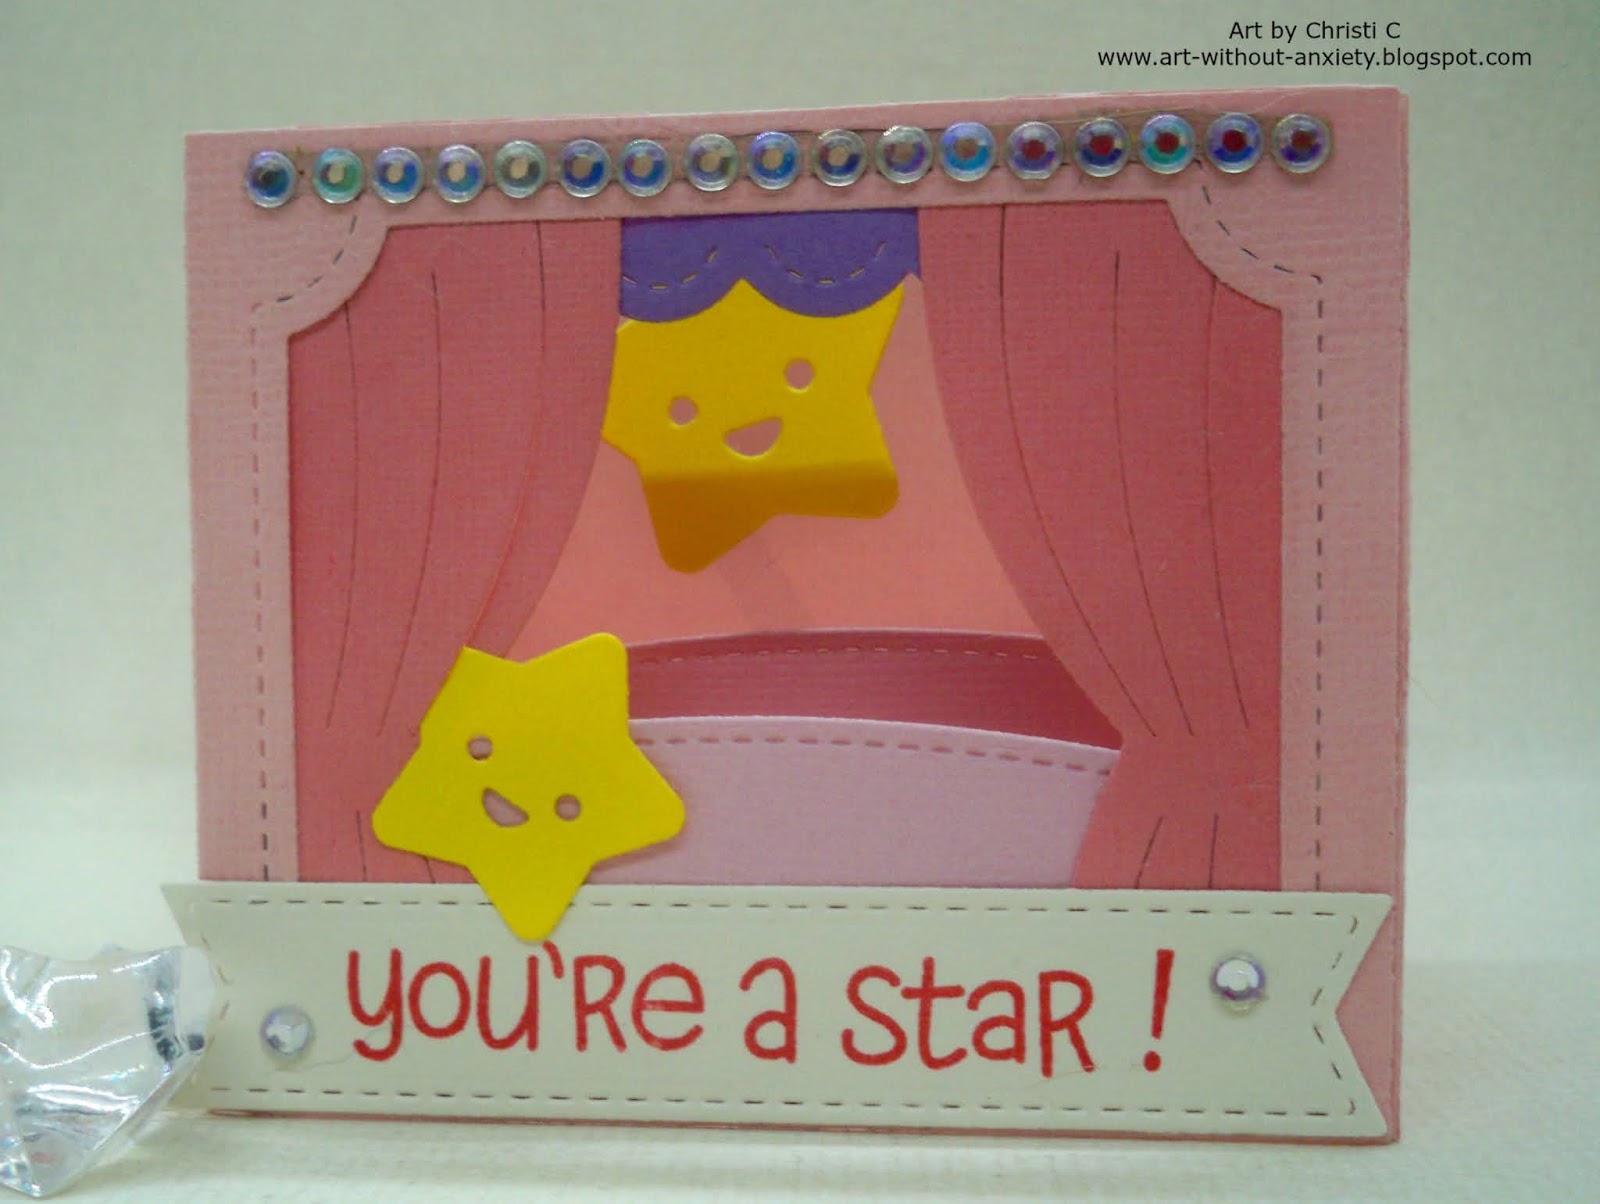
I know most of you are stuck in the house and the big trip of the week is to the grocery store to see if they have any toilet paper - thank goodness that is starting to get easier, at least here in Colorado it is.  I have been crafting like crazy in between doing some chores that have been put on the back burner; at least I feel that something is getting done! The entire  time I took off from crafting I still shopped, and bought crafting supplies, cause how can you not?   Once I started to look at all the goodies I have amassed I really wanted to play with these sets that go along with the Lawn Fawn Shadow Box card; I love that these cards can be folded to fit into a regular A2 envelope! I made three of them {I sense a pattern here; I seem to be making sets lately. I guess I am making up for lost time!} Here is the trio of Shadow Cards I made:

Here is the group:


What I Used for Each Card:
Lawn Fawn Shadow Box Card, #LF1486
Gina K. Amalgam Ink in Obsidian
Sturdy Cardstock for the Boxes 
Various Pastel Colored Card

Now, this is what I used to make the Waving Hello card {in addition to the items listed above}:
 

Lawn Fawn Shadow Box Ocean Add On, #LF1705
Lawn Fawn Wavy Sayings, #LF1899
Lawn Fawn Fancy Wavy Banners, #LF1923
WOW! Opaque Bright White Super Fine Embossing Powder, #WL01SF 
VersaMark Ink
 
This was simple to make, I just cut out all of the pieces, using appropriate colors of card and put the card together.  I stamped the sentiment onto the banner with Versamark ink and embossed it with the white embossing powder.  Attached the banner and the card is done!


To make the Spring Shadow Box card I used {in addition to the items listed above}:
Lawn Fawn Spring Shadow Box Add On, #LF1906
Strip of Acetate

This card was a little more time consuming; cutting out and gluing the little flowers to the hillside took a bit of time.  I cut out the bunnies, one out of grey card and one in brown, and put the card together.  I made the back brown bunny appear to be jumping using the strip of acetate.  It's so much fun to make the pieces of a car look like they are floating {it's the little things that make me laugh!!}


Lastly, to construct the You're a Star card I used {in addition to the items listed above}:

Lawn Fawn Shadow Box Card Theater Add On, #LF1706
Lawn Fawn Lucky Stars Stamp Set, #LF514
Hero Arts Strawberry Ink
Strip of Acetate
Die-Namics Stitched Fishtail Sentiment Strips, #MFT-1123

I like the double meaning of this card, you're a star in a theater, get it? I cut out all of the components, put the card together, again using a strip of acetate to make the star appear that it is floating in the background.  Finished it up with the sentiment and the gems.  After all, why be on stage if you can't rock some bling? 

That's it for today! I hope my 3 happy, spring cards brought you some joy; and
Another Look at all Three
I sincerely hope everyone in your world is doing fine.  If any of the cards, or projects, on my blog speak to you, please message me & if I still have it, it's yours! No worries as I will pay the postage.  I have so many cards hanging around I need to do something with them and while I do donate a bunch it would be nice to share them with other card makers.  Email me {StampinDiva at yahoo dot com} and I will let you know if I have the card(s) available.  Thank you so much for using your time to come visit me - do leave me a comment so I can visit you back! Fondly, Christi


I would like to enter my cards in the following challenges {if the challenge is specific to one of the cards, I will note which one is entered}:
Simon Says Stamp Wednesday Challenge - Spring Moodboard {see below} 
NBUS, #13 - Anything Never Been Used {schtuff} - I never used the Spring and the Theater Add On's for the Shadow Box Cards :)  
Die Cut Diva's - April Challenge - All About Animals {Spring & Waving Hello Cards}
Country View Challenges - April Challenge - Animal Magic {Spring & Waving Hello Cards}
A Perfect Time to Craft - April Challenge, Anything Goes
2 Crafty Critter Crazies, #37 - April Challenge, Anything with a Critter {Spring & Waving Hello Cards}
Southern Girls Challenge - April Challenge, Anything Goes 
Cut it Up! - Hopping Down the Bunny Trail {Easter} - {Spring Card}
Craft Rocket Challenge, #69 - April Challenge - Furry Friends {Spring Card}


Thursday, January 24, 2019

Plane and Simple

I get a huge kick out of a good play on words {almost as much as a good snarky sentiment} and this card just makes me smile!  It's difficult for me to make a sweet card that isn't too feminine looking - with all that pink and hearts and stuff.  But this year I am determined to make a "manly" lovey card for Valentine's Day; I think I did a good job, what do you think?


What I Used to Make my Card:
White Card Base
DCWV Maps, Text and Ledgers 8" x 8" Stack, #CS-019-00018
Lawn Fawn Plane and Simple stamps, #LF1409
Lawn Fawn Plane and Simple dies, #LF1410
Lawn Fawn Candy Hearts, #LF1827
Tutti Designs Scalloped Stitched Nesting Circles, #TUTTI-419
Ranger Archival Ink in Jet Black
VersaMark Ink
Simon Says Stamp White Fine Detail Embossing Powder
Watercolor Paper {I use this}
Zig Clean Color Brush Markers
White & Red scrap card
Vellum

I started by making a collage with a bunch of the papers from DCWV.  I ripped up some of the maps and collaged them on scrap white paper.  Then I trimmed the panel down and attached it to a white card base.  I didn't want anything to be recognizable on the map and ripping up the papers and mixing them up worked beautifully to get the background I wanted.

Although this is an older stamp set, this is the first time I've used it.  What better occasion than Valentine's Day or even just an every day "I love you" card to break out a some new goodies?  I love the planes and the puffy clouds, especially the puffy heart exhaust.  I think this set is perfect for a masculine card as it gets the point across without being too frilly and girly; plus you can always raise the cuteness factor by giving your clouds one of those adorable smiley faces that are included in the set.  Once all the images were stamped, colored, and cut, I realized I
Another Peek
had a dilemma.  How to add all the elements without covering up the map? I suppose I could have made a larger card but I am so used to designing for an A2 {4 1/4" x 5 1/2"} size card that I honestly didn't even think of making a larger card until I was faced with the placement of the pieces.  After some thought, I chose to use vellum to act as a buffer between the map and the components of the card.   I just bought some new Tutti Designs dies {and I HAD to try them out!} so I used the scalloped circle die for the vellum.  I attached the vellum to the card, hiding the adhesive under the clouds, plane, and heart.  I embossed part of the sentiment with white embossing powder and added the heart with white scrap layered behind it to finish it off.


And there is my "manly" love card.  I am pleased with the design and I think the recipient is going to enjoy it as well.  What do you use to design a masculine card?  I'd love to hear your tips and tricks.  Just leave me a comment and be sure to leave your contact information so I can visit you back.  Thanks for stopping by and I hope to see you soon! Fondly, Christi

I am entering my Plane and Simple card in the following challenges:
Lawn Fawnatics - #45, Lots of Love {graphic below}
Unicorn Challenge -M, #39, Things with Wings
Cardz for Guyz - #211, Trains, Planes & Automobiles
Work it Wednesday - Something New {the stamp & dies are new to me}
Simon Says Stamp Wednesday Challenge - Have a Heart
Southern Girls Challenge - Love is in the Air 
Moving Along with the Times - Have a Heart
Dies R Us - Anything New {the stamp & dies are new to me}


Tuesday, December 25, 2018

Golden Season's Greetings

Before I get into this card I want to wish everyone a very happy holiday season! Merry Christmas ~ Happy Hanukkah ~ Festive Kwanzaa ~ Happy Yule
please feel free to add your own holiday message if I've forgotten! 😁

I recently bought a whole bunch of the beautiful sayings that Sue Wilson has put out and I like the Mini Expressions because they fit so well on an A2 card.  I love a swirly, fancy looking font so these are a must have for me!  I have a bunch of them for the holidays; now I'm working on acquiring the "everyday" Expressions.  I made this card a while back but haven't shared it yet.


What I Used to Make my Card:
Kraft Square {5 1/4" x 5 1/4"} card
Neat & Tangled Friendly Florals stamps
Neat & Tangled Friendly Florals dies
Sue Wilson Season's Greetings die, #CED3154
Watercolor Paper {I use this}
VersaMark Ink
Gold Embossing Powder
Shiny Gold Card
Zig Clean Color Markers

In making this card, the first thing I did was stamp a bunch of the flowers onto watercolor paper with embossing ink {after I used my Powder Tool, so technically this is the second step LOL}, then liberally sprinkled on gold embossing powder, and embossed them.  For this design you need to use a detailed, regular, or fine embossing powder; no chunks because the lines are so fine and it won't stick.  Embossed designs are very easy to color since it's difficult to color outside the lines!  I colored the flowers using my Zigs and then, when they were dry, cut them using the matching dies.  I have to say this set from Neat & Tangled is very versatile; you can see some of the other cards I've created using this set here and here.

I admit it took me forever to get the flowers in something like a circle.  I spent hours upon hours trying to get the look I wanted; truthfully, I'm not thrilled about the shape on which I finally settled, but it was one of those times where if I didn't just glue the images down, the whole thing was getting tossed.  So I
Another Peek
arranged the flowers to fit the card, cut the sentiment out of gold card {the gold card I used is like a dull mirror card}, and attached that to the card.  If it hadn't taken me so long to arrange this card, it would of been one that I could of reproduced a few times but after the struggle I had, nope.  


I do like how the gold sentiment picks up the gold embossing and I'm pleased with the coloring.  I'll chalk this one up to another card that shows the charm of being handmade. I also really adore this entire stamp set - it's one of the most versatile sets I own and I do hope you check out other cards I've made using the set; the links are up in the first paragraph.  How are you doing with your cards and holiday projects? I'm feeling under the wire but I think I do some of my best work under pressure {but you kinda knew that already if you follow my blog - I'm always stressing myself out for one reason or another!}  Have you ever encountered a card you thought would be easy and it became a nightmare?  I'd love to hear your stories.  Leave me a comment if you have one to share.  Thanks so much for stopping by.  I know this time of year is rough and you have limited time to spend bopping about the internet and I appreciate you choosing my blog as one of your stops!  Fondly, Christi

I would like to enter my Golden Season's Greeting Card in the following challenges:
Papercraft Challenges - Merry Christmas, #27
Pin{spirational} Challenges - Anything Goes, #231
Simon Says Stamp Monday Challenge - Party Time!
Simon Says Stamp Wednesday Challenge - Party Time!
WOW! Embossing Powder - Silver/Gold {Facebook group}
Card Mania Challenge - Christmas, #111
Archi-Scraps - M, Anything Christmas
The Artistic Stamper - Christmas
Sweet Stampin' - Christmas
Fashionable Stamping Challenge - Winter, #142
Wednesday's Creative Inspirations - Feeling Festive
Scrapy Land - Anything Goes w/ a Brand They Carry, #104

Tuesday, October 23, 2018

Sweater Weather - 2018 Cat Lovers Hop, Day 2

Thanks for joining me on Day 2 of the Cat Lovers Hop 2018!
You can check out all the details here {link to the FAQ and Info page}, at Her Peaceful Garden {this is the link to the main hop page}! Hope you can join in, there are tons of fabulous prizes!

I just could NOT resist this set from Simon Says Stamp - I knew when I saw it that I want to make a blue and white winter card showcasing these adorable cats {but, honestly, show me a cat that isn't adorable!}  So when the package came in the mail, I got right to it.


What I Used to Make my Card:
White Card Base
Light Blue Card
Shimmer Dark Blue Card
Simon Says Stamp, Right Meow, Stamps & Dies Bundle, #SET335RM
Sue Wilson Dies, Indian Ocean Collection - Mauritius, #CED10014
VersaMark Ink
Simon Says Stamp Detailed White Embossing Powder
Ranger Archival Ink in Jet Black
Watercolor Paper
Zig Clean Color Makers
Water Brush
Silver Gel Pen
Pink Sparkle Gel Pen {for their noses}

First I made the background paper.  Choosing the cute little kitty in the sweater, I stamped the image randomly using VersaMark ink to get that tone on tone look.  I actually used a paper much larger than I was going to need so I could choose where to trim it.

After setting aside the background paper, I stamped the cats on some water color paper and used my Zig Clean Color Markers to color them up a bit.  The one on the left reminds me of my cat Sylvester because he always gets himself tangled up in various toys! Each one of the three cats I used reminds me of at least one of my five.  It's a shame I can't gather up all the fur balls and knit a sweater out of that; well, the more I think about it, maybe not.  Anyway, I colored in the kitties using a silver gel pen for every other square on the scarf the kitty on the right is wearing, then cut them with the coordinating die.

I used the VersaMark ink as my embossing ink, sprinkled some detailed white
embossing powder in the sentiment and heated it.  No matter how many times I do this, I literally get mesmerized by the process.  Watching that powder melt is just amazing to me and even more amazing is that I'm making it melt!  Once that was cooled, I used one of the many dies in the Mauritius set to cut it out. 

Finally, after I trimmed my background, I attached all the components and there you have your card!  I love white, blue, and silver together for winter cards; I just think it looks so put together.  Maybe not so on this card but it's hard to be 'put together' when you have kitties on your card!

I appreciate each and every one of you stopping by; without your support, I wouldn't have kept going with my blog.  I hope you and yours are having a wonderful day!  Christi

I am entering my Sweater Weather card in the following challenges:
2018 Cat Lovers Hop
Creative Sketchy Girls - M, #29, Make Your Own Background
Do-Al(l) Creative - M, #22, Make Your Own Background
Southern Girls Challenge - M, Animals
Simon Says Stamp Wednesday Challenge - Animal Antics
SUYP Challenge - M, #35, Furrything Goes

Monday, July 9, 2018

Red, White and Blue CAS Kitties!

I didn't have a chance to make a 4th of July card - it's been a crazy summer thus far! But, I got this cute die from Simon Says Stamps and I just had to use it; what better way to show some {a wee bit late} patriotism? Plus, seeing SO many Red, White & Blue challenges, I just HAD to whip something up and enter in all the fun!


What I Used to Make my Card:
Kraft Card Base
Red, White & Blue paper
Simon Says Stamp Kitty Cat Die, #S470
Trinity Stamps, Lady Liberty
Versamark Pad
Simon Says Stamp Fine White Detail Embossing Powder
Dimensional Dots

Once I had cut all the cats, I glued them together.  I then inked up my
sentiment with VersaMark ink and embossed it with white embossing powder directly onto my Kraft card base.  I attached the kitties to the card with dimensional dots and that's it! A super easy CAS card in red, white and blue!

Thanks for stopping by for this easy tutorial! I hope you are staying cool and hydrated, this heat is crazy! We are breaking all kinds of records here in Colorado; unfortunately, one of them is for the biggest forest fire the state has ever seen.  Stay alert and be careful out there! Fondly, Christi

I am entering my Red, White & Blue Kitties in the following challenges:
Cute 'n Crafty - #4, 4th of July
Crafting with Dragonflies - #108, Animal
DL ART Thankful Thursday - #231, Red, White & Blue
Addicted to Stamps - #299,  CAS
Craftaholics R Us - #27, Any Holiday Cards
Simon Says Stamp Wednesday Challenge - Red, White & Blue
Crafty Gals Corner - #169, Red, White & Blue
2 Crafty Critter Crazies - #16, Anything Goes w/ a Critter
Eclectic Ellapu - M, Red, White & Blue
Just For Fun Rubber Stamps - M, July Color Challenge - Red, White and Blue
Happy Little Stampers - M, Anything Goes with Dies
Happy Little Stampers CAS Challenge - M, Animals
Sunny Day Crafting - #26, Animals
SUYP - M, #32, Anything Goes with Cats


Friday, July 6, 2018

Best Wishes

When I found out that I was the winner of CropStop's Linky Party #39, I was thrilled.  It's always fun to win, even if it's just for fun.  But, not two days after my win, I received some beautiful embossing folders from them and an email asking me if I would like to be a guest designer on their blog! I'm very honored to be sharing my card with the gang at CropStop and all of you!
  

What I Used to Make my Card:
Square White Card, 5 1/4" x 5 1/4"
White Glitter Card
White Pearlescent Card
Sue Wilson Background Butterfly Frame, #CED-7105 {find all the Sue Wilson dies here}
My Sentiments Exactly! Best Wishes, from Wedding, #M106 {this stamp set will work just fine}
VersaMark Ink Pad {for the embossing}
Kaleidoscope Embossing Powder {Stampendous makes a nice one}
Colorbox Petal Point - Alchemy {any silver ink will work}
Dimensional Dots

You can see the sparkle a bit better here
I recently found out that an old friend was getting married, and while they are just doing a quickie ceremony at their local town hall, it inspired me to create a wedding card.  See, at my age, most folks are already married, or on their second and third marriages, so there isn't much call for wedding cards.  Which is why I purposely didn't put anything on the card about weddings or marriage, just a good old "Best Wishes" works for me.  I don't even know if I will send this card to him because he couldn't even give me a wedding date; I suppose I could always send it after.


Another Peek
I wanted the card to be elegant and sophisticated but still have the shine, glitter, and a taste of festivity.  I started the card by cutting the large background die and the top portion out of white shimmer card.  I glued the frame onto the square card.  Then I embossed the sentiment in the center of the top piece.  Next, I cut a square of white glitter card to go under the top of the card, attached the two pieces together, and used dimensional dots to attach that to the card.  That was really all there was to it.  I think it looks almost as good as a store bought card!

Thanks for stopping by and I hope you are entering the CropStop challenge as much as you can - the only product requirement is that you use a brand of die that they carry, and you can only enter five {5} times per challenge - that's it!  I hope to see YOU as the next Guest Designer!  Fondly, Christi

I would like to enter my Best Wishes Card in the following challenges:
Crafting with Friends - #71, Anything Goes
Southern Girls Challenge - M, Just a Bit Flash
Dies R Us - M, #100, Anything Goes
Card Mania - M, #106, Anything Goes

Monday, May 28, 2018

Nature's Solution ~ 2018 Spring/Summer Coffee Lover's Blog Hop


Another fabulous coffee card for the 2018 Spring/Summer Coffee Lover's Blog Hop.  I've been wanting to use the Hero Arts Spice Market stamp again and this was the perfect opportunity.


What I Used to Make my Card:
White Card Base
Hero Arts, Basic Grey Spice Market, #CG638 {retired but available}

Watercolor Paper
Sue Wilson Toronto die, #CED6204
CAS-ual Fridays Sentiment, Coffee Talk 
CAS-ual Fri Dies,  Coffee Cup
Simon Says Stamp Detail White Embossing Powder
Distress Oxide Inks in Gathered Twigs, Frayed Burlap, Walnut Stain & Vintage Photo
Distress Sprayer
Distress Ink in Ground Espresso
Versamark Ink
Shades of Brown Cardstock
MISTI

I had an idea in my head about how I wanted this card to look and I can proudly say it looks like it does in my head!  That's an amazing feat!  I began with a piece of watercolor paper, place it in my MISTI, and covered the middle area with a piece of scrap, about 1 3/4" high and long enough to cover the card side to side.  Then I stamped the Spice Market stamp onto the paper, removed the strip of paper, and embossed the image using white embossing powder.  If you click on the picture you can see the background stamp inked with the Versamark ink.   

Once the embossing was finished, I colored the image with the brown shades of
Oxide inks, spraying the inks with the Distress sprayer, re-inking, and generally working the colors until I got a balance of color that pleased me.  My next step was to stamp the sentiment directly on the panel, but my plans were changed because the ink ran a bit.  I guess I didn't wait long enough for the watercolor paper to dry.  No problem!  If there is one
thing I've learned from being a crafter it's how to step back and regroup!  I cut a piece of brown card, edged it with Ground Espresso ink and stamped the sentiment on that.  I attached the die cut to the card and then glued my already cut "coffee."  

I think the card came out wonderfully and I just cannot get enough of the CAS-ual Friday snarky coffee sayings!  I hope you'll join me in the Hop and then pop on over to my giveaway post and enter! I have TONS of great stuff to give away!  Thanks! Christi

I am entering my card in the following challenges:
2018 Spring/Summer Coffee Lover's Blog Hop #3
ScrapyLand - #90, Anything Goes w/ Dies They Sell
The Artistic Stamper - M, Background, {entry #2}
Crop Stop Challenge - May Challenge
A Blog Named Hero - Watercolor {my background is watercolored}
Inspiration Destination - Anything Goes
Sisterhood of Snarky Stampers - I is for Inky {entry 2}
Monochrome Magic - Anything Goes Monochrome, TWIST: No Patterned Papers