Followers

Showing posts with label Valentine's Day. Show all posts

Wednesday, February 16, 2022

Hearts and Kitties

 Hi all!! I've made this cute Valentine's {even though you could give it any time of year; I was careful not to add any specific Valentines sentiments} card using Lawn Fawn stamps and dies; some older and newer sets.  I hope you like it!


I started the card by cutting out the slimline panel using the Scalloped Slimline with Hearts, landscape out of dark pink paper, then I used the larger die and cut it out of lighter pink paper.  I also covered a white slimline card using a page from the Watercolor Wishes Rainbow paper pack.  Next, I stamped the curved hearts, from the Scent with Love stamps on watercolor paper, colored the with my Zigs and cut them with their coordinating dies.  I put them around the heart openings.  The kitties, from the Meow You Doin' stamps & dies, were already colored, cut and in my stash {I always have extra cats in my stash}.  I tucked the cats into the heart openings and put a few paper hearts cut from small hearts that are included with many of the Lawn Fawn sets {I can't recall what set I used, honestly, I have a bunch of them on my desk}.  I attached the hearts panel onto the pink scalloped paper, then used dimensional foam tape to pop it up onto the slimline card.  Lastly, I had stamped a few of the small sentiments from the Special Delivery set as well as the Scent with Love set.  I trimmed them down and added them inside the hearts.  Finally a few sequins were added and I was done.  

I had all these sets on my desk as I was to take a class {Love Letters} with the fantastic Jenn Shurkus; the class was originally on for he 5th of February, but they were getting a huge snow storm on the cape, so it was postponed to February 12. I decided to bite the bullet and order the copics she used in class, figuring I'd have them for the February 12th class, but the copics I had ordered never made it to my house, a case of "we delivered them" but *I* don't have them.  So, I am waiting for their delivery and hopefully I will be able to make the cards from the class and share them; thankfully Jenn allows you to access the class tape online along with your class fee so I can go back and take the class when the markers get here.  Ever notice that the more you want something the harder it is to get?  SO TRUE.  Also, the carriers have begun to take SO long to deliver items, not just one of them, all of them, things are taking 2 to 3 weeks that used to take a few days.  I am the type who wants their stuff before I order it and it's frustrating to no end.  But, it is what it is!  I hope you enjoyed my card, and I appreciate you listening to my little saga, and I thank you for stopping by!! Fondly, Christi

I am entering my card in the following challenges:
Simon Says Stamp Wednesday Challenge - Slimline Cards
The Funkie Junkie - Funkie Frilly Valentines
Sweet Stampers, #65 - Furry Friends
Dies R Us, #187 - Love & Hearts
A Place to Start, #202202 - Anything Goes, Twist: Include a Critter
SUYP, #75 - Anything Goes w/ Cats
Happy Little Stampers - Anything Goes With Dies


Double D - Shades of Pink


Thursday, February 10, 2022

How I feel About Valentine's Day

It's been so long since I've posted, it feels like months! First, my camera died - I can't say anything bad about it because it was about 18 years old, so getting a new one proved interesting and once I got the new camera I got sick.  So, I am far, far behind; I didn't even post any Christmas cards.  But here I am, and I plan on getting back on track!  Today I am sharing a card for Valentine's Day - I admit, it isn't one of my favorite holidays, and I express that fact with all these Simon Says Stamp dies and a few other goodies!


First I covered the white card base with a stencil from Kindred Stamps using Distress Ink Old Paper - I covered the stencil very lightly as I wanted the background to be visible, but not be the first thing your eye goes to.  Once that was done I cut the first die out of black card, the second part of the sentiment is cut out of red card, and I cut the "happy" off.  I used a cute alphabet from CZ Design to put the "it's" in between the words; looks like the Archie Jr. Solid Alphabet dies{czd50}I used are no longer available, but any small alphabet will do..  I finished the card off by using some old heart washi tape and some red hearts I had cut out using the Chunky Hearts Panel Wafer die.

Now I will be sharing some more "love" cards, and I even have a Galentine one to share :) Thanks for checking out my anti-Valentine :) Fondly, Christi

I am entering my card in the following challenges:
Simon Says Stamp Monday Challenge - Love is in the Air
Use Your Stuff #441 - Hearts/Love
Crafty Gals Corner, #228 - Add a Heart
Sisterhood of Snarky Stampers, #203 - J is for Judgemental {see Emma below}
Inspiration Station, #23 - Candy Hearts {I actually can't stand candy hearts - sorry!!! LOL}


Saturday, February 13, 2021

Happy Valentine's Day!

 Hi everyone :) I hope this post finds you in good spirits! This was a simple card that took no time to make at all but I think it's striking. Hope you like it too!


What I Used to Make my Card:
White Card Base
Pink Card & Darker Pink Card
Gina Marie Designs Argyle Heart Plate Background
Poppystamps Doodle Happy Valentine's Day Die, #2166 {retired but available}
Pink 1/2 Pearls

I just love Gina Marie Designs and I am so happy I found them!  If you are a die lover like I am, this is one of the best places to go for new designs that are inexpensive.  They do carry a limited number of other crafting products but to be honest I just looked at the dies.  Anyway, I began this card by cutting out the Argyle background and adhering it to a white card base.  Then I glued 1/2 pearls onto the design, four to a row.  After I was sure they dried, I cut and glued on the sentiment.  Easy card but as I said, I think it is beautifully striking! Thanks so much for stopping by!  Fondly, Christi

I am entering my card in the following challenges:
Poppystamps, #77 - I Love You
Cut it Up, #219 - All You Need is Love
Daring Cardmakers - Share the Love
Color my Heart Color Dare, #431 - Shades of Pink and 1 other Color {white}
Watercooler Wednesday, #308 - All About Occasions


Thursday, February 11, 2021

Sending Lots of Love

I have been seeing these adorable Lawn Fawn slimline cards everywhere and I am sure you have, too.  The images are so cute and I finally broke down, bought the stamps and dies, then made my own and here it is:


What I Used to Make my Card:
White Slimline Card Base
Watercolor Paper {I use this}

As always, my first area of business is to stamp, color, and cut all of the elements I want to use on my card.  Second, I used the cloudy stencil to make the sky and stamped the sentiment directly onto the card base. I dressed up the canary to make him look like a mailman and adhered him and the owl to the card, followed by all those cute little letters and hearts.  I really enjoy making scenes and I am happy I am fortunate enough to have acquired all the cool backdrops that I have as they make it so easy to make a scene card.  Honestly, I am not a huge fan of Valentine's Day but being able to make a cute card like this makes all the engagement commercials worth it! 

I hope this card put a smile on your face!  I appreciate you taking the time to visit me here and I hope you'll consider following me.  If you do, leave me a message so I can follow you back. Fondly, Christi

I am entering my card in the following challenges:
Simon Says Stamp Wednesday Challenge - Make a Slimline Card
Mod Squad - Must Have the Word LOVE
Fab 'n Funky, #510 - Love, Heart
Cuttlebug Mania - Put an Animal on it {hope the birds count!}
NBUS Challenge, #23 - Never Before Used Stuff {the stamps, dies and stencil!}
Shopping our Stash, #438 - Love is in the Air
Double D Challenge - Valentine Love
The Paper Players, #527 - Hearts and/or Stars


Wednesday, February 27, 2019

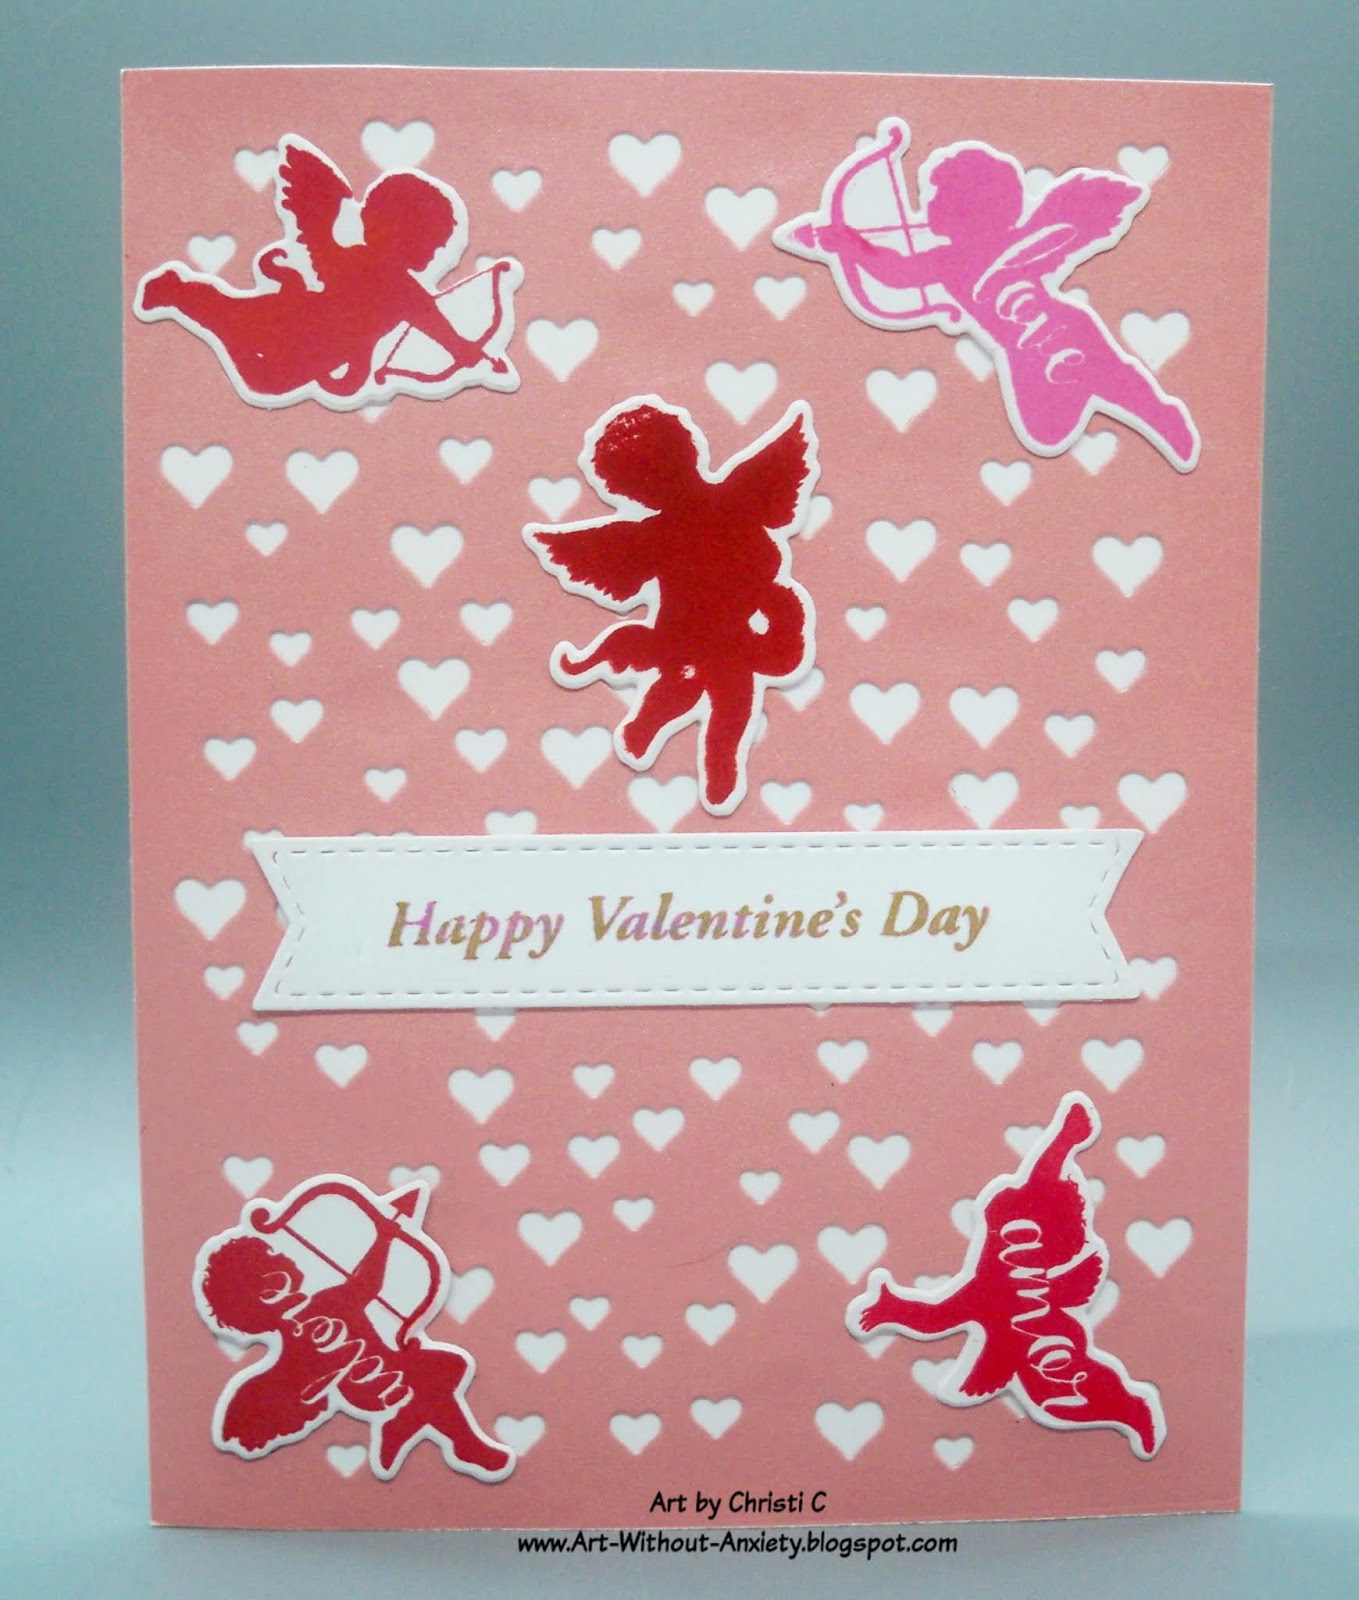
Some Cherub Love

Hi everyone!  While Valentine's day might be over, you can still enter your LOVE project over at Die Cut Divas!  I made my card full of Hero Arts goodness.  They are generously sponsoring the challenge this month and I'm hoping you can squeak into the challenge before it ends.  We'd LOVE to see your creations!


What I Used to Make my Card:
White Card Base
Pink Shimmer Paper
Hero Arts Heart Confetti Fancy Die, #DI348
Hero Arts Cherubs, stamps, #CM211
Hero Arts Cherubs, dies, #DI442
Die Namics Fishtail Sentiment Strips
Hero Arts Ink in Pink Tourmaline, Strawberry, Bubble Gum and Red Royal 
Colorbox Petal Ink - Alchemy {any shimmery gold will work}
White Card

I began this card by stamping a whole bunch of cherubs on some plain white card.  Them I cut them out and chose the best ones for the card.  I tend to be a hard stamper and sometimes the little details get lost when I'm using clear stamps {while Hero Arts uses photopolymer for their stamps, it honestly doesn't seem to matter what material is used to make the clear stamps; I just stamp too darn hard!} the words inside the cherubs kept getting smooshed away and I had to really be aware of the pressure I put on my stamp platform.  I have to get over that feeling that the harder I stamp the more ink will stick to the paper; it's simply not true!  It's a leftover issue from using the old wood mounted, red rubber stamps and only having one chance at making a good impression.   

Once I had all my angels cut, I stamped the sentiment.  I stamped it first in a very light pink and then over-stamped it with gold.  You can't really tell in the photo but in person it looks really cool, in my opinion.  I tried to capture the dual tone in a photo, but it didn't come across the way it looks in real life  I hope you had a fantastic Valentine's Day and I hope to see you soon! Fondly, Christi

I am entering my Cherub Love card in the following challenges:
A Blog Named Hero - M, Love is in the Air
Crafts Dreamy Mood Board Challenge - M, See Board Below
Creative Crafty Cottage - #115, M, Valentine
Simon Says Stamp Wednesday Challenge - Anything Goes
Little Red Wagon - #486, Love It!
Crafting by Designs - Silhouettes
Double D Challenges - Pink & White
Shopping our Stash - February 

Sunday, February 10, 2019

Sending You Love

If you are a regular reader of this blog, you have read about my next door neighbor, Helene, and her little dog, Lola.  Helene loves dogs about as much as I love cats!  I knew when I saw this stamp set it would make a fabulous Valentine's Day card for her, from Lola.


What I Used to Make my Card:
White Card Base
Red scrap cardstock
Heffy Doodle Yappy Happy Mail Stamps
Heffy Doodle Yappy Happy Mail Dies
Memory Box Stitched Rectangle Trimmings, #30082
Simon Says Stamp Fine Detail White Embossing Powder
Watercolor Paper {I use this}
Ranger Archival Ink in Jet Black
Dimensional Dots

How cute are these pups?  I have to say the dog using on the box to put the card in the mailbox is one of my favorite images.  I can literally picture Lola doing this {she'd need a taller box being part mutt with 'little dog' ancestors}. I stamped everything I wanted to use on watercolor paper, colored the images with my Zigs, and cut them with the coordinating dies.  Then I took some scrap, red, card stock and embossed my sentiment using white embossing powder.  There's just something about red and white that is just perfect for Valentine cards, don't you think?  I also mounted part of the sentiment, just stamped, not embossed, on red card stock as well.  They were cut with dies from a stitched rectangle set.  I've accumulated so many basic shape dies that it seems as if I have at least six sets of each shape; of course, that isn't true but I'm happy that
Dimension
I have my pick of which shape to use and I can pretty much cut out anything because I have the right sized die.  

The sentiment and mail box were attached directly to the card base while the dogs, box, and letters were stuck on with dimensional dots.  She is going to love this card!  I may not be able to wait until Valentine's Day!  I'm so grateful that I have a great neighbor; the people on the other side of us keep to themselves, which is fine, and the folks across the street are such a sweet couple I know if I needed any help they'd be happy to step in.  Many times in my life I've had neighbors to whom I didn't even talk, couldn't even tell you their names, and it's a treat to have someone so friendly.  She and I often
Another Look
remark how very lucky we are that we moved here.  It's like I have another mother {which is 98% fabulous and 2% not so fabulous.  I can't ever leave the house without Lola alerting Helene to the fact that I am going out in public, or that I've come home, and that can be a bit stifling but I wouldn't trade it for anything!}  Have you been blessed with a great neighbor? How about sharing who your worst neighbor was and why they were so bad?  I had one who was breaking up with his girlfriend and she proceeded to get drunk every night for at least six months, then would make her way to the apartment, and sit outside screaming for him.  I could go on and on!  I want to thank you for your visit and I do hope you'll consider following me on any of the social media platforms that can be found on the right side of this page.  Please make sure I have access to your info so I can return the favor!  Hope to see you soon, Christi  


I am entering my Sending you Love card in the following challenges:
Dies R Us - M, #114, Use Red {entry 2}
Cut it Up Challenges - #167, Inspired by a Love Song {Please, Mr. Postman, Puppy Love and many, many more}
Southern Girls - Animal Antics
Through the Purple Haze - #153, Puppy Love
The Cat's Pajamas - #354, Furry Friends
2 Crafty Critter Crazies - #23, Anything Goes w/ a Critter
613 Avenue - #218, Anything Goes w/ Option: Use a Critter
Cardz TV - Anything Goes


Thursday, January 24, 2019

Plane and Simple

I get a huge kick out of a good play on words {almost as much as a good snarky sentiment} and this card just makes me smile!  It's difficult for me to make a sweet card that isn't too feminine looking - with all that pink and hearts and stuff.  But this year I am determined to make a "manly" lovey card for Valentine's Day; I think I did a good job, what do you think?


What I Used to Make my Card:
White Card Base
DCWV Maps, Text and Ledgers 8" x 8" Stack, #CS-019-00018
Lawn Fawn Plane and Simple stamps, #LF1409
Lawn Fawn Plane and Simple dies, #LF1410
Lawn Fawn Candy Hearts, #LF1827
Tutti Designs Scalloped Stitched Nesting Circles, #TUTTI-419
Ranger Archival Ink in Jet Black
VersaMark Ink
Simon Says Stamp White Fine Detail Embossing Powder
Watercolor Paper {I use this}
Zig Clean Color Brush Markers
White & Red scrap card
Vellum

I started by making a collage with a bunch of the papers from DCWV.  I ripped up some of the maps and collaged them on scrap white paper.  Then I trimmed the panel down and attached it to a white card base.  I didn't want anything to be recognizable on the map and ripping up the papers and mixing them up worked beautifully to get the background I wanted.

Although this is an older stamp set, this is the first time I've used it.  What better occasion than Valentine's Day or even just an every day "I love you" card to break out a some new goodies?  I love the planes and the puffy clouds, especially the puffy heart exhaust.  I think this set is perfect for a masculine card as it gets the point across without being too frilly and girly; plus you can always raise the cuteness factor by giving your clouds one of those adorable smiley faces that are included in the set.  Once all the images were stamped, colored, and cut, I realized I
Another Peek
had a dilemma.  How to add all the elements without covering up the map? I suppose I could have made a larger card but I am so used to designing for an A2 {4 1/4" x 5 1/2"} size card that I honestly didn't even think of making a larger card until I was faced with the placement of the pieces.  After some thought, I chose to use vellum to act as a buffer between the map and the components of the card.   I just bought some new Tutti Designs dies {and I HAD to try them out!} so I used the scalloped circle die for the vellum.  I attached the vellum to the card, hiding the adhesive under the clouds, plane, and heart.  I embossed part of the sentiment with white embossing powder and added the heart with white scrap layered behind it to finish it off.


And there is my "manly" love card.  I am pleased with the design and I think the recipient is going to enjoy it as well.  What do you use to design a masculine card?  I'd love to hear your tips and tricks.  Just leave me a comment and be sure to leave your contact information so I can visit you back.  Thanks for stopping by and I hope to see you soon! Fondly, Christi

I am entering my Plane and Simple card in the following challenges:
Lawn Fawnatics - #45, Lots of Love {graphic below}
Unicorn Challenge -M, #39, Things with Wings
Cardz for Guyz - #211, Trains, Planes & Automobiles
Work it Wednesday - Something New {the stamp & dies are new to me}
Simon Says Stamp Wednesday Challenge - Have a Heart
Southern Girls Challenge - Love is in the Air 
Moving Along with the Times - Have a Heart
Dies R Us - Anything New {the stamp & dies are new to me}


Sunday, February 11, 2018

Purple and Gold Valentine

By now you should know that Dies R Us has expended it's product line, and I'm not going to go on and on about all the great stuff they are carrying; I'm just gonna say watch this space 'cause I've got goodies coming! I wanted to create a Valentine without using a speck of red or pink, one I could give my Man without it being too girly.  I think I accomplished my goal and got to use lots of yummy dies!  


What I Used to Make my Card:
White Square Card Base {5 1/4" x 5 1/4"}
Purple Card {Core'dinations Lap of Luxury Paper Pack}
Pale Gold Card
Gold & Silver "Crinkle" Designer Paper
Creative Expressions, Sue Wilson Jeweled Heart, #CED21005
Creative Expressions, Sue Wilson Swirly Lace Edger, #CED6405
Cheery Lynn Heart Chain Border, #B115
Die-Version Complements Everyday, #DVS-4X6-104 
Purple & Gold Designer Paper
Gold Background Paper

Making this card is the beginning of fulfilling my resolution to use more of my stash.  I've had the purple & gold paper, and the gold & silver crinkle paper, for longer than I care to admit.  Back in the day, when I first started stamping, I collected designer papers like mad.  I have some that are so beautiful, I can't
The heart is cut from this
ever use them.  I used to think I was going to delve into book binding and all these gorgeous papers were going to grace my book covers.  Well, that never really happened {although I still have all the stuff needed, should I ever decide to go that route} and I have to start using these papers.  Especially since Dies R Us has started carrying paper; and there are SO many paper pads I want! I have to start making some room.  


I started this card with the center design, the purple & gold heart.  The gold background matches the gold in the design almost perfectly.  I carefully cut the heart out and mounted it on the gold paper.  The next step was to find a purple paper that matched so I could use it as a mat; luckily, the Lap of Luxury paper worked.  I then mounted that onto the square, white, card base.  The card was pretty, but I needed to add more, and I need a sentiment.  I cut the "Love You" out of the same purple I'd used as the mat and glued that into the middle of the heart.
The corner paper

I literally just got the Swirly Edger Die in the mail so you know I had to figure out a way to use that on the card.  Plus, there was some nasty glue residue that had to be covered up; but that's our secret, so don't tell anyone.  I found this interesting, crinkly, paper in my stash and decided to use that.  I cut it out twice; there wasn't enough room at the top of the design to add the corners there, too.  This did mess with my sense of uniformity but I am working on getting over that, too.  

The card was looking better to me but it still was missing something.  It
needed one more little touch of oomph.  I happened to have the heart border die on my desk and I thought that would fit in the border of the card perfectly.  Instead of using the same gold with which I had matted the card, I went with a pale gold {another very old stash item} and, in person, it really does perk up the card.  It's a shame I can't get a picture of the pale gold card; it looks white {or vanilla} in the pictures, but it is a creamy gold and has a subtle shine to it.  Not ideal for pictures at all.

I hope you enjoyed my tutorial {and I hope my Man likes his card; I'm sure he will!} and that you are having a fabulously creative week! Don't forget to stop by all of the Dies R Us blogs for more inspiration and creativity and maybe stop by the store for some new goodies ~ Fondly, Christi

Don't forget to join in on all the fun at the Dies R Us Challenge Blog.  
There's  a new challenge theme offered on the 1st and 15th of each month
 and one lucky  randomly drawn winner will receive a gift voucher prize to 
the Dies R Us Store.  For your convenience, all the important Dies R Us 

links are provided below.


click below for:

I am entering my Purple & Gold Valentine in the following challenges:
Cut it Up - #141, Layers of Love
The Die Cut Divas - M, Love is in the Air, #5
Scrapy Land - #83, Anything Goes

Tuesday, February 6, 2018

Bird Crazy Lovers

I'm still crazy about Tim Holtz' "Crazy Birds."  I've been wanting to break them out again and I think Valentine's Day is a perfect time to play with them, especially when there is a fabulous challenge to enter!  The theme for February at Stinkin' Inkers is "Love is in the Air" and your creation can be for Valentine's Day, an anniversary, or even a wedding; anything to do with L-O-V-E.  So, while love is flying all over the place, I present my Bird Crazy Lovers:

What I Used to Make my Card:
White Card Base
Versafine Onyx Black Ink
Watercolor Paper
Tim Holtz/Stampers Anonymous Bird Crazy Stamps, #CMS212
Tim Holtz/Sizzix Bird Crazy Dies, #660954
Tim Holtz/Stampers Anonymous Crazy Things Stamps, #CMS237
Tim Holtz/Sizzix Crazy Things Dies, #660953
Clean Color Zig Markers
Derwent Water Color Pencils
Hero Arts MMH January 2017 You Are Loved Sentiment
Heart Googly Eyes {Dollar Tree}
MISTI
Dimensional Dots

Playing with these stamps feels like I'm home.  I love all the crazy animals Tim's designed and I always have a stash colored and cut, ready to use when the mood strikes me.  However, for this card, I made these characters just for this card.  I didn't want the birds to be too red or pink; in other words, I wanted the card and embellishments to say Valentine's Day - not the color of the birds. 
Mr. Bird
Also, it was important that the birds were looking at each other; and I wanted to color.  Before I get into the making of the card, 
I just have to detour for a quick second.  I was rummaging through my stamp pads and found my Versafine Black Onyx pad; I must have had this pad for at least 15 years {and five of those years were in storage} and I figured this pad would need to be re-inked, but I'd recently seen a card on Pinterest that used this ink and wanted to try it again.  To my surprise, there was NO re-inking needed!  This pad was so juicy and vibrant that I only needed to stamp with my MISTI one time! Only once! I am hooked on this pad again.  It's been taken out of the drawer and is living on my desk.  Simply amazing since every other black ink I've used on watercolor paper has taken at least two re-inkings to get a good image -
Ms. Bird
these images were clearer and crisper than I've ever gotten on watercolor paper.  So, yes, I've gotten my images happily stamped and I colored them in with my Derwent Watercolor pencils first, and then added some more color using the Clean Color Markers.  I like using more than one medium to color; it gives me the richness I want and it's fun.

Angry Ms. Bird

I cut all my images and accessories, including an extra wing for our fancy guy, and assembled my birds.  I put a bow on her head and he's dapper with his hat and bow tie.  In his wing he is carrying a box of chocolate-covered birdseed to give to his honey.  As you can see, they both have love in their eyes; and, since they are birds, I expect they will get some "Love in the Air" as well <wink>.
A calmer Ms. Bird
One thing you need to be aware of when using shaped googly eyes is how the eyes are pointed.  See how she looks awfully angry in the above picture! Just a little thing to be aware of!  Thank you so much for stopping by and I hope you enjoyed my little tutorial.  You have an entire month to enter your Love is in the Air creation at Stinkin' Inkers; I hope to see you there! Christi


PS: As the requirement for Retro Rubber is to state how long I've had these stamps I'm going to say at least since April of 2015.

I'm entering my Bird Crazy Lovers in the following challenges:
a2z Scrapbooking - M, It's a Love Thing
Die Cut Divas - M, Love is in the Air, entry #2
2 Crafty Critter Crazies - M, #11, Anything Goes w/ a Critter {or 2}
Simon Says Stamp Monday Challenge - Love is in the Air
Retro Rubber - M, #79, Inspired by Love
The Paper Players - #379, Will You be my Valentine?
Just Us Girls - #426, Love
Simon Says Stamp Wednesday Challenge - Anything Goes
 

Sunday, February 4, 2018

Roses are Red or What to do with Leftover Shaker Card Foam

I LOVE making shaker cards; even more since I discovered this foam that Kelley from Lawn Fawn inspired me to use {you can see her video as well as the foam I used here.}  Now I seem to have a lots of "extra" foam, so I made a card out of it! This is something new that I have never done before, so for all those "new" challenges, I hope this fits the bill! I made a bunch of roses that I really like and I might even make a wall hanging out of it!

What I Used to Make my Card:
Red Card Base
Die from Die-Namites, Rose Bouquet, #DN-1120 {available online}
Vellum
Embossing folder, Darice, Mini Hearts, #1219 223 {available online}
Alcohol Ink Markers
Red & Green Card
Foam from this card
Ranger Glossy Accents

First thing I did was die cut the roses. I wasn't sure it the die would go through the foam, but it worked perfectly!  So then I had these rose buds cut from white foam.  I wasn't sure what I was going to use to color them, but I figured
I had to start somewhere, so I whipped out my alcohol ink markers; I have a bit of every manufacturer {my generous friend, NanaConnie, sent some to me that she was no longer using - SO SWEET!} and took every red I could find.  It took me two days to color the flowers, mostly because I wasn't sure what they'd look like dry, and I really wanted a deep, rose red on them.   Once they dried, one of them had a sheen to it; no matter what I did, how many times I colored it, the sheen stayed.  What's a crafter to do? Make them ALL shine a bit - I covered them all with s light coat of Glossy Accents.  Problem solved.  Aren't we a talented bunch when it comes to problem solving?

Now I set the roses aside and began to construct the stem portion of the card.  I
cut the die out twice; once in green and then again in red.  The green card is the main design, the one I built off.  I manipulated the red cut by trimming out just the bow portion.  I attached the red card to the green card and then set about attaching the foam flowers; this is when I realized I was missing something - can you spot it? Yep, I am one flower shy.  I have NO idea where it went, but I suspect a Fabulous Feline might have been creeping on my desk.  I try to cover everything I'm working on so
they can't get to it, but they're pretty crafty little devils.  Luckily, I still had foam left and I cut another rose, colored it and glazed it with Glossy Accents.  This rose didn't take as long as the others since experience told me it didn't matter how long I let it dry or how many colors I used; and I had some idea which markers I used.  While this rose was drying,  I ran my vellum through my Big Shot using the Mini Hearts embossing folder and set it aside.

Finally all of the roses were ready to go and I glued the last rose to it's stem; the existing roses on the card had to be trimmed down since my foam flowers didn't quite match up to the roses on the green card.  I wasn't as careful as I should have been and I must have glued a red rose to the wrong green rose.  No worries, you can't tell.  I attached my rose bouquet to the vellum and then used the area under the bouquet to glue the vellum to the red card base.  There you have it! There are tons of ways to use leftover foam; any die will cut it, so even a tiny heart, star, or accent can be utilized - just keep the critters away!
 Since this is such a tactile card, it's going to be my mother's Valentine card.  She never has to worry about the roses wilting!  

I hope you enjoyed my little tutorial.  What do you do with your leftovers? Be it foam, shapes, whatever; I'd love to hear how you recycle your crafty leftovers.  Please leave your idea in the comments below and be sure there is a link back to your creation, if you've made one.  I'd also be grateful if you'd consider following me; I'll follow you back :)

Have a wonderful day! Christi


I would like to enter my Roses are Red card in the following challenges:
Die Cut Divas - Love is in the Air
Simon Says Stamp Wednesday Challenge - Anything Goes
AAA Cards - #108, CAS & All You Need is Love
Crafting with Dragonflies - #97, Valentines