Followers

Showing posts with label Distress Markers. Show all posts

Saturday, February 17, 2018

Celebrating Janis' 60th Birthday! {week 1 - All Those Cats}

Janis, from Her Peaceful Garden, and I met back when she had her first Cat Lovers Blog Hop {here is the link for the 2017 hop} - she is a cat lover, as I am, and she is owned by about 13 cats; both feral and house cats.  We've become friends over the years and I adore her.  When she began talking about her birthday and how she wanted to do ATC's for her online celebration, I was so happy! I LOVE ATC's and used to participate in many swaps online.  I hope this little party of Janis' encourages ATC's to make a comeback.  

What are ATC's? ATC stands for Artist Trading Cards.  There are no requirements to make them {unless you are participating in a swap, or, in this case, Janis' first theme: All Those Cats} EXCEPT they must be 2 1/2" x 3 1/2", the same size as a standard playing card or trading card.


I'm not going to go into detail about how I made each one; it's fairly self explanatory but, if you have any questions, just ask! 

I try to use scrap papers to make my ATCs - here is a picture of my scrap bin {I only put small snippets in it} just to give you an idea of how small the pieces for your ATC can be. There is a picture of the side of my little bin, and then the bottom.  I save more than I can ever use, but it comes in VERY handy!


Here are my four ATCs for week one of Janis' birthday party:

Paw Prints


What I Used to Make my Paw Prints ATC:
Heavy White Card, cut into ATC size
Snips & scraps of various pink & purple papers 

Penny Black, Nine Lives Set, #30-050
Stampendous, Cat Sayings, #SSC1222
Small Heart Punch
Hero Arts Ink in Pink Tourmaline, Ruby & Amethyst                       

 Balloon Kitty
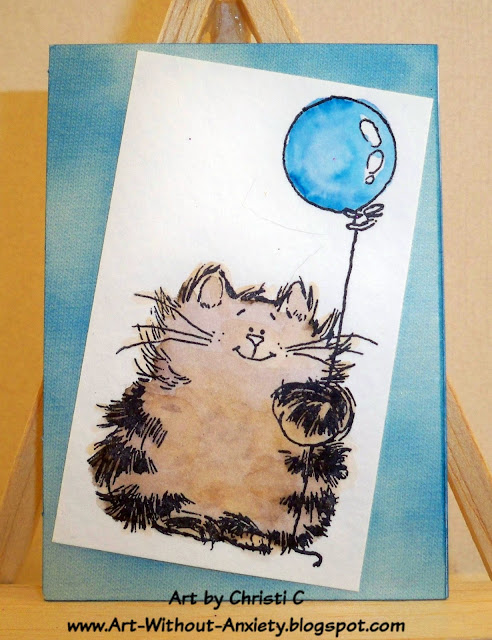

What I Used to Make my Balloon Cat ATC:
Heavy White Card, cut into ATC size
Ranger Archival Ink in Jet Black
Penny Black, Purrfect Day, #30-027 {discontinued but available}
Unknown Coloring {colored this image AGES ago}
DCWV, Tie Dye Stack {discontinued but available}
Distress Marker in Broken China

Sneaky Kitties

The Mama Elephant "The Cat's Meow" stamp and die are MUCH longer than an
ATC.  In fact, it's called "Crowd of Cats" and according to the ME website, it measures 5 3/4" x 2".  In order to make this ATC and the Meow ATC, I cut the image down into two separate groups of cats, then added single cats in places. Also, I colored the kitties with whimsical colors - I figured why not and I need a break from trying to color them realistically.  This goes for both of the Mama Elephant ATCs.  

What I Used to Make my Sneaky Cats ATC:
Heavy White Card, cut into ATC size
Mama Elephant, The Cat's Meow, stamps
Mama Elephant, The Cat's Meow, Creative Cuts Dies
Detail Water Brush
Ranger Archival Ink in Jet Black
Clean Color Markers
Watercolor Paper
Palm Frond Punch
Various Green Paper

Meow
I needed a break from using realistic cat colors, so these kitties are colored fancifully.  I cut down some dimensional dots and dotted the birthday hat, the blue balloon, and the meow sign but you can't really tell in this picture. I also added some single cats to round out the group.

What I Used to Make my Meow ATC:
Heavy White Card, cut into ATC size
Mama Elephant, The Cat's Meow, stamps
Mama Elephant, The Cat's Meow, Creative Cuts Dies
Detail Water Brush
Ranger Archival Ink in Jet Black
Clean Color Markers
Watercolor Paper
Dimensional Dots
Washi Tape in Glitter Purple

Finally, here is a picture of all four together.


I hope you enjoyed my ATCs.  I really have a great time making them and going through my snippet box to see what inspires me.  My favorite is the meow ATC - which one is yours? Thanks SO much for your visit and I hope you come back soon! ~Christi

I would like to enter all four of my creations in the following challenges -
Her Peaceful Garden Birthday Celebration - Wk 1, All Those Cats
Addicted to CAS - #130, Cat {At least 2 of my ATCs are CAS}
Crafting with Friends - M, #61, Anything Goes
The Outlaws - Twisted Thursday - Twist: Fur {lots of virtual fur here!}
2 Crafty Critter Crazies - M, Anything Goes w/ a Critter
Fairy-Tale Challenge - Use Mini Stamps {The 2 ATCs using ME are Mini Stamps}
SUYP - M, Anything Goes and/or LOVE

Saturday, December 16, 2017

Hero Arts ~ Christmas Village

I love getting My Monthly Hero Kit each month from Hero Arts.  Not only do I get introduced to new products, but it is truly like Christmas every month! I haven't had a chance to play with December's kit, yet, but I made this cute little village scene using November's kit.  I hope you enjoy it :)

What I Used to Make my Card:
White Card Base
Watercolor Paper
My Monthly Hero, October, 2017
Hero Arts Intense Black Ink
Distress Markers
Derwent Inktense Colored Pencils
MISTI
Wink of Stella in Clear
Oxide Inks in Salty Ocean, Seedless Preserves, Broken China and Faded Jeans
Stickles in Christmas Red and Green
White Glitter Paper
Silver Gel Pen
Red Glitter Gel Pen
Dimensional Dots

I began this card by making the sky using the Oxide Inks.  I am stunned every time I use them and they work to give me a beautiful sky! I honestly never thought I could make a scene with a truly amazing sky and I am thrilled I can do it now! 
Some Parts

As the Oxide Ink sky dried, I stamped my images on watercolor paper, using Intense Black ink and my MISTI.  I stamped a few of the images a couple of times so that if I ruined one {or two} with my coloring, or die cutting, I'd have other choices to use.  I used the pencils to do the bulk of the coloring, accenting the images with Stickles, gel pens and Wink of Stella.  

Once everything was dry, colored and cut out, I cut the mountain range out of
Another Look
white glitter cardstock.  I attached that to the sky panel, then placed my buildings, and Mr. & Mrs. Claus, onto the mountain, occasionally using dimensional dots for some of the buildings.  I debated for a while if I should have put something in the sky, a sentiment or something, but then decided to leave it as is.  I'm fairly sure you can tell it is a Christmas Card.


I would love to know if you get the My Monthly Hero Kits, or any subscribed kit for that matter and your opinion of them.  I hope to be able to see some of your creations and if you've made a village scene, please leave me your blog address in the comments so I can go leave you some blogger love.  I hope you & yours are having a healthy, happy and safe holiday season ~ Hugs, Christi

I am entering my Christmas Village card in the following challenges:
A Blog Named Hero - M, Winter Holiday
The Artistic Stamper - M, Christmas
Christmas Cards All Year Round - M, Anything Goes
Die Cut Diva's - M, Winter Cards 
Emerald Creek - M, Happy Holidays
Simon Says Stamp Monday Challenge - Christmas/Winter Holidays

Thursday, October 26, 2017

Deck the Halls!

My family might not be the typical family, but one thing we have in common is the love of a good 
laugh, and I KNOW this card will get some chuckles at holiday time.  I figured after all the Halloween projects and cards I've been sharing it was time for a nice break, although I still have so many Halloween cards I'll be ahead of my posting for next year 'cause there is NO way I'm going to be able to blog all of them.  This card is also part of the Cat Lovers' Blog Hop. I sincerely hope you are playing along!


What I Used to Make my Card:
Dark Red Card Base
Tim Holtz Yuletide Paper, #TH93240
Distress Ink in Fired Brick
Distress Marker in Fired Brick
Katzelkraft Cats Set, # KTZ152
Sentiment from Riley & Co., #RWD-472
Spellbinders Nestabilities Curved Rectangle, #S5-006 {on sale $6.99!}
Watercolor Card
Derwent Inktense Pencils
Ranger Archival Ink in Jet Black
MISTI

I love these cats.  The expression on their faces can be used in SO many ways and I can see characteristics of each of my cats in each of the stamps.  I started this card by stamping the cat onto watercolor cardstock with black ink and coloring him {why him? I dunno - looks like a him} with the Derwent Pencils.  I then fussy cut him out and set him aside.

Then I went through my stash of papers and decided upon a background using Tim Holtz' Yuletide collection.  I have found it easier to match a background paper to the card base then vice versa, so I dug into my cardstock stash and found this dark red that fit the bill for my card base brilliantly.  I trimmed down the decorative sheet and attached it to my card base. 

I stamped the sentiment using Fired Brick ink, then cut it out using the Curved Rectangle die.  Using the Fired Brick marker, I edged the sentiment to get rid of those bright white edges.  Lastly, I adhered both the sentiment and the cat to the card.  This is my kind of holiday card - I'm not a huge fan of the mushy ones.

Finally, I want to tell you about a small giveaway I'm having on my blog.  Here are the details:
presents
HAPPY HALLOWEEN!
I’m having a small drawing on my blog.  All you need to do is click onto this post, chose the costume you like best & when I get 75 costume comments, I’ll draw a random winner.  Open Internationally! Please feel free to share!
EXPIRES Nov, 1. 2017

I hope you find the time to enter and share about my giveaway!  Thanks so much for stopping by, I truly appreciate it! If you decide to follow me, please leave me a note in the comments with your blog info so I can follow you back.  Hugs! Christi

Friday, April 14, 2017

Kitty Love

Hi all! I fall in love with a new (to me) stamp company about once a week and one of my newest obsessions is the Unity Stamp Company.  I adore their sentiments, beautiful flowers and, of course, their kitty stamp sets!  Plus, they really know how to throw a great sale. They have a few adorable cat sets, one of which I used to make this card.


What I Used to Make my Card:
White Card Base
Unity Stamp Set . . .Really Kitty, UK-1009A
Embossing Ink
Detail Black Embossing Powder
Watercolor Paper
Distress Markers in Mermaid Lagoon, Pumice Stone, Hickory Smoke, Festive Berries
DCWV Luxury Stack, 4.5" x 6.5" (available online)
Hero Arts Stamp & Cut, Love, DC175
Die-Namics (MFT) Stitched Oval Stax
Pop Dots

First thing I did was I stamped the kitty with embossing ink onto the watercolor paper and embossed the image with detail black embossing powder.  I water colored the kitty, and the hearts, using Distress Markers and then the image sat on my desk for weeks.  I really love how it came out and I just wasn't sure what I wanted to do with it yet.  Another thing that had been hanging out on my desk was the decorative paper from DCWV Luxury Stack.  I had picked the pink paper to go with another project and it languished on my desk, getting moved to one spot or another.  Finally, I HAD to do something with the kitty (I was getting nervous that I'd ruin it somehow; drop some ink on it, get some marker on it or drown it in coffee, so I cut out the cat using the Stitched Oval Dies and used a die two sizes larger to cut the patterned paper.  Using the small scrap left over from the oval cut, I die cut the word "love".  I attached the cat panel onto the decorative paper panel and positioned the "love" cut out so that, hopefully, it appeared that it was attached to the patterned paper.  Finally, the panel was pop dotted onto the card base and my card was born.  

As simple as this design is, I am really pleased with how the card came together.  I have only used a few pages of the DCWV Luxury Stack and I am trying to use it more - the paper is very thick and looks like the coating is pearlized.   Perhaps my post will inspire you to use a long neglected paper in your next creation.  Have a great day! Christi

I would like to enter my Kitty Love card in the following challenges:
Dream Valley Challenges - #153, Our Four Legged Friends
Simon Says Stamp Wednesday Challenge - Spring Inspiration Board (I used the kitty)

SUYP Challenge - M #17, Furrything Goes or Easter
2 Crafty Critter Crazies - M #1, Must Feature a Critter
Crafting When We Can - #141, Animals
Crafty Catz - #366, Anything Goes w/ Option of an Animal
The Sisterhood of Crafters - Stamp it!

Wednesday, March 15, 2017

Have a Beautiful Day!

My friend, Zoe (who taught me how to blog, how to be on a Design Team, how to run a blog and basically everything else when I was such a newbie) is having a birthday in the beginning of April.  Since she lives across the big pond I've already mailed this card out and I'm hoping she doesn't peek! I hope you like the design ~


What I Used to Make my Card:
Sparkly Green Card Base (out of a kit from years ago)
Unity Stamp, ...bunches of love, UK-669A (739)
Ranger Archival ink in Jet Black
Distress Markers in Mowed Lawn, Peacock Feathers, Mermaid Lagoon, Festive                                 Berries, Ripe Persimmon, Carved Pumpkin, Lucky Clover and                             Wilted Violet
Water Brush
Watercolor Paper
Craft Mat (Enabler alert - this link will take you to a cheap source for mats)
MISTI

I stamped the beautiful flowers image on some watercolor paper using Jet Black ink.  I scribbled my markers on my craft mat (which I have to tell you, was massively cheaper at the link above. I got enough to cut into 4 separate mats and now I have them everywhere) and picked up the color with my detail water brush. 

Close Up of the Flowers
One thing I have learned using the water brush is that after you test the brush, ensuring the water is flowing, be aware of the amount of water left on the tip.  I've soaked away many a color because I dipped the very flowing water brush onto the color and then 
the color on the paper was so washed out it wasn't visible. I always have a piece of paper towel handy when I am using watercolor mediums - I'd rather have the brush too dry than too wet.  Then you have to wait for it to dry (did you know that drying your colors between adding more works wonderfully when using Distress Markers? Even if you are adding more of the same color the color builds better on dry paper. Disclaimer: Each water color medium works differently! Know the properties of the one you are using!)

After I was done with the flowers, I used my MISTI to center the sentiment.  I
Just another look
have to confess, when the image isn't even (like this floral spray) the sentiment never looks properly placed to me.  It makes me nuts.  I literally have to ask another opinion, or I just go with my gut.  The images are hand drawn and that's why I like them, because they aren't perfect.  Why do I expect my creations using those images will be perfect? Another age old question I think all crafters struggle with one way or another.  Enough prattling on.  I hope you enjoyed my little tutorial and that you are tempted to bring out some flowers and play a bit! Fondly, Christi

I would like to enter my Have a Beautiful Day card in the following challenges:
The Artistic Stamper (March) - Spring
Do-Al(l) Kreatives (March) - #3, Spring
Paradise of Stamps (March) - #54, Spring
The Flower Challenge (March) - #6, Anything Goes 

Simon Says Stamp Wednesday Challenge - Bit 'o Green
City Crafter - #353, Spring is Around the Corner
613 Avenue Create - (March) #195, AG w/ Optional Twist: Use Rubber 
Stamping Sensations - (March) Close to Nature
Alphabet Challenge - Z is for Zero Embellishments 
Art Impressions - #203, Let's Watercolor
DL Art Thankful Thursday - #200, Flowers 

Monday, February 6, 2017

A good day has both COFFEE and YOU!

I just recently started drinking coffee again. I stopped years ago due to some stomach issues and found that English Breakfast tea was delicious and didn't give me ulcers. Granted it wasn't only the coffee that gave my ulcers, but I successfully got rid of everything that was causing them <wink>.  That was years ago and since my honey drinks coffee I began drinking it again.  I try to limit myself to one cup a day (unless I'm going out with my sister - then an ice cold, sweet, coffee drink is a must) and I still crave Dunkin' Donuts over Starbucks (Dunkin' Donuts are far and few between out here in Colorado.)  I felt that this adorable card could be given to anyone with whom that you enjoy a cup of coffee.


What I Used to Make my Card:
Kraft Card Base
StampCouture Small Cup with Foam Heart (Brand New)
Sentiment from STAMPlorations Literary Caffeine-Ations (Big Grins by Becca Cruger) (First Time Using the Set)
Brown Card (2 shades from stash)
Distress Marker in Festive Berries
Versamark Ink
Ranger Archival Ink in Jet Black
Pop Dots

My Custom Stamp
I recently needed to get a new "Stamped by Christi" stamp for the back of my cards.  My old one had finally seen enough ink and I put it to rest.  I love to support small businesses, and I found StampCouture on Etsy, to make it even more special they are practically local to me! Honestly, I had contacted - via Etsy contact - every manufacturer of custom stamps in the USA that were listed and they were the ONLY ones who got back to me!  But I am SO glad they did because I had many conversations with them about how I wanted the stamp to look and they were fabulous to work with.  While I was waiting for my custom stamp I browsed their shop and just had to pick up a few more stamps - this adorable coffee cup with the foam heart being one of them. The others are patiently waiting their chance to be used.  I highly recommend StampCouture if you ever need any custom stamps or if you are in need of some adorable little whimsical stamps. They kept in contact with me, even through the busy holiday season, where extremely helpful and the prices were very reasonable (and I get no commission from any manufacturer or company just because I link to or write about them!)

OK, now back to the card.  I used one of the coordinating brown papers from my stash and stamped the small coffee cup with Versamark ink sort of in a
Another Look at the Card
pattern, but I wasn't too careful about the placement of the cups.  Once that was finished, I trimmed the panel to fit the card (since I always use A2, 5 1/2" x 4 1/4" cards, I typically trim a panel to 5 1/4" x 4". If the card size or panel sizes are different, I will mention it in my post. Taking the Festive Berries Distress Marker, I chose one of the cups and colored in just the heart portion.


I then stamped the sentiment and the coffee cup onto a darker brown cardstock using the Jet Black ink. I used some thin Pop Dots to adhere the panel to the card.  Making this card brought back so many memories of when I first began stamping - the awe of watching embossing powder melt for the first time, finding amazing products like chalk, Versamark ink and the pure wonder of the entire art form.  It has inspired me to play with some of the products that were around when I first began stamping.  So, I'll be breaking out cool stuff like Shrink Plastic, Veggie Leather as well as some other "oldies but goodies" in the near future.  Is there any old product or technique that you loved to play with when you started stamping?  Please leave me a comment! Thank you SO much for sticking with me, and this post.  I'd love for you to become a follower. If you let me know in your comment that you have begun following me, I'll be sure to do the same for you.  Fondly, Christi

I am entering my "Coffee & You" card in the following challenges:
The Artistic Stamper - (M) February's Challenge - Love Hearts
STAMPlorations CAS Challenge - (M) Anything Goes w/ option of Hot Pink
STAMPlorations Theme & Sketch - (M) Stamp Retro (theme)
Simon Says Stamp, Monday Challenge - Young at Heart (too much coffee makes my heart race like when I was young and literally used to race <grin>)
Use Your Stuff - Love is in the Air (Use Hearts)
Addicted to Stamps - #141, Love
Simon Says Stamp, Wednesday Challenge - The Color of Love
Simon Says Stamp Work it Wednesday - (M) Use Something New
DL Art Thankful Thursday, #197 - Anything Goes option of Thank You
DL Art Monthly Linky Party - (M), February, Anything Goes

Wednesday, February 1, 2017

You Are Loved


Hello everyone! Thanks for stopping by to check out my latest creation for House of Cards!  This month's inspiration picture is:

with the optional theme of "Love." 

It's a perfect challenge to get your Valentine projects started!  In January, I was lucky enough to get the My Monthly Hero Kit from Hero Arts.  I totally fell in love with all the flowers and sentiments and I've been creating with the kit since I got it.  Here is one of my creations:


What I Used to Make my Card:
White Card Base
Hero Arts Kit of the Month, My Monthly Hero January 2017 (sold out)
Hero Arts Ink in Soft Pink, Bubble Gum, Strawberry, Mint Julep & Tide Pool
Distress Ink in Cracked Pistachio, Spun Sugar, Picked Raspberry & Candied Apple
Ranger Archival Ink in Jet Black
Distress Marker in Spun Sugar
Patterned Paper from my Stash
Corner Punch
Clear Wink of Stella 

I went crazy making those adorable flowers and leaves.  Reminds me of the Two Step Stampin' from Stampin' Up! way back when I was a demonstrator for that company.  It is MUCH easier now, using clear stamps and the MISTI.  I was making three and four flowers at a time.  I really enjoyed messing around with all the color combinations. You will be seeing these flowers many more times - I have a bunch of them all ready to go!  Deciding what container to put them in was the hardest part of this card.  I dug through my stash and found a scrap of really old paper from Somerset Studio magazine. It's difficult to see the subtle pattern, but it's got some pinks and whites in it. I stamped the flower wrap in Bubble Gum ink and then die cut it.  I colored the bow using a Distress Marker in Spun Sugar.  

Then, I set about using some of my flowers and leaves.  I would position everything and then go look for a pink paper to match the roses so when I came back to the bouquet again I would either love it or start over.  For me,  when I'm
Just Another Look

undecided about something, I like to leave it and go back to it later.  I found a nice pink paper in my stash, trimmed it down and used an old corner punch to notch the corners.  


I went back to my MISTI and stamped the sentiment in Strawberry at the bottom of the pink paper so my bouquet would be above it.  I glued the wrap for the flowers down first, then all the flowers and leaves got attached.  I swiped the Wink of Stella pen over the flowers and around the sentiment (in fact, if you look close you can see the Wink of Stella around "You are Loved").  I had so much fun playing with this kit that I subscribed to the My Monthly Hero Kit.  Now I'll get one every month.  

I hope you will join us at House of Cards, you have ALL month to join and play, and be sure to check back each Tuesday for some more inspiration from the Design Team.  Thanks so much!  Christi


A special shout out to my good friend Nana Connie - she's a gem! Pop over and check out her blog (just click on her name).

I am entering my You Are Loved card in the following challenges:
Simon Says Stamp Wednesday Challenge - The Color of Love
Frilly & Funkie - Be My Valentine
Die Cuttin' Divas - Anything Goes
Simon Says Stamp Work it Wednesday - (M) Make Something With a New Product
Darnell's NBUS #10 - Anything Goes or Theme (The Hero Arts Kit is my NBUS item - this is the first project I used it for)

Saturday, December 24, 2016

A Meowy Christmas

Wishing You and Yours a
Very Happy Holiday Season!
~~~~~~~~~~~~~~~~~~~~~~
Thank you all SO much for your continued support of my little blog!
XO Christi

and the Fabulous Feline Four


I love how this kitty came out - he looks so warm and snugly in his scarf and his Santa hat.  My favorite color is blue and winter is the perfect time to make some icy creations with the various shades.  I found the designer background paper in my stash and I have no idea who makes it (I suspect it's from Stampin' Up! and probably discontinued) but I knew I had to use it on at least one of my holiday cards.  
What I Used to Make my Card:
White Card Base
Newton's Nook Newton's Holiday Mischief Stamp Set
Newton's Nook Newton's Holiday Mischief Die Set
Ranger Archival Ink in Jet Black
Stickles in True Blue
Distress Marker in Broken China
Spellbinders Shapeabilities Victorian Tags, S4-448
Nuvo Crystal Drops in White, 677N
Nuvo Glitter Drops in Ruby Slipper, 752N
Corner Decorative Punch
Blue Cardstock

I stamped and die cut the kitty and used Stickles to fill in every other area on his scarf.  I set him aside to dry because me & any kind of wet medium are guaranteed to make a mess. 

As the kitty was drying, I trimmed a piece of patterned paper and punched the corners.  I have had this punch for years and I have no idea where I got it from or who made it - I'm sure they are still around somewhere.  I glued the patterned paper to the white card base and put that aside (under my tile on my desk to ensure it dried flat) and turned my attention to the sentiment.

I stamped the Meowy Christmas with Jet Black ink, die cut it to fit in the middle of the decorative die cut that I had cut out of a scrap of blue that matched the patterned paper.  I glued the two die cuts together and attached them to the card.  I stamped and die cut out his Santa hat and to that I added glitter Nuvo Drops in Ruby Red and Nuvo Crystal Drops in white.  While that was drying, I colored in the empty spaces on his scarf with the Distress Marker in Broken China.
Another Look

The next day I popped his hat on, and then glued him onto the card.  It was the perfect card to make while working on other stuff since there was so much drying time.  I typically make more than one thing at a time as the mess on my table will attest to.  Now, do you think I could get one of my cats to wear a scarf and a hat? Hmmmm - maybe I should finish these posts before I attempt that! As always, I so appreciate your visiting me and I hope you'll leave me a comment so I can visit you back ~ Happy Holidays, Christi

I am entering my Meowy Christmas card in the following challenges:
Crafty Hazelnuts Christmas Challenge - #313, Use a Sentiment
CAS-ual Fridays - #163, Christmas & Hanukkah 
Cute Card Thursday - #457, Anything Goes
Crimbo Crackers - #122, Animals (entry #2)
SUYP - (December) #13, Krimbo Kats