Followers

Showing posts with label The Robins Nest Creatives. Show all posts

Thursday, June 2, 2022

Shimmery Joy Card

While it is just starting to heat up here I am sharing this sparkly Christmas card today.  I've had this card in my head for a while and I'm pleased that it looks just like I'd hope.  Hope you enjoy it!


I used a swirling snowflakes embossing folder, embossing a piece of shimmer white paper, which I then attached to a white card base.  Setting the card aside, I set to making the snowflakes. I used these beautiful opaque pearl white diamond shaped Dew Drops.  For each snowflake I used 6 of the Dew Drops, adhering them together on a piece of non-stick freezer paper, but any non-stick surface, such as a craft sheet will work.  What I did was put a dot of glue on the non-stick paper, then placed the diamonds in a "circle" pattern; then placed a small drop of glue in the center of the snowflake and added a Mini Pearl Dew Drop onto the glue.  You need to use something non-stick since the glue becomes a part of the snowflake and after leaving the flake to dry overnight you need to be able to gently lift the snowflake from the paper. The flake may still be slightly damp and may bend a bit. Just put the snowflake back onto the non-stick sheet, and gently bend the Diamond Dew Drops back into place and let it dry a bit more.  I turned the snowflakes over and let them dry overnight again just to make sure they were fully dry. Meanwhile, I had used holographic paper {the pattern I used is a burst, or fireworks pattern; it's subtle, but you can still see it since the word die is so large} and cut out the word joy {I used Winnie & Walter's In a Word Joy die, but they are no longer in business.  You can find many other options for a large joy die}, then popped the word up with dimensional tape. I added three of the snowflakes I made, as well as a few more of the Mini Dew Drops in Pearl.  The card is very sparkly and festive in person, and I know the recipient will certainly get into a holiday mood.  

Thanks so much for visiting and checking out my card! Have a fabulous day and I will see you again soon :) Fondly, Christi

I am entering my card in the following challenges:
Crafty Hazelnut's Christmas Challenge (#597) - Anything Goes Christmas
12 Months of Christmas (#89) - Anything Christmas Goes
Creatalicious (#236) Anything Goes w/ Lots of Bling
The Holly & Ivy Christmas Challenge - Anything Goes
Simon Says Stamp Monday Challenge - Up in the Air (Snowflakes)

Wednesday, May 4, 2022

Mixed Media with The Robin's Nest Creative

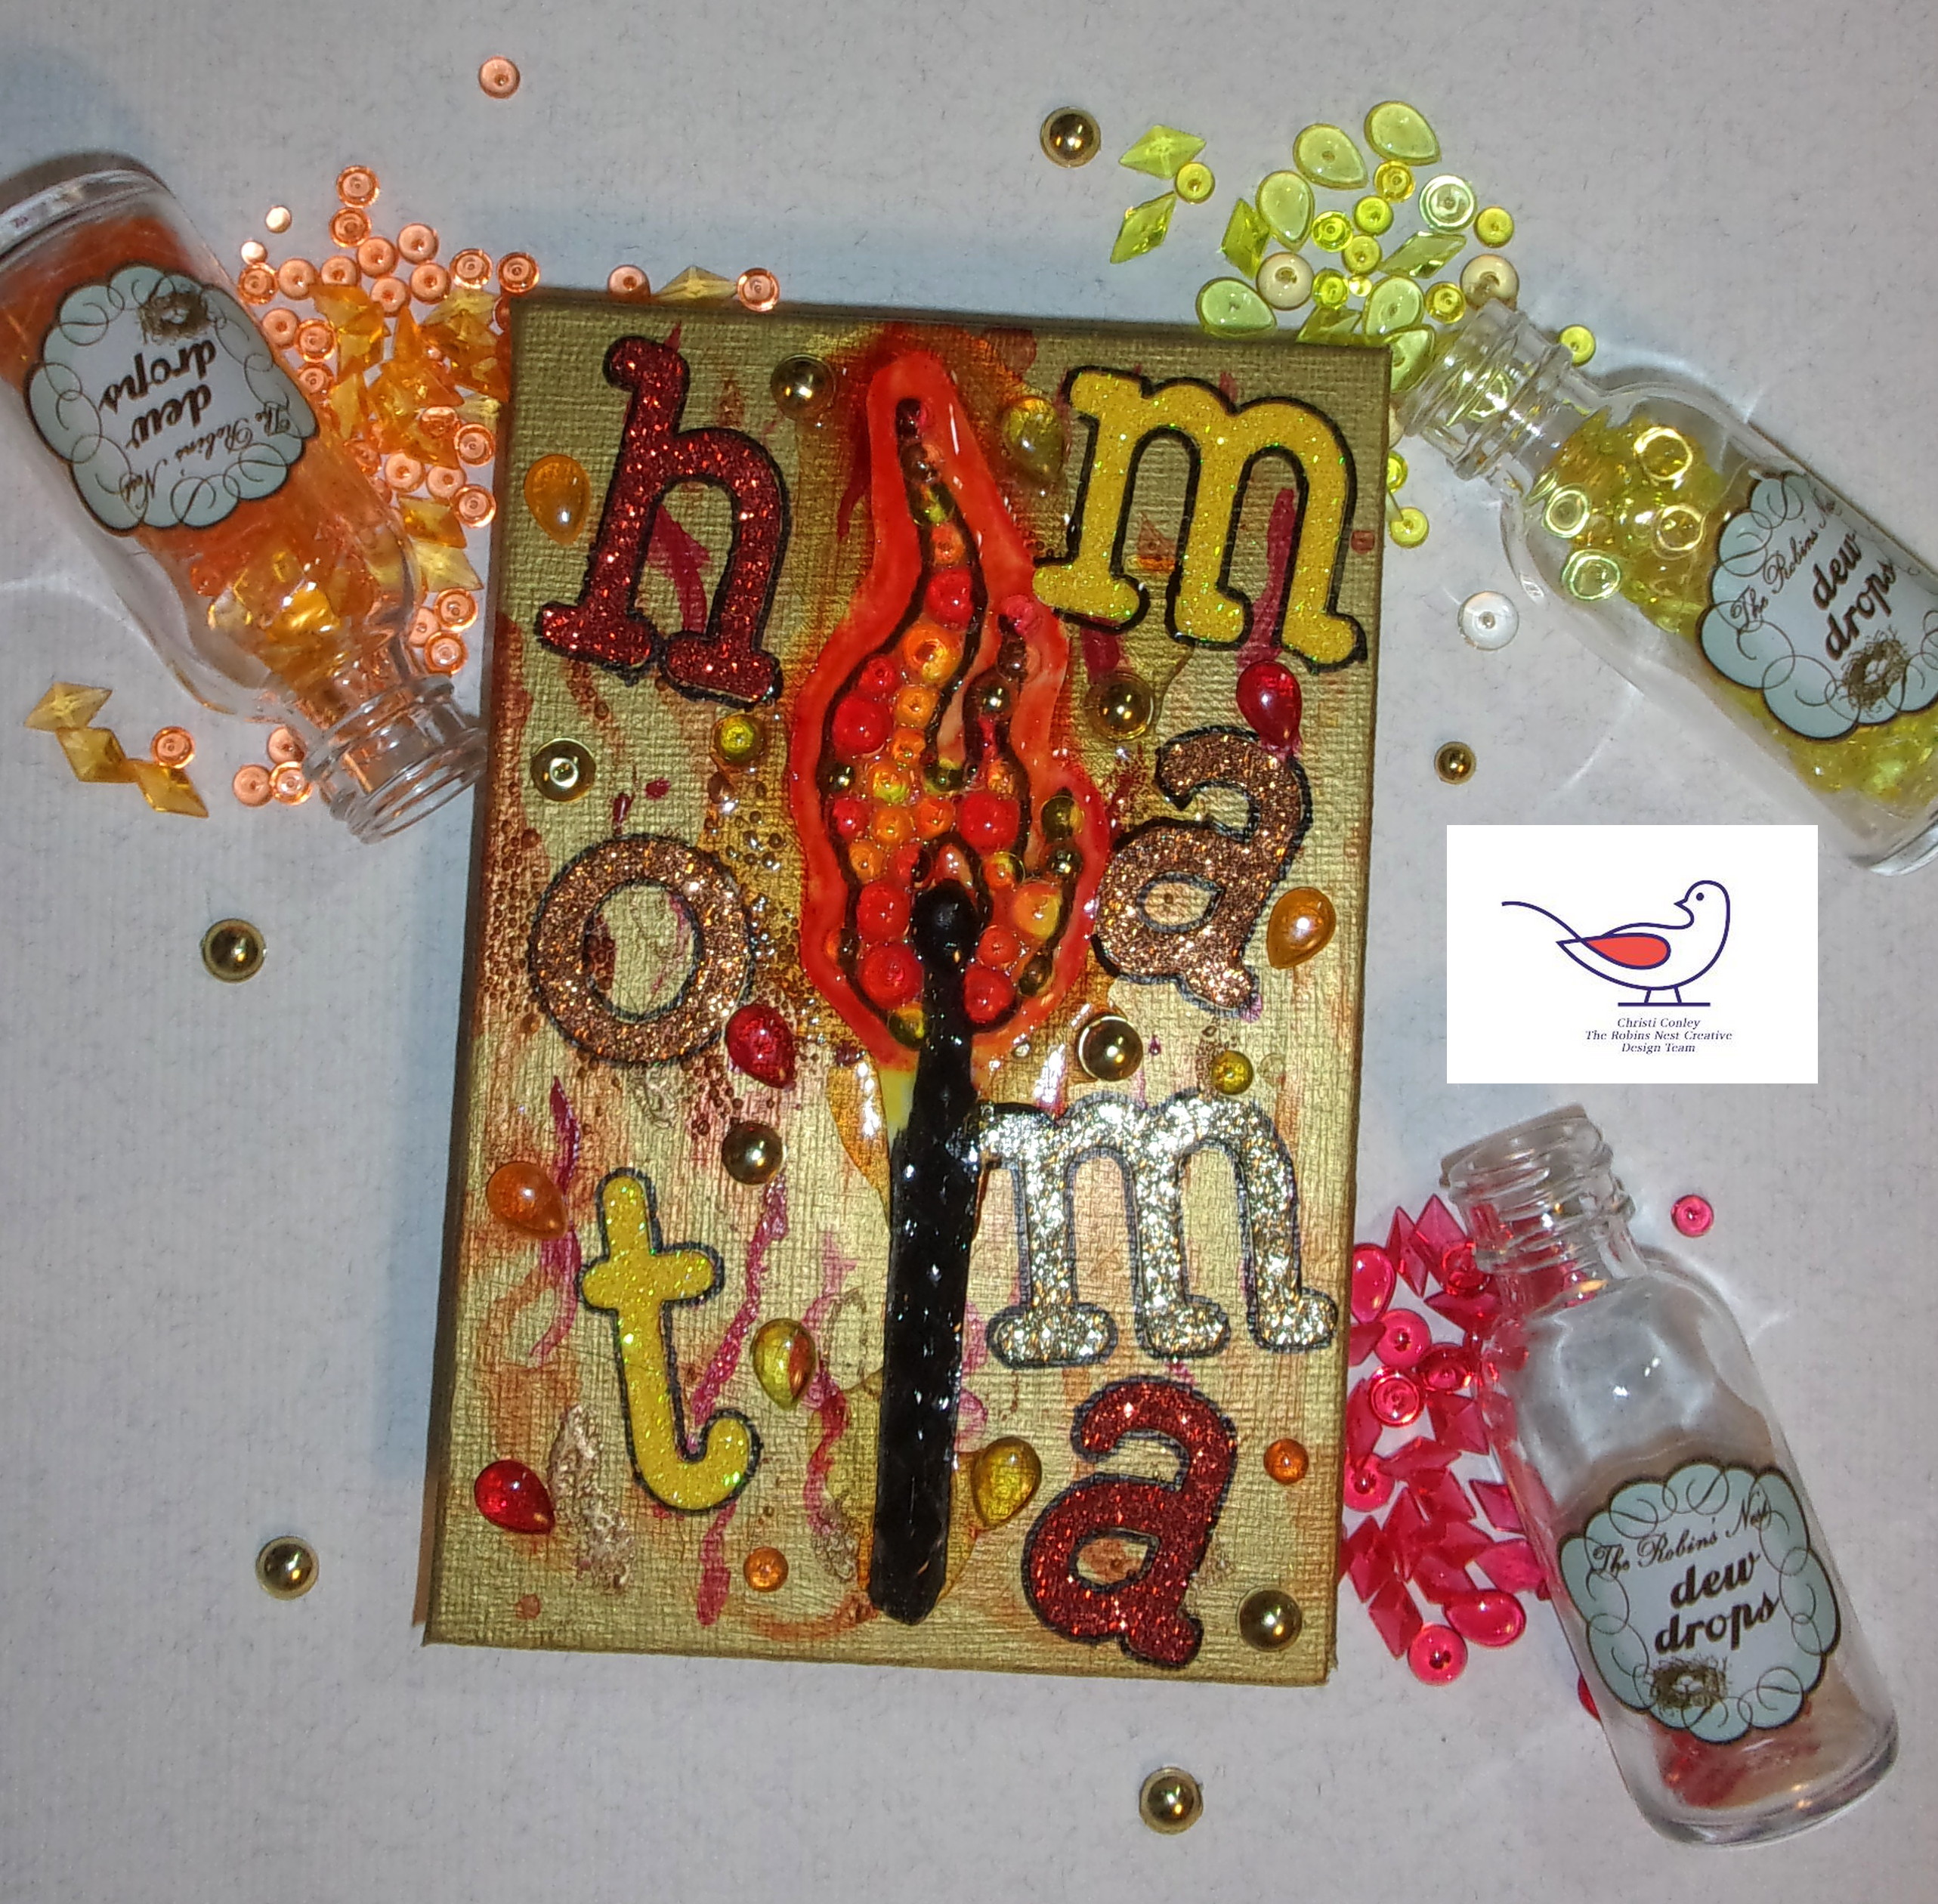
 Hello everyone! For my Design Team project at The Robin's Nest Creatives I decided to go all out and get really messy.  I used to make mixed media items all the time, but have since gotten busier and really haven't had time to play; I made up for lost time!  Let's get to it, here is the project; it's made on a Frederix 4" x 6" panel - this is a long post, I apologize, but I used a lot of different products (some not so successfully) while making this piece.


The first thing I did was use one of the really cool kits they have at The Robin's Nest called Creative Dew Drop Canvas and there are some amazing pictures to choose from, I used the Matchstick Creative Dew Drop Canvas for today's project.  These kits come with everything you need (except glue) to make a masterpiece worthy of framing - AND they come in different sizes! I used Dew Drops that I though would represent the flame best, orange, gold, red and yellow and filled it in completely with both Regular and Mini Sized Dew Drops. Black Diamond Dews were used on the wooden part of the match. I also colored around the flame to sort of give it that halo glow you sometimes get around fire using Copics right on the canvas.  I smothered it with Diamond Glaze and let it sit overnight to dry.  I wanted

Another Look
to use a panel as my substrate so I cut the match out.  I actually did this back in the beginning of being on the Design Team but I put the match somewhere and couldn't find it - shocking, I know - it popped out of where ever those items go when "they were right here" and then they are gone (another dimension with lost socks?? I don't know) but I found it.  Setting the match aside, on my desk so it couldn't escape again, I painted the 4" x 6" panel gold using Lumiere True Gold Paint. I have to swoon for a second because I love Lumiere Paints - if you like rich color, some of the coolest pearlescent colors (some of them are blended with 2 colors and the effects are amazing!) you need to check this paint out.  It is sold for use on fabric, but I have used it on everything and I have never been disappointed with it.  It's a quality product and it may seem pricey (if you shop around you can get a jar for around $6, a 2.25 fl. oz, jar, but they also come in sets with little squeeze bottles, called Exciter packs), but a little goes a long way. Sorry for that little detour! 

So once my panel was dry this is basically where I went crazy.  I used a flame stencil and some sprays to try and make a fire background, well the gold paint did not like the sprays (they are water based and just beaded up and dripped away) but some of the color did take.  At this point I just started to throw products at the panel; and I used so many different colors I couldn't begin to list them all. I used a few different embossing powders from Wow Embossing Powders, some diluted red paint from Golden, and some more embossing powers -which again were an issue because the embossing ink just beaded up on the paint.  No worries I just made the background really, really abstract.  I glued the Matchstick Creative Dew Drop Canvas that I had cut out onto the panel and attached the alphabet letters I had cut out of  6" x 6" DCWV glitter stacks and I then added more Dew Drops using the same colors I used to fill in the flame, but I used the Tear Drop style of Dew Drops instead.  I added a few Mini Dew Drops as well.  I wanted them to sort of look like sparks from the flame.  I glued the sentiment onto the panel and the letters just blended right in with everything else so I used a permanent black marker and traced them all so they'd be easier to read and pop a little.  The final step was to smother the match stick once again with Diamond Glaze and once that dried I was done.

I am actually happy how this panel ended up.  It is very interesting with all the colors, glitter, glaze and, of course, Dew Drops.  I hope you enjoyed my long story- I have been trying to make my posts shorter and I think I am succeeding, but sometimes I just have to tell the whole story!  Thanks for your support ~ Lots of love, Christi

I am entering my Mixed Media Panel in the following challenges:
Crafting Happiness, #123 - Anything Goes
Love to Craft Challenge Blog, #68 - Anything Goes
Mix it Up Challenge, #59 - Anything 3D Goes
Creative Artiste Mixed Media Challenge, #82 - Anything Mixed Media Goes
A Perfect Time to Craft, #5 - Anything Goes
Mixed Media Lovers, #13 - Anything Goes

Thursday, March 31, 2022

To the Moon with The Robin's Nest Creatives

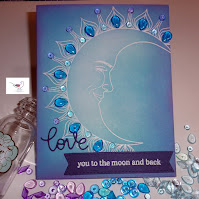
 Hi all! Today I have another 2fer for you! It's so much fun when I get so inspired by a stamp set that I have to make two, or more, cards. I had made these cards a while ago - it was one of those cases where as soon as I saw the stamp set I knew how I wanted to play with it :) I am so pleased with how these cards came out and I hope you like them as much as I do! And I knew just how I wanted to decorate them with my Dew Drops!


  Each card started out with a white blank card.  I stamped the sun on one and the moon on another using  the Simon Says Stamp set To The Moon with embossing ink.  Then both images where embossed with white embossing powder .  I set the moon card aside and worked on the sun card first, blending Distress  Oxide yellow inks in the center and orange inks along the sides.  I LOVE the POP you get when using white embossing powder - I really enjoy watching the image come out; reminds me of watching the picture develop when you use a Polaroid camera.  Once I was happy with the blending, I moved on to the Moon card.  In addition to embossing the moon, I embossed part of the sentiment on a piece of dark blue card, cut it out with a fishtail die and set it aside.  I used shades of blue and purple ink for the moon card and again went lighter in the center and darker toward the outside.  

Before I put the sentiment die cuts on the cards {the hello on the sun cut out of white card and the love on the moon cut out of the same dark blue that the embossed sentiment was on} I started to figure out what type of design I wanted on each card using The Robin's Nest Creatives Mini Dews, Tear Drops and Diamonds {I  have included links to each specific product I've used - just click on the link provided}  I used yellow and orange Mini Dews {you can get both orange & yellow Mini Dews in the Paisley Collection}, as well as Diamond yellow Dews on the sun card and purple and light blue Mini Dews, as well as royal blue Tear Drops on the moon card.  I personally love how these 2 cards came out; ink blending is so much fun and the options are endless! Also, the Dew Drops enhance the designs but don't distract from them - perfect if you ask me! Pinterest is fantastic if you are looking for color combinations but beware, you will get lost in the lovely colors so let everyone know you are busy, get a cup of whatever and prepare to be there a while; happens to me every time!  Thanks SO much for dropping by! Christi  

I am entering my cards in the following challenges:
Simon Says Stamp Wednesday Challenge - Anything Goes
Classic Design Challenge, #6 - Anything Goes
Crafts Galore Encore #98 - Anything Goes
Creative Knockouts, #446 - Anything Goes
Creative Fingers, #228 - Anything Goes
Simon Says Stamp Flikr Challenge, #198 - Anything Goes


Friday, March 4, 2022

Peace Sign decorated with The Robins Nest Dew Drops

 This wasn't the project I was going to share today but I feel it's relevant to what is going on in the world, so it is a perfect time to share it.  


I had purchased the Peace sign at Christmas time at my local Dollar Tree Shop knowing I wanted to make something out of it that would be on my desk year round.   I began by sanding the wood a little bit mostly to just get any slivers that were hanging off and generally smooth the sign out.  I then used gesso, in white, as a base coat.  I knew you'd be able to see the white but since I love the combination of blue and white, I was fine with that.  I started trying to keep all the shapes and colors consistent with each other on the individual letters, but that soon became impossible because some letters took a curve when others didn't and so on, so I just filled in the spaces with Dew Drops that continued the theme and fit; the sign isn't that big, it's only about 6 inches long and about 2 1/2" high.   This sign sits on my desk to remind me to breathe, chill and relax; to find that inner peace, even if it is just a tiny bit.  I didn't want to make something that would need to be put away once the holiday season was over and I feel that the word peace is appropriate any time!

Dew Drops that include colors that I used in my project: Sea Foam Diamond Dew Drops,  Sea Glass Tear Drops, Black/White/Silver Dew Drops, In Love in Italy Mini Dew Drops and Raindrops Dew Drops which is a mixture of all the sizes and shapes of Dew Drops in clear.  Dew Drops come in an array of mixes; so your Diamonds could also have some round Dew Drops in the mix and you may be able to purchase some colors in a single pack while some colors are only in mixes.  The suggestions I provided are just that; I urge you to take a look at the shop and see what strikes your fancy!

I appreciate you taking the time to stop by and take a look at my Peace sign! I hope you & yours are safe and happy. See you soon! Christi

I am entering my project into the following challenges:
Crafting Happiness - Anything Goes
The Funkie Junkie Challenge - Mixed Media
A Perfect Time to Craft, #3-2022 - Anything Goes
Creative Artiste, #80 - Anything Goes