Followers

Showing posts with label Love. Show all posts

Wednesday, March 2, 2022

March already? Come join us at Paper Funday with Newton's Nook!

 I can feel myself falling behind and how I hate that feeling! But yes, March is upon us and for this months challenge at Paper Funday I am using Newton's Nooks products which is generously sponsoring our challenge this month. It shouldn't be a surprise to anyone that I simply adore the cute, cuddly cats that can be found at Newton's Nook and these products were introduced just last month so everything is brand new!  Oh and this post is a 2fer!  Yes, 2 for the price of one; such a bargain! If the theme of Anything Goes doesn't work for you, feel free to enter something with the colors of Green & Gold; perfect for those St. Paddy's Day cards!   

To start with I stamped the Heartfelt Meows stamp on both water color paper and grey card.  I used the corresponding die to cut both of the hearts out and concentrated on the water color heart first.  I colored the heart with my Zigs, chose a Kraft card, then figured out the placement of the heart; which I attached to the card with foam tape.  I embossed the sentiment using white embossing powder and finally added a few homemade dots {made with Perler beads that I cut in half and baked in the oven!}


Now it was time to work on the other card.  I chose a white card base for this card and left the black ink on the grey card as is.  I did cut a few more of the Heart Frames Die, one using a darker grey and one using a shade of pink that matched the strip of the Love & Meows Paper Pad paper I used.  Lastly, I had the red Love You sentiment on my desk from a project I didn't use it for so I popped that onto the small grey heart.  And by the way, Newton's Nook has a complete product line that work with the Heart Frames Die, check it out here; everything from dogs, to fall, holidays and MORE! So cute!

I had a blast making these cards and I already have my eye on some more Heart Front stamps to get that match the die, just don't tell my credit card! I hope to see you at Paper Funday! Have a great week! Christi

I am entering my cards in the following challenges:
Simon Says Stamp Wednesday Challenge - Add a Die Cut
Addicted to Stamps, #424 - Any Occasion
Crafty Animals, #59 - Anything Goes with an Animal
NBUS Challenge, #36 - Anything Goes that is NBUS
SUYP, #76 - Anything Goes with Cats
Pammies Inky Pinkies, #2209 - Anything Goes

Wednesday, February 16, 2022

Hearts and Kitties

 Hi all!! I've made this cute Valentine's {even though you could give it any time of year; I was careful not to add any specific Valentines sentiments} card using Lawn Fawn stamps and dies; some older and newer sets.  I hope you like it!


I started the card by cutting out the slimline panel using the Scalloped Slimline with Hearts, landscape out of dark pink paper, then I used the larger die and cut it out of lighter pink paper.  I also covered a white slimline card using a page from the Watercolor Wishes Rainbow paper pack.  Next, I stamped the curved hearts, from the Scent with Love stamps on watercolor paper, colored the with my Zigs and cut them with their coordinating dies.  I put them around the heart openings.  The kitties, from the Meow You Doin' stamps & dies, were already colored, cut and in my stash {I always have extra cats in my stash}.  I tucked the cats into the heart openings and put a few paper hearts cut from small hearts that are included with many of the Lawn Fawn sets {I can't recall what set I used, honestly, I have a bunch of them on my desk}.  I attached the hearts panel onto the pink scalloped paper, then used dimensional foam tape to pop it up onto the slimline card.  Lastly, I had stamped a few of the small sentiments from the Special Delivery set as well as the Scent with Love set.  I trimmed them down and added them inside the hearts.  Finally a few sequins were added and I was done.  

I had all these sets on my desk as I was to take a class {Love Letters} with the fantastic Jenn Shurkus; the class was originally on for he 5th of February, but they were getting a huge snow storm on the cape, so it was postponed to February 12. I decided to bite the bullet and order the copics she used in class, figuring I'd have them for the February 12th class, but the copics I had ordered never made it to my house, a case of "we delivered them" but *I* don't have them.  So, I am waiting for their delivery and hopefully I will be able to make the cards from the class and share them; thankfully Jenn allows you to access the class tape online along with your class fee so I can go back and take the class when the markers get here.  Ever notice that the more you want something the harder it is to get?  SO TRUE.  Also, the carriers have begun to take SO long to deliver items, not just one of them, all of them, things are taking 2 to 3 weeks that used to take a few days.  I am the type who wants their stuff before I order it and it's frustrating to no end.  But, it is what it is!  I hope you enjoyed my card, and I appreciate you listening to my little saga, and I thank you for stopping by!! Fondly, Christi

I am entering my card in the following challenges:
Simon Says Stamp Wednesday Challenge - Slimline Cards
The Funkie Junkie - Funkie Frilly Valentines
Sweet Stampers, #65 - Furry Friends
Dies R Us, #187 - Love & Hearts
A Place to Start, #202202 - Anything Goes, Twist: Include a Critter
SUYP, #75 - Anything Goes w/ Cats
Happy Little Stampers - Anything Goes With Dies


Double D - Shades of Pink


Tuesday, February 1, 2022

You're Sweet at Paper Funday!!

Boy, pink is a TOUGH color to photograph! But I still love this card and made it for the Paper Funday February "Hugs & Kisses" challenge.  I adore Lawn Fawn Products and this was made with some of the older ones, but I have some new ones in the works, so stay tuned!I


What I Used to Make my Card:
White Slimline Card Base
Pink Card
White Card
Lawn Fawn Slimline with Hearts, Landscape, #LF2476
Kat Scrappiness Slimline Never Ending Nesting Dies
Lawn Fawn You're Sweet Line Border, #LF1560
Lawn Fawn Polka Heart Backdrop Die, Landscape, #LF1830
Lawn Fawn Hedgehugs Die, #LF730

I stretched myself making this card; there is NO stamping on it at all!  I almost had to stamp a sentiment, but as you can see I worked that out. Let me explain how I made the card. I started with the slimline card and cut out the back layer and the front layer, using pink and white card. Then I cut out the hearts so they were visible through the hearts on the front of the card.  I wanted the small hearts to be white, so I used some scrap white card to layer behind it.  I attached that portion close to the top because my plan was to use the sentiment at the bottom of the card.  Well, that didn't work out very well. First it didn't fit and then there was the dilemma of what color should the sentiment be?  I really did not want to introduce another color to the pallet so I just moved the sentiment up a bit and placed it onto the focal part of the card. Then I had to figure out what to add to the bottom since there was too much space to just leave it {at least I thought so.}  I debated if I should trim it {there doesn't seem to be any real standard yet for slimline cards.}  No trimming; instead I focused on something I could add.  I tried pearls and gems until my eye settled on the Hedgehugs set that was on my desk.  Perfect!  I cut out those little hearts five times and adhered them to the bottom of the card.  I doubt you'd think that space was unplanned if I didn't tell you!  I love the way the card came out, especially the little hearts along the bottom!  I hope to see your "Hugs & Kisses" projects on the Paper Funday Challenge! Thanks for stopping by!  Fondly, Christi


Friday, March 12, 2021

You Have My Heart

Hey everyone!

First, I have been moving and as I write this I am currently surrounded by bins & boxes - I'm exhausted just looking at all the stuff I need to find homes for.  Anyway. . . .

Have you ever seen a card and said to yourself "I need that stamp"? That was the beginning of this card!


What I Used to Make my Card:
White Card Base
Simon Says Stamp You Have my Heart Stamp Set, #SSS202250C 
Simon Says Stamp You Have my Heart Die Set, #SSSD112295C
Watercolor Paper {I use this}
Zig Clean Color Brush Markers
Gina K Amalgam Ink Pad in Obsidian Ink
Distress Ink in Blueprint Sketch
Dimensional Dots
Wink of Stella Clear

Cindy's Card
I was so inspired by the beautiful card made by CRNCards {you can check out her other creations on her Instagram account, @CRNCards}I had to get this set.  I love the clean and simple look of the wreath, and the purple hues Cindy used are just gorgeous! Since there is only one flower on the wreath I figured I could actually color the image and make it look good enough to present it to the public.  I enjoyed coloring this wreath so much I plan on stamping a bunch of them on watercolor paper, to have them ready if the coloring bug bites me.  I have already stamped and started to color the other floral element in the set but this wreath is my favorite part! All I did was stamp the wreath, color it with my Zigs, cut it out, figure the placement, stamp the sentiment onto the card base and use dimensional dots to attach the wreath.  I'm not skilled at clean and simple cards but I feel that this card is a great example.  So, as I asked before, have you ever seen a card and literally rushed to get the set it was made from? If so, let me know below! 

Thanks for stopping in, I appreciate it! 

Fondly, Christi

I am entering my card in the following challenges:
Crafting Happiness Challenges, #87 - Flowers
Simon Says Stamp Monday Challenge - Use Something Green
Dragonfly Dreams - Include a Flower or Flowers
Challenge Up Your Life, #133 - Flowers
NBUS Challenge, #24 - Anything Goes as Long as it's New {first time I have used this set!}
Simon Says Stamp Wednesday Challenge - A Bit 'O Green
Addicted to Stamps and More, #400 - Use Dies and/or Stencils
Watercooler Wednesday, #311 - All thing Feminine
The Cat's Pajamas, #377 - Florals
Craft Rocket Challenges, #79 - Use Dies and/or Spring


Saturday, February 27, 2021

Hero Arts Love is Love

Hi everyone,

Hero Arts periodically offers items that when they are purchased, a portion, or all of the profits go to different causes.  Both of the sets I used to make this card are an example of such products.  In addition to their own charitable giving, Hero Arts also collaborated with many other stamp companies to put out products such as the We Stand with You stamp set; it is worth a look, especially with so many different styles in one set!  The sets I used for this card are part of the Kindness Campaign {you can read about the various ways Hero Arts gives and supports various charities by clicking that link}.

What I Used to Make my Card:
White Card Base
Tutti Designs Nested Stitched Hearts die, #TUTTI-216
Hero Arts Support Prayers Love stamp set, #CM219 {retired}
Hero Arts You Are Loved stamp set, #CM171
Kaleidacolor Ink Pad in Spectrum,  #KA-000-001
Dimensional Dots

I just have to start with the fact that I have had this Kaleidacolor ink pad for over 20 years and I have never had to re-ink it or ever had any issues with the pad or any other Kaleidacolor pads I have.  I even had one on which the top got cracked during a move and I put the pad in a zipper bag and it STILL works!  When I find a product that I feel is a great value, I just have to share it!  So I stamped the image of the hands holding the heart globe on a scrap piece of white card, cut that out with the stitched heart die, and set it aside.  Then I took the card base and stamped the sentiment on it with the same Kaleidacolor pad as I used to stamp the focal image. I attached the heart with dimensional dots and I was finished. I think the message of this card is so timely and the CAS design catches your eye. What do you think?

Thank you for stopping by and taking the time to look at my card.  I appreciate it SO much! Also, in the near future I will be having a giveaway on my Instagram account so if you are a part of that social media I urge you to begin following me, don't worry, I will happily follow you back!  If you aren't yet on Instagram, well, you don't know what you are missing!  There is more content, crafters, ideas, and things to inspire you than anywhere else I have seen.  And you can use your computer; just go to Instagram.com and make an account!  Hoping you and yours are healthy & happy!   

Fondly, Christi

PS: My editor and dear friend, Nana Connie is in the hospital with pneumonia - maybe you could pop over to her blog and let her know you are thinking of her?? She can read her FB posts in the hospital and I know many of you know her.  I'm sure she'd appreciate so love! She also said, if you have her address, send cards there.  Praying for you Connie!!

I would like to enter my card in the following challenges:
Love to Scrap, #142 - Love is. . .
Love to Craft Challenge Blog (LCCB), #55 - Anything Goes
Krafty Chicks, #548 - Occasions {I think love is an occasion!}
Simon Says Stamp Wednesday Challenge - Anything Goes
Double D Challenges - Anything With a Heart {2nd card}
Happy Little Stampers CAS - Love is in The Air
Day of the Month Card Club, #24 - Valentine's Day/Love
Sweet Stampers, #53 - CAS
Dare to be Artzy - Love


Thursday, February 11, 2021

Sending Lots of Love

I have been seeing these adorable Lawn Fawn slimline cards everywhere and I am sure you have, too.  The images are so cute and I finally broke down, bought the stamps and dies, then made my own and here it is:


What I Used to Make my Card:
White Slimline Card Base
Watercolor Paper {I use this}

As always, my first area of business is to stamp, color, and cut all of the elements I want to use on my card.  Second, I used the cloudy stencil to make the sky and stamped the sentiment directly onto the card base. I dressed up the canary to make him look like a mailman and adhered him and the owl to the card, followed by all those cute little letters and hearts.  I really enjoy making scenes and I am happy I am fortunate enough to have acquired all the cool backdrops that I have as they make it so easy to make a scene card.  Honestly, I am not a huge fan of Valentine's Day but being able to make a cute card like this makes all the engagement commercials worth it! 

I hope this card put a smile on your face!  I appreciate you taking the time to visit me here and I hope you'll consider following me.  If you do, leave me a message so I can follow you back. Fondly, Christi

I am entering my card in the following challenges:
Simon Says Stamp Wednesday Challenge - Make a Slimline Card
Mod Squad - Must Have the Word LOVE
Fab 'n Funky, #510 - Love, Heart
Cuttlebug Mania - Put an Animal on it {hope the birds count!}
NBUS Challenge, #23 - Never Before Used Stuff {the stamps, dies and stencil!}
Shopping our Stash, #438 - Love is in the Air
Double D Challenge - Valentine Love
The Paper Players, #527 - Hearts and/or Stars


Saturday, February 6, 2021

Simon Says Stamp Scattered Hearts 2Fer

I am on a roll with making more than one card using the same items!  I am not sure why; it isn't easier to do and it surely isn't easier to take pictures of a 2fer, but I can't seem to help myself!  Here are my latest 2fer creations:


What I Used to Make my Cards:
White Card Base
Light Pink Card Base
White Card
Shades of Pink Card
Simon Says Stamp Stacked Hearts Wafer Die, #SSSD111540
Simon Says Stamp i love you Shadow Wafer Die, #SSSD111800
Distress Oxide Inks in Spun Sugar, Picked raspberry and Candied Apple

These were surprisingly easy to make and I had originally planned on just making the one card that says "I Love You" on it. I had cut out another of the stacked hearts since I wanted to put some white inlay hearts into the original card.  Then I realized, why not use the white leftover frame as a stencil and make another card?  So that's what I did, using distress oxide inks.  All along I had planned on just using the stencil and throwing it away but I loved how pretty it was once I was done blending the inks so I used that part too! That is how most of my 2fers are born; the leftovers are too good to throw out so I make another card to use them up.  It's a win-win in my mind.  I get more cards and I make less waste.  

Thanks so much for stopping by!  I'm wondering do you often find yourself making two or more cards out of the same supplies?  How does the process work for you?  Let me know in the comments below!  Fondly, Christi

I am entering my card in the challenges below:
Simon Says Stamp Wednesday Challenge - Love is in the Air
Simon Says Stamp Monday Challenge - Love/Hearts
Inkspirational, #232 - Hearts
My Time to Craft, #450 - Love
Little Red Wagon, #587 - Total Eclipse of the Heart
Sisterhood of Crafters - Create Your Own Background


Wednesday, February 3, 2021

Love is in the Air with Paper Funday's February Challenge

Hello everyone! I'd like to take this time to announce that I am now on the Design Team of  The Paper Funday Challenge Blog which is a monthly challenge open to any and all papercrafts!  I am very excited to share my first creation for the month of February; our challenge is Anything Goes with the Option of Love is in the Air.  I chose to work with the option this month and here is my card:


What I Used to Make my Card:
White Card Base
Red Cardstock
Light Pink Cardstock
Simon Says Stamp Pawsome Love Stamp Set, #SSS102077
Simon Says Stamp Pawsome Love Die Set, #SSSD112094C
Simon Says Stamp Ornate Love Dies, #SET12180L {retired, I just used the heart die}
Gina Marie Designs Lacey Lattice Rectangle Dies 
Watercolor Paper {I use this}
Zig Clean Color Brush Markers
Gina K Amalgam Ink Pad in Obsidian Ink
Derwent Inktense Pencils
Stickles Glitter Glue in Christmas Red 

I've been finding that using colored pencils, watercolor or not, along with my Zig Clean Brush Markers allows me to color in designs better and I have much more fun when I am mixing mediums.  That is what I did with the images I used on this card; I stamped them, colored them, {I can't remember which I used first but I think it was the pencils} and then cut them out, and set them aside.  For a background, I used the lace lattice dies and red cardstock.  I had first used a clear dimensional gel on the heart balloons but for some reason as it was drying it cracked and while that look may be fine for some projects, it just didn't work for this one so I covered the clear dimensional gel with the Christmas Red Stickles and they came out nice and sparkly.  I stamped the sentiment onto light pink card and used a heart die to cut it out.  Lastly, I adhered all the pieces to the card base and here you have it!

I love how each of the kitties is different; I still have yet to master adding stripes to my cats without them looking silly, but I think these cats are adorable even without the stripes!  Now it is your turn to create a paper craft or two and enter it into our challenge; after all you have the entire month so I am positive you can make something and join in the fun{day}!  I hope you enjoyed my card!  I am hoping to see you soon!  Fondly, Christi

Monday, February 1, 2021

Sending Hugs Shaker Card

This card has been in the works for a while and it is actually a comedy of errors.  While I am pleased with the end result, the picture I had in my mind's eye was a little different.  Here is what I used and how I made the card {including what went wrong!}


What I Used to Make My Card:
White Card Base
Dark Pink Glitter Card
Various Shades of Pink Card
Birch Press Designs Adora Die Set, #56093
Birch Press Designs Big Hugs Sugar Script Die, #57138
Birch Press Designs Just Because Stamps, #CL8124 {retired but available}
Gina K Amalgam Ink Pad in Obsidian Ink
Thick White Card
Acetate
Shaker Material from Stash {lips sequins, red cup sequins, red seed beads}

I started this card because I wanted to make a shaker card using the beautiful Birch Press Design Dies, so I cut the three layered dies out of glitter and colored cardstock, then proceeded to make a base out of five or six cuts using only the bottom die.  I used a circle die to cut a piece of acetate, attached that to the top portion of the shaker and set the 2 pieces {the top and the stacked bottom} aside to dry.  When I went to assemble the shaker itself, I could not find the bottom stacked piece.  I don't know if you have ever made a shaker card this way, using a stacked piece, but it isn't difficult.  It is time consuming, especially using an intricate die such as this. I looked everywhere; it was gone and the cats were not talking.  So I made another stacked piece and set that aside to dry.  This time when I went to assemble the shaker everything was there and I moved on.

I started this card sometime in December and when it came time to attach the shaker piece onto a card base, I decided white looked best so I glued the shaker onto a white card base.  Then came time for the sentiment.  I knew what I wanted to use.  I grabbed my Platform to stamp "sending" directly on the card and I couldn't do it.  Where I had already glued the shaker was causing the Platform to not make contact with the card.  I wrestled with this for a good amount of time, moving the card around, thinking if I wanted to risk stamping without the Platform {the old way; I am NOT good at the old way of stamping. I shudder to think of all the paper and ink I wasted trying to get a good impression.  And I can't use the old stamp positioners. I have two of them gathering dust somewhere and I just cannot get them to work properly} so I resorted to putting the entire sentiment on a separate piece of card and attaching that to the card base.  Normally I would have worked all of these tiny issues out prior to gluing anything down but because I didn't want to lose the shaker, I didn't even think of the possible sentiment issues.  To a non-crafter this is NOT a big issue.  I tried to talk to my roommate about it to get some sympathy and he just didn't get it.  Anyway, I stamped my sentiment and used the hugs die.  As a little bit of bling, I used a few of the hearts left over from making the shaker.  I can promise you I will never jump the gun like this again!  I blame the fact that I worked on it, set it aside, then worked a little more, instead of doing my usual work style and finishing the card within a week of starting it.  I would have liked the card better if the stamping and die cut were literally on the card, but it is what it is.

I know we all have little fails and I'd love to hear about some of yours below.  Maybe the one fail that sticks out in your mind is not so much for what went wrong but why.  Oh, and I did find the first stacked portion I made.  Under the paper cutter!  I still suspect the cats had something to do with it but until I install those nanny cams, I just need to move on.  Thank you so much for reading all of this and I know YOU feel for me!  Fondly, Christi

I am entering my card in the following challenges:
Simon Says Stamp, Monday Challenge - Love/Hearts
Use Your Stuff, #145 - Hearts
Sweet Stampin'  - Love
Color Hues, #11 - Red and Pink
Dies R Us, #162 - Anything Goes
Crafting Happiness, #82 - Hearts


Monday, April 20, 2020

We Were Mermaid for Each Other

While this is an older Lawn Fawn set, it's brand new to me and what better time to break out an adorable mermaid couple than when we are all stuck together and maybe not feeling so loving towards those we are stuck with?  I dearly love my family, but things are starting to feel a bit. . . crowded.  I just keep telling myself this too shall pass :) 


What I used to Make my Card:
Navy Blue Card Base
Lawn Fawn Mermaid for You stamps, #LF1167
Lawn Fawn Mermaid for You dies, #LF1168
Pre-made Distress Oxides Ink Background {I always have a bunch of these around}
Various Hero Arts Inks
Watercolor Paper {I use this}
Ranger Archival Ink in Jet Black
Light Blue Card
Sakura Gelly Roll Silver Pen, Stardust
Scrap White Card

I had already made the background of the card; I find it very helpful to have a bunch of these backgrounds in various colors ready to make into a card at any time.  I find it very relaxing to play with the Distress Oxides.  I love the fact that you really can do no wrong with them.  If you don't like the way the colors blended or thought it would look different, you can always add more Oxides to the watercolor paper or use any number of shimmer sprays to liven it up.  I also keep all the scraps from my backgrounds {at least the ones that are 1/4" or bigger.}  You'd be surprised at how many uses come up between stamping a sentiment or weaving bits together.

Since my background was done, I moved on to the elements of the card.  I stamped, colored, and cut all the pieces, some on watercolor paper and some on plain scrap white.  For the images I stamped on the white scrap that didn't need to be colored, I used various Hero Arts inks.  The Oxide Ink background was
Another Look
glued onto a navy blue card, another scrap of white was glued inside so the giver would be able to write inside the card, and then all of the pieces were glued onto the front of the card.  I am by no means a talented color-er but looking back at my earlier creations, say last year and the year before, I'm happy to say I've gotten better, at least with water coloring.  I look at my cards from way back and I just cringe, but I try to look at how I've grown rather than focus on how bad I was.  I'm talking cards so bad they will never see the light of this blog.  I've also lost my irrational fear of alcohol ink markers which is handy since I am watching videos and reading tutorials on how to use them {one of my on going goals.}  How are you doing with your crafty goals?  Do you go back to your older cards and marvel at your progress?  You should!  Maybe I should make a page {or start a challenge!} for "The Cards We Made Way Back Then!"  Hope you enjoyed my post and I hope you come back and visit me soon!  Fondly, Christi


I am entering my card in the following challenges:
Simon Says Stamp Monday Challenge - Make a Scene 
Little Patch of Crafty Friends, #130 - Anything Goes
Three Muses - Something Fishy
Through the Purple Haze, #166 - Anything Goes
Cardz TV, #112 - Anything Goes
Alphabet Challenge Blog - A is for Anything Goes

Wednesday, February 27, 2019

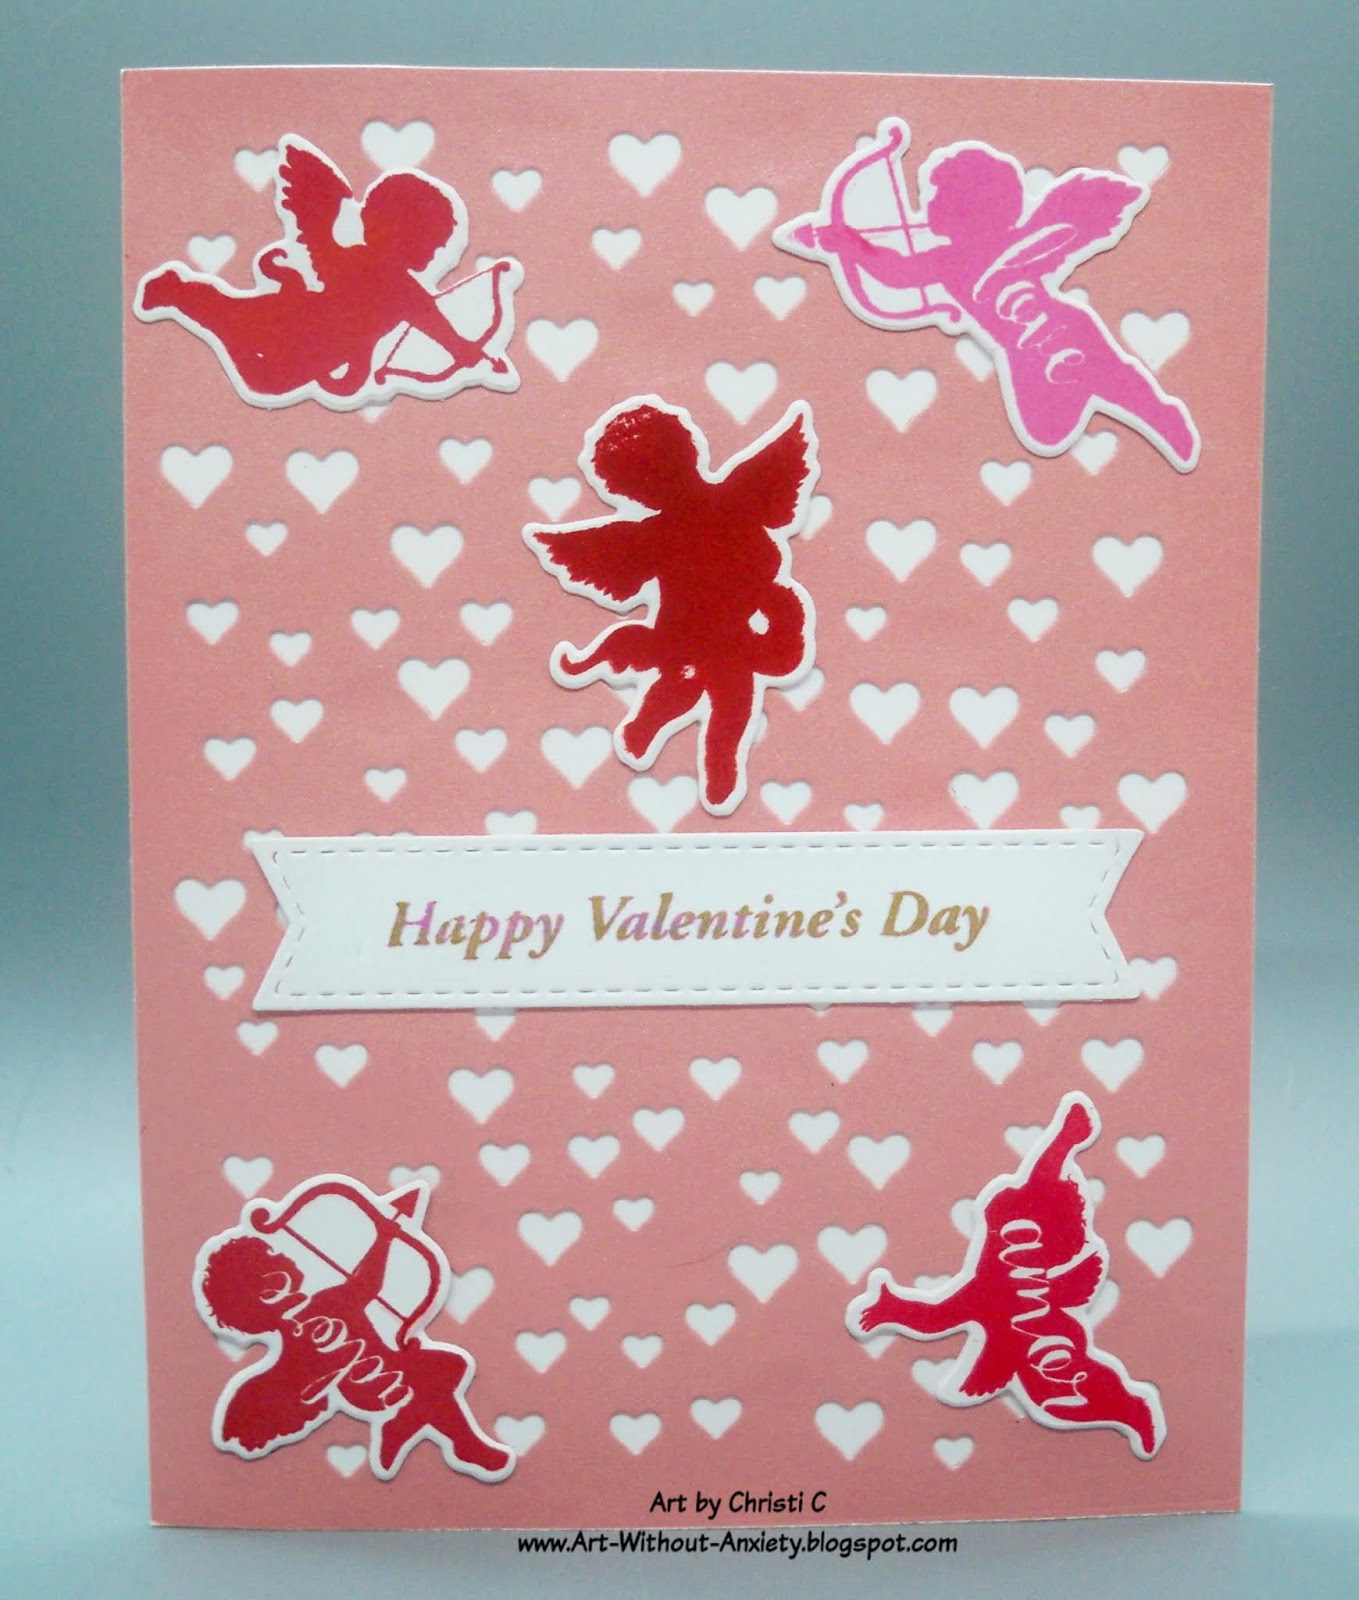
Some Cherub Love

Hi everyone!  While Valentine's day might be over, you can still enter your LOVE project over at Die Cut Divas!  I made my card full of Hero Arts goodness.  They are generously sponsoring the challenge this month and I'm hoping you can squeak into the challenge before it ends.  We'd LOVE to see your creations!


What I Used to Make my Card:
White Card Base
Pink Shimmer Paper
Hero Arts Heart Confetti Fancy Die, #DI348
Hero Arts Cherubs, stamps, #CM211
Hero Arts Cherubs, dies, #DI442
Die Namics Fishtail Sentiment Strips
Hero Arts Ink in Pink Tourmaline, Strawberry, Bubble Gum and Red Royal 
Colorbox Petal Ink - Alchemy {any shimmery gold will work}
White Card

I began this card by stamping a whole bunch of cherubs on some plain white card.  Them I cut them out and chose the best ones for the card.  I tend to be a hard stamper and sometimes the little details get lost when I'm using clear stamps {while Hero Arts uses photopolymer for their stamps, it honestly doesn't seem to matter what material is used to make the clear stamps; I just stamp too darn hard!} the words inside the cherubs kept getting smooshed away and I had to really be aware of the pressure I put on my stamp platform.  I have to get over that feeling that the harder I stamp the more ink will stick to the paper; it's simply not true!  It's a leftover issue from using the old wood mounted, red rubber stamps and only having one chance at making a good impression.   

Once I had all my angels cut, I stamped the sentiment.  I stamped it first in a very light pink and then over-stamped it with gold.  You can't really tell in the photo but in person it looks really cool, in my opinion.  I tried to capture the dual tone in a photo, but it didn't come across the way it looks in real life  I hope you had a fantastic Valentine's Day and I hope to see you soon! Fondly, Christi

I am entering my Cherub Love card in the following challenges:
A Blog Named Hero - M, Love is in the Air
Crafts Dreamy Mood Board Challenge - M, See Board Below
Creative Crafty Cottage - #115, M, Valentine
Simon Says Stamp Wednesday Challenge - Anything Goes
Little Red Wagon - #486, Love It!
Crafting by Designs - Silhouettes
Double D Challenges - Pink & White
Shopping our Stash - February 

Wednesday, January 30, 2019

Love has Four Paws

Good morning! I'm so glad you stopped by and I hope you like my most recent card for Die Cut Diva's.  This month's theme is Anything New and this image, provided by our sponsor, Bugaboo Digi Stamps is brand new; at least to me!  You still have a little time to enter this month and I hope to see you there!

What I Used to Make my Card:
White Card Base
Pink Card
Alcohol Ink Markers
Bugaboo Valentine Pup Set, #BUGVALPUPSET
Kat Scrappiness, Pet Sentiments dies
Darice Mini Hearts embossing folder, #1219223 {retired? Still available}
Tutti Scalloped Stitched Nesting Circles, #TUTTI-419
Altenew Enamel Dots, Red Cosmos, #ALT2591
Wink of Stella, Clear
Gelly Roll Gel Pen, Clear
Gelly Roll Gel Pen, White, #10 {I highly recommend the 3 pack}

I had printed this pup out on two different type of paper just to see if different
If you look close you can
see the sparkle on the
heart and a few around
the puppy.
paper printed better - I could see no difference.  I just grabbed the image closest to me and started to color away with my hodgepodge of alcohol ink markers; the reason I don't note the colors I've used is because I have such a mix of the markers half the time I'm not even sure which manufacturer I'm using!  The picture was colored and I added the white dots around the smaller heart {which is a different color than the large heart - I'm not sure if that is clear on your monitor}, some clear Wink of Stella around the large heart and I added some little sparkles around the dog with my clear gel pen.  


Once the image was colored I concentrated on the rest of the card.  I like the light pink background but it lacked something; the card needed more interest so I embossed the background paper with the mini hearts folder.  I trimmed that paper down and adhered it to my card base.  I then cut the dog out using the stitched scalloped circle die and cut the love out twice, using white and red card.  I inlaid the paw with the red pieces and glued that to the card.  Finally, just to add a bit more embellishing I finished off the card with three enamel dots on the lower right side; one of them blends in very well with
Another Look
the pink card so you might have to look for it.  


I am becoming more comfortable with using digital stamps and I still plan on learning how to use my alcohol markers properly.  I realized while coloring this image that alcohol ink markers use color to highlight and blend not a blender.  Might not sound like a breakthrough to you but I was happy; I felt as if I cracked one of the many secrets of using these markers.  I'd love to hear your secrets to using alcohol markers, please leave me a comment {complete with your info so I can return the blog love and visit you!} with your breakthroughs or tips and tricks, I could use all the help I can get!  As I said, there is still a bit of time to enter this Die Cut Diva's challenge, using the theme of Anything New,  but if you can't make this one there will be a brand new one tomorrow.  I hope to see you there! Fondly, Christi

I am a day late in adding my card to some challenges! I forgot I had this card scheduled :)
2 Crafty Critter Crazies - #23, M, Anything Goes w/ a Critter
Pearly Sparkles Challenge - #37, M, It's a LOVE thing
Dies R Us - #114, Use the Color Red
Color Crazy Challenge - Anything Colored Goes (week 4)
Creative Friday - #223, Love is in the Air
Cut it Up - #166, Hearts
Kat Scrappiness Challenge - Hearts

Thursday, January 24, 2019

Plane and Simple

I get a huge kick out of a good play on words {almost as much as a good snarky sentiment} and this card just makes me smile!  It's difficult for me to make a sweet card that isn't too feminine looking - with all that pink and hearts and stuff.  But this year I am determined to make a "manly" lovey card for Valentine's Day; I think I did a good job, what do you think?


What I Used to Make my Card:
White Card Base
DCWV Maps, Text and Ledgers 8" x 8" Stack, #CS-019-00018
Lawn Fawn Plane and Simple stamps, #LF1409
Lawn Fawn Plane and Simple dies, #LF1410
Lawn Fawn Candy Hearts, #LF1827
Tutti Designs Scalloped Stitched Nesting Circles, #TUTTI-419
Ranger Archival Ink in Jet Black
VersaMark Ink
Simon Says Stamp White Fine Detail Embossing Powder
Watercolor Paper {I use this}
Zig Clean Color Brush Markers
White & Red scrap card
Vellum

I started by making a collage with a bunch of the papers from DCWV.  I ripped up some of the maps and collaged them on scrap white paper.  Then I trimmed the panel down and attached it to a white card base.  I didn't want anything to be recognizable on the map and ripping up the papers and mixing them up worked beautifully to get the background I wanted.

Although this is an older stamp set, this is the first time I've used it.  What better occasion than Valentine's Day or even just an every day "I love you" card to break out a some new goodies?  I love the planes and the puffy clouds, especially the puffy heart exhaust.  I think this set is perfect for a masculine card as it gets the point across without being too frilly and girly; plus you can always raise the cuteness factor by giving your clouds one of those adorable smiley faces that are included in the set.  Once all the images were stamped, colored, and cut, I realized I
Another Peek
had a dilemma.  How to add all the elements without covering up the map? I suppose I could have made a larger card but I am so used to designing for an A2 {4 1/4" x 5 1/2"} size card that I honestly didn't even think of making a larger card until I was faced with the placement of the pieces.  After some thought, I chose to use vellum to act as a buffer between the map and the components of the card.   I just bought some new Tutti Designs dies {and I HAD to try them out!} so I used the scalloped circle die for the vellum.  I attached the vellum to the card, hiding the adhesive under the clouds, plane, and heart.  I embossed part of the sentiment with white embossing powder and added the heart with white scrap layered behind it to finish it off.


And there is my "manly" love card.  I am pleased with the design and I think the recipient is going to enjoy it as well.  What do you use to design a masculine card?  I'd love to hear your tips and tricks.  Just leave me a comment and be sure to leave your contact information so I can visit you back.  Thanks for stopping by and I hope to see you soon! Fondly, Christi

I am entering my Plane and Simple card in the following challenges:
Lawn Fawnatics - #45, Lots of Love {graphic below}
Unicorn Challenge -M, #39, Things with Wings
Cardz for Guyz - #211, Trains, Planes & Automobiles
Work it Wednesday - Something New {the stamp & dies are new to me}
Simon Says Stamp Wednesday Challenge - Have a Heart
Southern Girls Challenge - Love is in the Air 
Moving Along with the Times - Have a Heart
Dies R Us - Anything New {the stamp & dies are new to me}


Friday, January 18, 2019

Deer Love

This card was so easy to make; the perfect clean and simple card for Valentine's Day, or any occasion really.  A sweet card just to let the recipient know you are thinking of them.  I am planning on making a bunch more to have on hand for those times when someone needs a little pick me up or you just want to say hello.

What I Used to Make my Card:
White Card Base
Die-Namics Deer Love die set
Kraft, red and dark brown cardstock

The pieces were cut from coordinating cardstock and adhered to the card base.  You can't get much simpler than that!  I think variations of this card would be so cute for a wedding, any holiday, even a masculine birthday, if you only use one {or none} of the hearts.  I think these deer are just so charming and they make a marvelous clean and simple card.  I've actually had this set for a while but just now found time to use it; so for all the "new" challenges, this set is new to me and it is the first time I've used it.

Thank you so much for stopping by and I hope you are having a great day! Fondly, Christi

I am entering my Deer Love card in the following challenges:
The Cutie Pie Challenge - M, #131, Cute, Clean and Simple 

2 Crafty Critter Crazies - #22, Anything Goes w/ a Critter
Kraft Plus - M, Inspired by Indigenous Art {these look like cavemen drawings to me!}
CARDZ TV - #81, Anything Goes
Cuttlebug Mania - New! {new die set}
Dies R Us - #113, Anything New {new die set}
Moving Along with the Times - Have a Heart
City Crafter - #445, CAS 
Crazy for CAS - #13, Animal
Simon Says Stamp Wednesday Challenge - CAS
The Cat's Pajamas - M, #353, Love
Create a Smile - M, Use Kraft