Hey all, it's Christi here today with a romantic, any occasion card. Honestly, at my age most of my friends and family are already married, but I still get the desire to make some sweet romantic type cards. I've been obsessed with doilies and all things lacy lately and this is certainly reflected in my card.

What I Used to Make my Card:
White Card Base, 5 1/2" X 5 1/2", Handmade Gate Fold Style
Vanilla Card
Shimmery Textured Off White Card (this is SO old - I've had it for years!)
Gold Card, Heavy
Cheery Lynn Designs, Border Dies, Heart Chain Border, #B115
Creative Expressions by Sue Wilson, Jewelled Heart, #CED21005
White Pearls, 5 cm, by The Paper Studio, #549543

 As I said, I have had this card idea rolling around in my head for a while now. I splurged on a bunch of goodies from the Dies R Us store and the dies used here are part of that haul. I made my own gate fold card (for the very first time!) out of sturdy white card and then cut the main heart die out of vanilla card.
There are 7 dies in the Jewelled Heart set, so I used another of the dies to cut out a textured, shimmery, off white heart and placed that in the center heart of the main die cut. I then cut the love die out of subtle gold. I glued the sentiment onto the textured heart and set the main die cut aside.

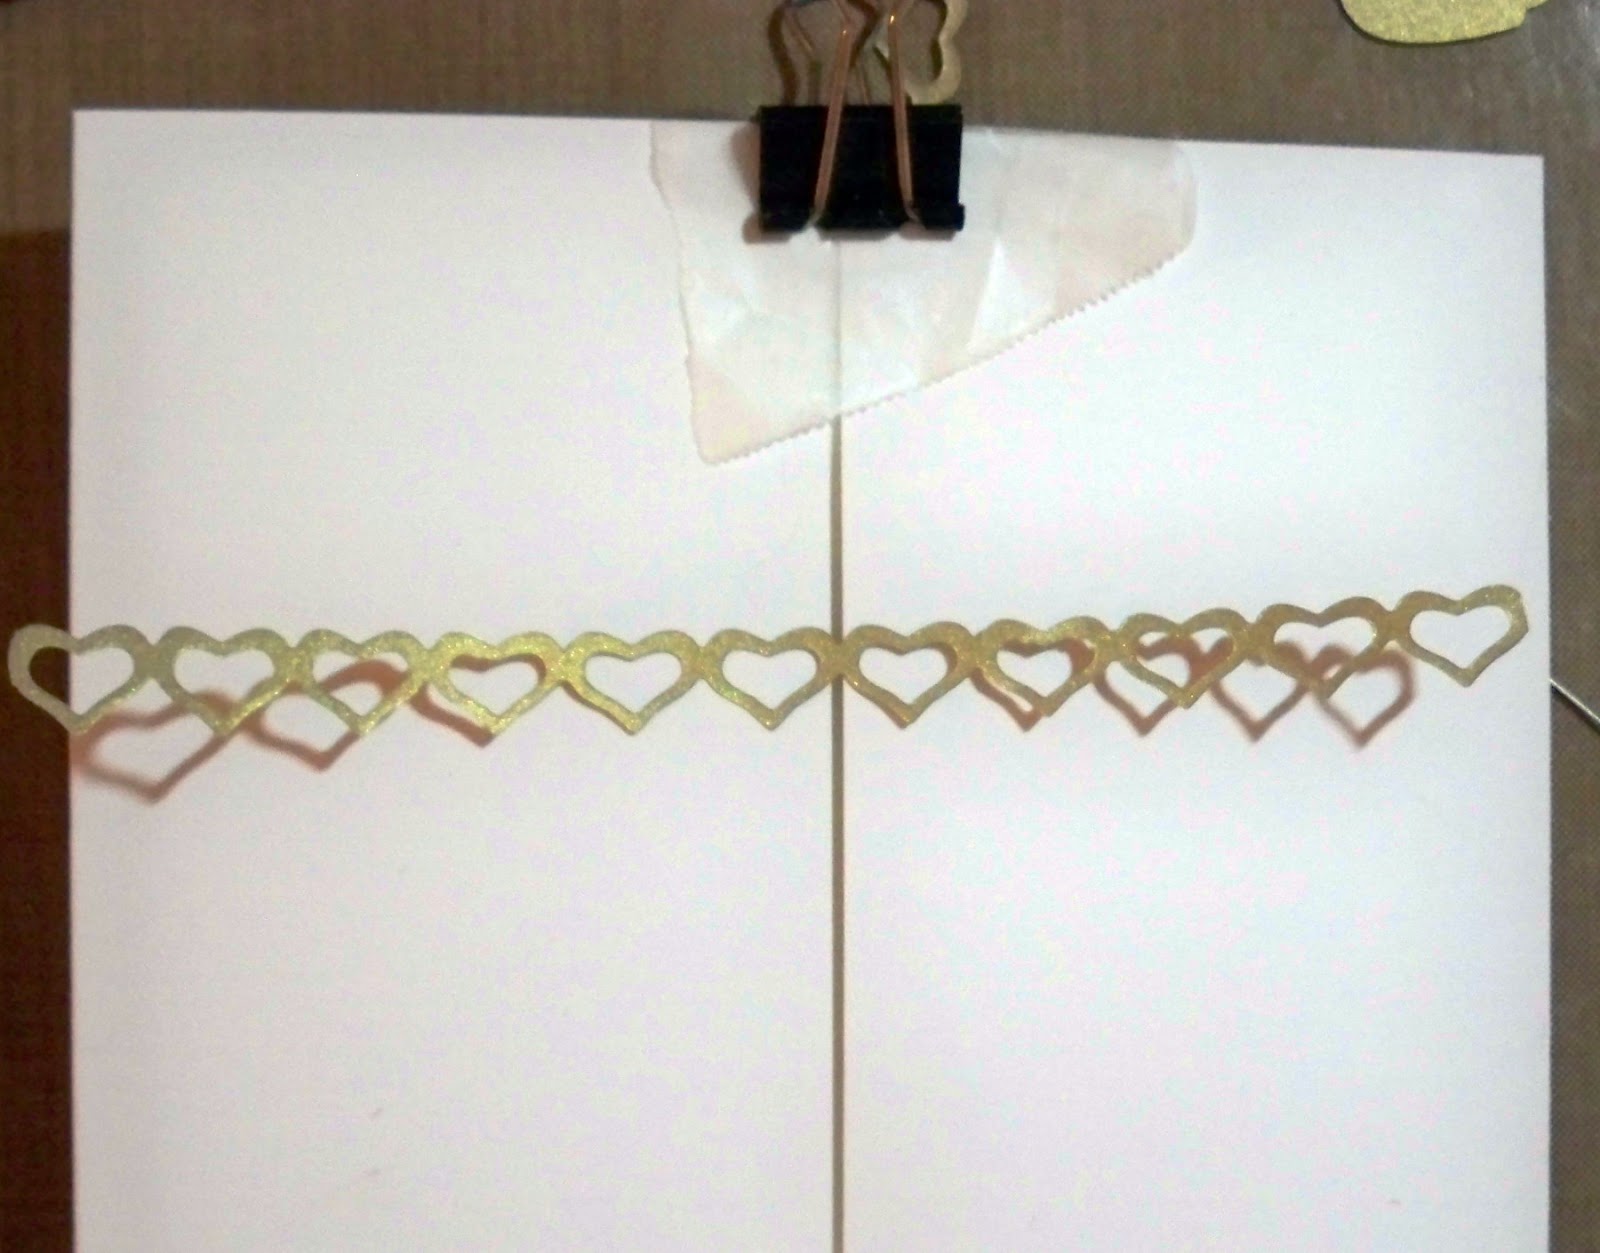
 I cut two of the heart chain border out of the same gold card and attached them to the sides of the card. Since the card was already folded, I came up with an idea on how to keep the "doors" closed and stable while I attached the chains. Using 2 small bulldog clips (with waxed paper between the clip and the card - I've ruined SO many cards by not taking that type of precaution!) I clipped the doors closed. That trick helped make attaching the heart chain super easy!
One of the things that drew me to this die was all the detail and little extras; I added some of my own little extras by attaching some white pearls strategically around the design (the little stitches just make this design look that much more special)!
Finally I attached the main heart die cut to just one side of the card; so the card opens up with a gate fold.
Thank you for taking the time to join me on this little journey! I hope that those who are in the hurricane zone are all safe & sound and that YOU have a great week! Christi

What I Used to Make my Card:
White Card Base, 5 1/2" X 5 1/2", Handmade Gate Fold Style
Vanilla Card
Shimmery Textured Off White Card (this is SO old - I've had it for years!)
Gold Card, Heavy
Cheery Lynn Designs, Border Dies, Heart Chain Border, #B115
Creative Expressions by Sue Wilson, Jewelled Heart, #CED21005
White Pearls, 5 cm, by The Paper Studio, #549543
 As I said, I have had this card idea rolling around in my head for a while now. I splurged on a bunch of goodies from the Dies R Us store and the dies used here are part of that haul. I made my own gate fold card (for the very first time!) out of sturdy white card and then cut the main heart die out of vanilla card.
There are 7 dies in the Jewelled Heart set, so I used another of the dies to cut out a textured, shimmery, off white heart and placed that in the center heart of the main die cut. I then cut the love die out of subtle gold. I glued the sentiment onto the textured heart and set the main die cut aside.

 I cut two of the heart chain border out of the same gold card and attached them to the sides of the card. Since the card was already folded, I came up with an idea on how to keep the "doors" closed and stable while I attached the chains. Using 2 small bulldog clips (with waxed paper between the clip and the card - I've ruined SO many cards by not taking that type of precaution!) I clipped the doors closed. That trick helped make attaching the heart chain super easy!
 One of the things that drew me to this die was all the detail and little extras; I added some of my own little extras by attaching some white pearls strategically around the design (the little stitches just make this design look that much more special)!
Finally I attached the main heart die cut to just one side of the card; so the card opens up with a gate fold.
 |
| Another Look |
Don't forget to play along at the Dies R Us Challenge Blog for your chance to win a gift voucher to the Dies R Us Store. A new challenge begins on the first and fifteenth of every month.

I am entering my Elegant Love card in the following challenges:
Southern Girls Challenges - #164, Retro Challenge
That's Crafty! - Cards Only
Scrappy Land - #72, Anything Goes
Die Cut Divas - Anything Goes, M
Happy Little Stampers Dies Challenge - Anything Goes, M
Through the Craft Room Door - Anything Goes


