Followers

Showing posts with label Stinkin' Inkers DT. Show all posts

Tuesday, December 4, 2018

Winter Wonderland ~ Thinking of You

Isn't this polar bear just adorable!?  I knew I had to have this stamp set as soon as I saw it - it's perfect for any occasion cards and what better occasion than thinking of you?  I made this card for my last design team project with Stinkin' Inkers.  I'm sad that I have to leave but I've gotten a new job and one of my design teams had to go, and since I've been with Stinkin' Inkers since the beginning, I decided that my post for the December challenge, Winter Wonderland, would be my last.  I want to thank Terri and all of my teamies for a wonderful experience and I will miss you all! 


What I Used to Make my Card:
White Glitter Card
White Scrap
My Favorite Things BB Polar Bear Pals stamp set
Sakura Gelly Roll Pens, Stardust set
Ranger Archival Ink in Jet Black

I have to give a shout out to Cut Card Stock.  They have some awesome $1.99 specials and beautiful card stock.  I even got a handwritten thank you note in my order!  I wasn't aware of the extensive collection of card stock, papers and other goodies that they carry so you might want to consider taking a look at them the next time you are in need of some card stock.  In any case, my order from Cut Card Stock helped this card come to fruition.  I had an idea how I wanted it to look and when I saw the Stardream Coral A2 cards in person, I instantly knew how I was going to make it happen!  I began by stamping the bear on white card, die cutting him {why a him? I don't know, looks like a him to me!} and coloring the scarf with gel pens.  Then I cut the hillside out of white glitter card, trimmed off the frame piece so all I had were the hills, cut the
Another Peek
snowfall backdrop, and attached all of that to the coral card base.  I added the snowfall backdrop first and then the hills over that.  The subtle pink of the coral is just a shade different than the white glitter card so the snowflakes stand out a little bit.  

Next I stamped the sentiment onto scrap white card and die cut that with a banner die, attached that to the top left of the card, and put the polar bear on one of the hills.  I wish you could see how sparkly this card is in person.  All the metallic and glitter papers really make the entire card pop!  Even the sparkle of the scarf adds to the Winter Wonderland theme.  I wanted to create a wonderful, wintry place for the polar bear to be sitting while he was thinking of you, and I think I did just that.  Blue and white is one of my very favorite color combinations; something about it just looks so crisp to me.  Now it's your turn to enter your Winter Wonderland cards in the December Stinkin' Inkers challenge; maybe my polar bear can visit your wonderland?  I do hope you will enter as we just love seeing all your creations!  Thank you to the Stinkin' Inkers team for a wonderful design team and to you for stopping by and visiting my blog.  Fondly, Christi

I am Entering my Thinking of You card in the following challenges:
TioT - Winter Wonderland
Muse Card Challenge - #293, Any Card Can be Linked
Simon Says Stamp Monday Challenge - "B" is for. . . BEAR
The Paper Girls - #165, Die Cuts
2 Crafty Critter Crazies - #21, Anything Goes with a Critter
Die Cut Divas - Winter Theme
CARDZ TV - #76, Anything Goes
Simon Says Stamp Wednesday Challenge - Anything Goes
Work It Wednesday - Ho Ho Holidays
Stamping Sensations - M, Winter Sparkle
Path of Positivity - #64, Anything Goes, OPTION: Silver, Gold, Metallics

Tuesday, November 6, 2018

The Main Reason Santa is SO Jolly

I love mixing snarky sayings with traditional holiday images {OK, I love using snarky sayings with everything!}, especially when they are unexpected.  I recently found out about a new stamp company and I just had to buy the set that had this image.  Santa is getting hip in his old age!  I made this card for the Stinkin' Inkers November Challenge, the theme is "Just Because" ~


What I Used to Make my Card:
White Card Base
Polka Dot Paper from my Stash
Craft Foam
Ranger Archival Ink in Jet Black
Happy Holla Days Stamps from The Ink Road
The Main Reason Santa is So Jolly Sentiment from Quietfire Designs
Stitched Nested Squares from Die-Versions, #DV-572 {appears to be discontinued, but any nested or stacked square dies would work}
Stitched Nested Rectangles from Tutti Designs, #TUTTI-217

I'm not sure where the idea for this card started.  I had pulled out my Christmas papers and spied this polka dot paper that has to be at least 10 years old.  I have no idea who made it, but I thought it would be great as a small frame since the pattern was so close together and, out of that, this card was
born.

I inked up the Santa image and stamped it on white card, cut the front of the frame from the polka dot paper, and cut a square from the craft foam I have lying about for when I make shaker cards {you can learn about what foam I use and my shaker card process here.}  I glued the polka dot frame onto the foam square, then attached the Santa to the front of the card {after I cut him out with one of the square dies} and finally glued the frame front over the image.

Lastly, I stamped the sentiment on a piece of white card, cut it out with a stitched rectangle die, and used dimensional dots to attach it to the front of the card.  
I debated about coloring in Santa's pipe, but I like the clean look of minimal color on this card.  The fact that the sentiment is so fancy looking, you expect it to say something delicate and then you read it - let me say everyone who has seen this card lets out a huge laugh.  Holidays are so stressful; I think everyone can use a good chuckle!

If you have a moment, we'd love to see your "Just Because" creations at Stinkin' Inkers! I hope you have enjoyed my little tutorial.  I appreciate your visit and here's hoping your holidays bring you lots of laughter. ~ Fondly, Christi

I am entering my The Main Reason Santa is SO Jolly card in the following challenges:
The Holly & Ivy Christmas Challenge - #40,  M, Anything Christmas Goes
Incy Wincy - Christmas
Less is More - #383, Dimension {graphic below}
The 12 Months of Christmas - #47, M,  Anything Christmas Goes
CAS Christmas - M, Santa {graphic below}
Stamping Sensations - M, Get Ready for Christmas
Simon Says Stamp Wednesday Challenge - Anything Goes
The Sisterhood of Crafters - M, Humor


Tuesday, October 2, 2018

The Eyes Have it. . .

This month's theme at Stinkin' Inkers is "The Eyes Have It," which opens up a whole bunch of interpretation!  I struggled with this theme for a bit; I looked through every single pad of paper I have, looked online for some sort of "eye" background paper {and of course, I found one in a paper pad but I cannot remember what pad or who made it!} and went to our fearless leader for some inspiration.  Then I remembered a stamp and die set that I just bought; it's not new, but it's new to me!  That set, coupled with some googly eyes, bore this card:

What I Used to Make my Card:
Purple Card Base

Authentique "Spirited" Paper Pad, 12" x 12", #SPI020 {retired but available}
My Favorite Things/Die-Namics BB Which Way is the Candy Stamps 
My Favorite Things/Die-Namics BB Which Way is the Candy Dies
Zig Clean Color Brush Markers
Watercolor Paper
Ranger Archival Ink in Jet Black
White Scrap Card
Cross Stitched Rectangle STAX by Tutti Designs, #TUTTI-410
Googly Eyes
White Gel Pen

I had already stamped a few images from the stamp set onto some watercolor paper and had colored them in with my Zig markers; one of the images happened to be the bat.  Bingo!  I quickly stamped, colored, and cut four more bats, added the googly eyes, and set them aside to dry.


Another Peek

Even though they are supposed to be black, I think the bats look more purple to me.  I know if I had colored them in solidly with any black marker I could have achieved a true bat black, but I wanted these guys to seem sweet, not scary.  I matched the bat color to the dotted designer paper and mounted that onto the purple card base.  I almost forgot - I used a white gel pen to color in the fangs of the bats.

Once the bats were dry, I stamped the sentiment on a scrap piece of white cardstock, cut it out with the cross stitched rectangle die, {truthfully I only used that die because none of my other shapes fit around the saying} and glued all the pieces together.  The longest part of making this card was waiting for everything to dry!

I think this can be a really fun theme so I hope you can get your eyes on something that will fit and join us at Stinkin' Inkers - you have all month to play and with Halloween right around the corner, I'm sure you have something {monsters, perhaps?} you can use.  Thanks for popping by and I hope to see you at the "The Eyes Have It" challenge. ~ Christi

I am entering my card in the following challenges:
Dragonfly Journeys - Happy Halloween!
Stamping Sensations - M, Something Beginning with B {Bats!}
Creative with Stamps - M, #31, Halloween or Leaves


Just For Fun - M, Halloween!
Papercraft Business Challenge - M, #11, Anything Goes, Twist of Halloween
Scrap from your Heart - M, #26, Use Dies
Always Fun Challenges - #78, Dies and Punches
Simon Says Stamp Wednesday Challenge - Anything Goes
Cards in Envy - M, Something Spooky!
Sweet Stampin' - Spots
YNS (Fun Friday) - #98, Fall Fun


Tuesday, September 4, 2018

Jump for Joy!

It's almost fall and I can definitely feel the difference in temperature {my favorite part} and the days are getting shorter {my least favorite part}.  Which leads me to this month's challenge at Stinkin' Inkers.   We are celebrating fall.  Our theme is "Falling Leaves" and I hope you can grab a few stamps, dies, alcohol inks, whatever, and join in the fun!


What I Used to Make my Card:
Vanilla Card Base
Brown, White, Yellow, Orange, Red and Green Cardstock
Lawn Fawn Leafy Tree Backdrop - Landscape #LF1237
Lawn Fawn Jump for Joy Stamp Set, #LF1212
Ranger Archival Ink in Jet Black

I have to be honest - I completely forgot about my Design Team duties for this challenge.  Completely.  I've been trying to complete some of my DT duties ahead of schedule and I think I thought I'd already made a project for this challenge.  Nope.  The good news is this card was SO easy to make I threw it together in record time!

I first cut the Backdrop out of white card, then cut the tree out of brown
The Bare Tree

 card.  I attached the tree to the die cut, then attached the panel to a vanilla card just so there would be a slight color difference between the panel and the actual card.

Tons of Leaves

Cutting out the leaves was super easy.  The Backdrop set has a row of leaves that cuts out 6 at a time.  In no time I had a pile of leaves ready to be attached to my tree.  I glued the leaves around the tree, purposely leaving a bit of the branches sticking out.  

The falling leaves are meant to look like they are swirling off the tree; I suppose I could have used a stamp to drive that point home - some sort of movement stamp - but I didn't think of it until I was writing this post.

Lastly, I stamped the sentiment onto the card with the help of my stamp platform.  I absolutely adore this thing and I'm so happy I made the switch from my old stamping tool.  

I hope you've had a relaxing long weekend.  I've been making Halloween cards and decor like crazy; that shouldn't come as a shock because you know Halloween is my favorite holiday and it is never too early to get your Halloween on!  I hope you get your fall stamps and colors out and join us at Stinkin' Inkers; you have NO excuse, the challenge runs the entire month. Thanks for stopping by!  Christi

PS: It's almost that time for the Cat Lovers 2018 Blog Hop - start getting your kitty makes together now so you'll be ready!


I am entering my card in the following challenges: {where did I find all these awesome challenges to enter?? At Challenges for Days!)
The Cat's Pajamas PaperArts - M, #350, Fall
Paper Smooches - M,  CAS
Scrap From Your Heart -M, Autumn Colors {see below}
Dream Valley Challenges - M, Autumn Colors
Lawn Fawnatics - 2W, #36, Mood Board {see below}
Alphabet Challenge Blog - L is for Leaves
a to z Scrapbooking - M, Clean & Simple {see below}


Monday, August 6, 2018

Steamed Heat at Stinkin' Inkers

Just in time for the hottest month of the year {it is here at least}, Stinkin' Inkers August theme is "Steamed Heat."  If there is one thing I can blog about endlessly is the summer heat!  We have broken many records this summer due to the high temperatures in the Denver area; thank goodness we have a swamp cooler to help keep things cool.  Now, I'd never even heard of such a thing when I first moved here, and I still can't really wrap my brain around how it works, but it does work and that's all that matters!  I made this card to help all of us experiencing steamed heat visualize being a little cooler!  I hope to see you this month at Stinkin' Inkers "Steamed Heat" August challenge!


I made my card using the Hero Art's My Monthly Hero kit for the month of
June.  The entire card is made using the items in the kit, except for the white card base.  I first used the mini ink-blending tool and Soft Sky ink to make the sky.  I then flipped the card over and used the Deep Ocean and Summer Sky inks to make the ocean.  The kit includes all the stamps you need to make the ocean seem full of waves and texture.  You just layer the stamps with ink colors going from light to dark and BAM! you have an 
ocean!  Once the sky and ocean were finished, I
embossed the beach by dabbing Versamark ink on the lower half of the card and embossed the beach
 directly onto the card with the Sand embossing powder. 
The embossing powder is SO pretty in real life - it has notes of various browns and sparkly copper in it.  Next, I stamped the Adirondack chairs on light brown card and embossed them with Simon Says Stamp white detail embossing powder and die cut them. I cut the clouds out of white, coated, shiny card {from my stash - I'm sure it's as old as the hills} and the cute starfish out of some pink scrap card.  I put a few white accents on the starfish so he wouldn't get lost in the scene, then stamped my sentiment and cut it out with Tutti Designs Cross Stitched Rectangles.  I attached the sentiment, then the chairs and the starfish, and then I used dimensional dots to adhere the clouds to the sky.  It looks like a beautiful day in my scene! Hopefully, your sky is as pretty as this one is.  

Thanks for stopping by and I hope to see your creations at Stinkin' Inkers August Challenge "Steamed Heat!" Fondly, Christi

I am entering my Beach Scene Card in the following challenges:
{Where do I find all these FABULOUS challenges?? At Challenges for Days - and easy to read blog that helps you easily find challenges to enter - check us out!}
Lost Coast Portal - #58, Anything Goes
Unicorn Challenge - #35, At The Beach
CardsInEnvy - Something New {First time I've used the MMH Kit}
Just Us Girls - #452, Word Week: Beach
a2z Scrapbooking - Anything Goes {August}
The Artistic Stamper - Anything Goes {August}
Emerald Creek - The Great Outdoors {August}
Papercraft Business Challenge - #9, Anything Goes, TWIST: Summer
Craft Rocket Challenge - #51, Anything Goes


Tuesday, July 3, 2018

Transportation at Stinkin' Inkers!

Hi everyone! Welcome to my July post for Stinkin' Inkers! The theme for this month is Transportation and I wanted to do something a little different than the standard planes, trains, and automobiles! So, how about a little intergalactic transportation? The little rocket actually moves! 


What I Used to Make my Card:
White Card Base
Black Card
Lawn Fawn Slide on Over Circles Dies, #LF1382
Watercolor Paper
Zig Clean Color Markers
Lawn Fawn Starry Skies Dies, #LF1377
Silver Glitter Card
Lawn Fawn Out of This World Stamp set, #LF1330
Lawn Fawn Out of This World Dies set, #LF1331
Ranger Archival Ink in Jet Black
Ranger Foam Tape, Black
Various Gel Pens
Penny {for the rocket}

As this is my second (check out the first one here) interactive card, at least I had an idea what to expect.  There are still things I need to work on, like my tape placement but it is getting easier and I didn't have the "first time" jitters; just the second time ones; ok, I'm kidding!

I started this card by stamping and coloring all the elements I needed and, once they were dry, I cut them all out.  It's easier for me to figure out the layout of the card when I have everything I'm going to use ready to go, especially with this type of card, since I've never made one before!  I also enhanced a few of the planets with various gel pens to add some sparkle.  The flame of the rocket is cut out of washi tape, but I would recommend using glitter card instead.  I didn't even think about the sticky washi tape and how that might make it harder for the little rocket to spin; but by the time I realized it, it was too late.  I also should have cut the flame out of plain old red glitter card; at the very least used the stamp that is supplied with the kit to make it.  Good thing the fussy cutting was rather free form so it wasn't too hard.  And I powdered the heck out of the sticky side of the tape so the flame didn't stick anywhere else.  

Instead of making a galaxy background, I decided to just use plain black card.  I cut out the track and then put the black outer piece {the one with the cut}, popped up with foam tape (doubled up foam tape - you need to give the slider element room to actually slide) and attached it to another piece of black card.  It's like making a card topper that is self contained.  Once the entire section is done, all the parts are attached and whatnot; then you attach it to your card base.

I prepped myself by re-watching the fabulous Lawn Fawn video on making slider cards and then got to work.  I happened to have some black foam tape that I bought ages ago and I like that the tape is almost invisible.  I'm not going to go into detail on how I made the card because the video really does it much better
Another Peek
than I could so, if you are interested in how to make a slider card, I highly recommend checking it out.  There are also a gazillion more videos on YouTube that explain the process.


A surprising element for me was the penny.  I never knew what people used when making a slider card to actually make the slider slide. I attached a piece of black card to the penny, then a doubled up piece of foam tape, and finished it off with the rocket.  

Once the piece was done, I decided the card needed some bling.  I used the Starry Skies die to cut out some silver glitter card and added some little twinkly stars to the card.  Now it was done!  I'm happy to say it worked, mostly.  I had to force the rocket around some of the circle, but once I made it go, it was fine.  It doesn't slide as easily as Kelly's does in the video.  I actually broke down and purchased an EK Success Powder Tool; it comes filled with a fragrant powder but once that powder is gone, I can refill it with regular baby powder.  It made a HUGE difference in regard to leaving powder residue on the black card.  I've always used a "pounce pad" for my embossing and have struggled with it dulling darker cardstock.  This didn't leave a SPECK of residue!  If you emboss a lot, I highly recommend it!  Just do a Google search for it and there are TONS of places to buy one and even a bunch of YouTube videos to explain the tool.  But I'm happy with it.  I've given the card to the Man and he likes it; all is well in the world!

I hope you enjoyed my write up and I'd love to know if you've made one of these cards yet - how did it work out for you? Thanks for visiting and I hope to see your transportation creations at Stinkin' Inkers - you have the entire month of July to join in, so I hope to see you there!  Christi

PS: Please keep your pets inside beginning at dusk if you live in the USA - fireworks can traumatize ANY animal to the point of death and this day of the year has the most animal runaways!! 

I am entering my "Space" card in the following challenges:
Alphabet Challenges - G is for the Great Outdoors
Patties Creations - #147, Anything that Flies {like my little rocket}
The Sisterhood of Crafters - Anything that goes/you see in the Sky
Tuesday Throwdown - The Great Outdoors
The House that Stamps Built - #DCC74, The Great Outdoors
Creative Friday - #208,  At Night, While Everyone is Sleeping

Tuesday, April 3, 2018

April is Simply Made at Stinkin' Inkers

When I found out that the April Stinkin' Inkers challenge was Simply Made {a one layer card}, I knew it was really going to be a challenge for me.  I never make one layer cards, ever.  So, I went to Pinterest and found this amazing card by Wanda Guess.  I literally bought my Prismacolor pencils because of her beautiful coloring. I want to be able to color like that!  I recently was gifted the Altenew "Adore You" set, so, I CASED Wanda's card.  I practiced a few cards on Kraft cardstock, but I couldn't get the vibrancy that Wanda achieved.  So I switched to a Bristol vellum cardstock; a smooth, white card.  Now, I researched this a bit because I couldn't wrap my head around the vellum part - all the vellum I knew was the regular, no good way to attach to your card, see through vellum.  Well, I learned that apparently vellum is a very smooth texture as well as a paper.  After all of the trials, I produced this card:


What I Used to Make my Card:
Strathmore Bristol Card Base

Altenew Adore You Stamp set
Prismacolor Pencils
Ranger Archival Ink in Jet Black
MISTI

I first made masks of all the flowers and leaves from the set that I wanted to use.  I just used plain old sticky notes, like we used to before there was all these fancy masking products.  I cut the masks out using the matching Adore You dies and set about placing the images.
Another Look

Once I was done stamping the flowers and leaves in Jet Black ink, I just colored.  I didn't use any blender except the colored pencils.  Once the coloring was done, I finished the card by stamping the sentiment.  That's it.  A simple, uncomplicated card.  Honestly, I wasn't expecting much from the colored pencils; I'd had a cheaper set I bought years ago and didn't have any luck coloring, or blending, with them.  This is a clear case of you get what you pay for.  I'm very pleased with this card and you will be seeing more Prismacolor coloring from me in the future.

Now, do you make one layer cards? Regardless if you an old pro or, like me, new to the one layer card, now is the time to enter them into the Stinkin' Inkers April challenge - who knows, maybe you'll be one of the winners!  Thanks so much for the visit, I really appreciate it ~ Christi

I am entering my Simply Made card in the Following Challenges:
Calling All Sistahs - #11, M, CAS Challenge using Photo {I used flowers}
DL Arts Thankful Thursday Challenge - #225, Thank you or Flowers
Altenew Challenge - Best Altenew Project {my first one actually!}
Emerald Creek Dares - Spring has Sprung!? 
Creative with Stamps - #25, M, CAS w/ a Sentiment
The Sisterhood of Crafters - Spring Flowers
Incy Wincy - Nature and all of it's Beauty

Thursday, March 1, 2018

Stinkin' Inkers Wishy Washi Challenge

** Yes, this posted early.  Yes, it is my mistake.  Yes, I'm sorry.  Please do join the challenge, due to begin Tuesday, March 7.  Meanwhile, Love is in the Air is still going until March 6!

Hello everyone! Let me just say I am not a washi tape person.  I didn't go crazy {unbelievable, but true!} and buy tons of tape when it first came out.  In fact, for the longest time all I had was the first batch made by Tim Holtz.  But, the more I saw the creative ways people used washi tape, the more that helped me slowly collect more.  I still don't have very many {not compared to some of you!} but I did score these beautiful glitter washi tapes at my Dollar Tree.  And then I saw the sequins that matched and had to buy those, too!  Out of those two supplies was born my "Wishy Washi" card for the March Challenge at Stinkin' Inkers


What I Used to Make my Card:
White Card Base
Scrap Paper
Washi Tape, Glitter Purple & Pink
Spellbinders Nestabilities, Curved Rectangles, #S5-006
Distress Ink in Wilted Violet
Sentiment by Riley & Co., Funny Bones, Supermodel, #RWD-399
Sequins
6mm White Craft Foam {Michael's}
Acetate
MISTI
Copic Markers that Match the Frame

Before I get into the card, I need to share this ENABLER alert! The dies I used to make this card are on sale at Spellbinders for $6.99! Regular price is $19.99, so that is a SUPER deal, even if it is getting discontinued!

First, I used a piece of scrap cardstock to layer the washi tape, alternating
the two colors.  The only issue with Dollar Tree glitter washi tape is that the
glitter isn't that great at staying on the tape.  I got glitter everywhere; and I am still finding glitter in places it has no business being.  However, the loss of glitter didn't effect the tape at all, so I guess that makes up for it. I looked on the Dollar Tree website and couldn't find any glitter washi but it's readily available elsewhere or you may be lucky and find some at your local Dollar Tree store.


I thought I'd show you how I make sure the frame of my shaker card matches up with the acetate.  Now, you don't have to be exact; I could have cut out a plain rectangle for the shaker window but I think it adds to the construction of the card if everything is as close to the same shape as can be.  What I did was use removable tape to hold the dies together so when I cut the frame and then the foam the dies stayed in the same place for both.  You can't really see the removable tape but I use it SO much I have a dispenser on the same table as my Big Shot.  It's cheap and I typically don't have an issue with it sticking when it isn't wanted.  I used the dies three times {the frame, the foam, and the acetate} and the removable tape worked wonderfully.  I know some crafters use washi tape to hold their dies in place; I tried that but promptly lost misplaced the roll I'd designated for that purpose in the mess on my die cutting table. Like I said, I have a dispenser - one of the old, heavy ones that teachers used to use in the classroom, and that's fairly hard to lose.


Once all my pieces were cut, I stamped the sentiment on the white card base, using my MISTI and the dies to ensure I placed it correctly.  I adore the whole Funny Bones line of Riley & Co.; they are just as snarky as I am!  Besides, who doesn't love a good giggle?  Before I assembled the card, I colored the edges of the craft foam cut out so the edges wouldn't stick out like a sore thumb.  I used Copic markers, but any alcohol ink marker will work {note: if you decide to do this step, make sure you are wearing latex gloves.  The alcohol ink takes a bit to dry on the foam and you don't want to end up with pastel finger tips like I did.} 
Another Look
As you can tell if you are a follower of mine, I love making shaker cards, and this one was a blast to make.  I hope you enjoyed my little tutorial and you should be breaking out your washi tape RIGHT NOW so you can join us at Stinkin' Inkers! Fondly, Christi

I am entering my Shaker Card in the following challenges:
Frilly & Funkie - Get in on the Action

Scrapy Land - Anything Goes
Craftaholics R Us - #9, Sequins
Simon Says Stamp Wednesday Challenge - Anything Goes (#2)
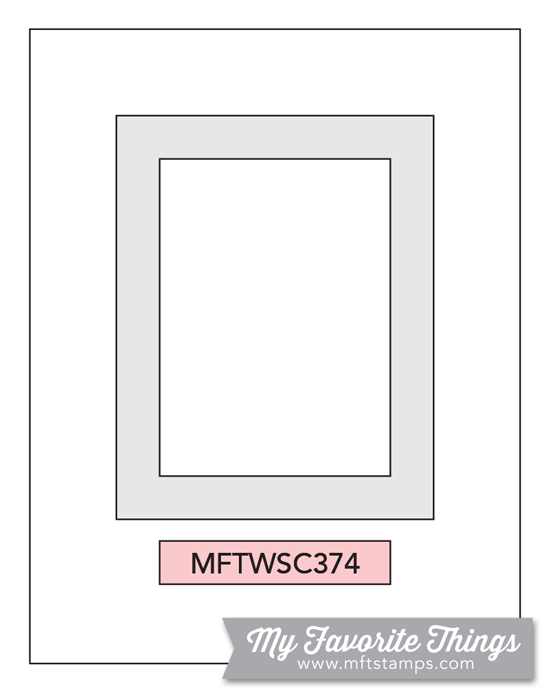
My Favorite Stamps - #374, Sketch Challenge
Die Cut Divas - M,  Monochrome
Stamps & Fun - Glitter
Time Out Challenges - Be Bold!
4 Crafty Chicks - #392, Anything Goes TWIST: Add a Sentiment

Tuesday, February 6, 2018

Bird Crazy Lovers

I'm still crazy about Tim Holtz' "Crazy Birds."  I've been wanting to break them out again and I think Valentine's Day is a perfect time to play with them, especially when there is a fabulous challenge to enter!  The theme for February at Stinkin' Inkers is "Love is in the Air" and your creation can be for Valentine's Day, an anniversary, or even a wedding; anything to do with L-O-V-E.  So, while love is flying all over the place, I present my Bird Crazy Lovers:

What I Used to Make my Card:
White Card Base
Versafine Onyx Black Ink
Watercolor Paper
Tim Holtz/Stampers Anonymous Bird Crazy Stamps, #CMS212
Tim Holtz/Sizzix Bird Crazy Dies, #660954
Tim Holtz/Stampers Anonymous Crazy Things Stamps, #CMS237
Tim Holtz/Sizzix Crazy Things Dies, #660953
Clean Color Zig Markers
Derwent Water Color Pencils
Hero Arts MMH January 2017 You Are Loved Sentiment
Heart Googly Eyes {Dollar Tree}
MISTI
Dimensional Dots

Playing with these stamps feels like I'm home.  I love all the crazy animals Tim's designed and I always have a stash colored and cut, ready to use when the mood strikes me.  However, for this card, I made these characters just for this card.  I didn't want the birds to be too red or pink; in other words, I wanted the card and embellishments to say Valentine's Day - not the color of the birds. 
Mr. Bird
Also, it was important that the birds were looking at each other; and I wanted to color.  Before I get into the making of the card, 
I just have to detour for a quick second.  I was rummaging through my stamp pads and found my Versafine Black Onyx pad; I must have had this pad for at least 15 years {and five of those years were in storage} and I figured this pad would need to be re-inked, but I'd recently seen a card on Pinterest that used this ink and wanted to try it again.  To my surprise, there was NO re-inking needed!  This pad was so juicy and vibrant that I only needed to stamp with my MISTI one time! Only once! I am hooked on this pad again.  It's been taken out of the drawer and is living on my desk.  Simply amazing since every other black ink I've used on watercolor paper has taken at least two re-inkings to get a good image -
Ms. Bird
these images were clearer and crisper than I've ever gotten on watercolor paper.  So, yes, I've gotten my images happily stamped and I colored them in with my Derwent Watercolor pencils first, and then added some more color using the Clean Color Markers.  I like using more than one medium to color; it gives me the richness I want and it's fun.

Angry Ms. Bird

I cut all my images and accessories, including an extra wing for our fancy guy, and assembled my birds.  I put a bow on her head and he's dapper with his hat and bow tie.  In his wing he is carrying a box of chocolate-covered birdseed to give to his honey.  As you can see, they both have love in their eyes; and, since they are birds, I expect they will get some "Love in the Air" as well <wink>.
A calmer Ms. Bird
One thing you need to be aware of when using shaped googly eyes is how the eyes are pointed.  See how she looks awfully angry in the above picture! Just a little thing to be aware of!  Thank you so much for stopping by and I hope you enjoyed my little tutorial.  You have an entire month to enter your Love is in the Air creation at Stinkin' Inkers; I hope to see you there! Christi


PS: As the requirement for Retro Rubber is to state how long I've had these stamps I'm going to say at least since April of 2015.

I'm entering my Bird Crazy Lovers in the following challenges:
a2z Scrapbooking - M, It's a Love Thing
Die Cut Divas - M, Love is in the Air, entry #2
2 Crafty Critter Crazies - M, #11, Anything Goes w/ a Critter {or 2}
Simon Says Stamp Monday Challenge - Love is in the Air
Retro Rubber - M, #79, Inspired by Love
The Paper Players - #379, Will You be my Valentine?
Just Us Girls - #426, Love
Simon Says Stamp Wednesday Challenge - Anything Goes