Followers

Showing posts with label Embossing Enamel. Show all posts

Saturday, October 22, 2016

Always Use Rubber ~ Winter and/or Spring Challenge (#2)


Thank you so much for popping by my blog.  This post is for Challenge #2 at Always Use Rubber, a new challenge blog run by the same three gals as Twofers was.  The fabulous Alleystamp are staying with us as Sponsor but we have changed things a little there will be a top 3 for each challenge and one monthly winner chosen by the team from the months top picks.  Thank you Alleystamp we are delighted that you chose to continue to support us.


So, winter is just beginning here in Colorado, we actually have had some days still make it into the high 80's, even broke a few records, but, you can smell the winter coming in the air, the leaves falling off the trees and of course the temperature dipping down to 35 degrees at night!! Brrrrrrr - good thing I have the Fabulous Feline Four to keep me warm ~


While making this card I wanted to convey a sense of chill in the air, and the way the sky looks just before it does snow.  I hope you like it!


What I Used to Make my Card:

White Card Base
Light Blue Paper
Navy Blue Sparkly Paper
Embossing Fluid
Small snowflake punch
Pop Dots


Can I just say that the Snowflake Flourish is a STUNNING stamp in person - I was lucky enough to snag one at a show I recently went to, the vendor had bought too many and was selling them at a fabulous price. Lucky me!  And, I have to shout out to Quietfire Designs - I must use this "Warm Winter Wishes" stamp at least 50 times during the holiday season.  Honestly, I don't know the faith of a lot of people I like to send cards to and this sentiment takes all the guesswork out of holiday cards.  Love it! OK, on to how I made the card.

I stamped the Snowflake Flourish with embossing fluid and embossed with white embossing powder on light blue paper - I used fine because there are some very delicate wisps and snowflakes on the stamp.  I then did the same with the sentiment.  After I was done I felt a little pop was needed, so I searched my stash for some metallic, sparkly navy blue paper and found just the right shade! I punched a teeny snowflake out of the navy paper and then framed the sentiment with the same paper.  I pop dotted the sentiment up just a wee bit and I was done.  Funny how the details can really make a card sing.  Thanks ~ Christi

I hope to see your creation linked up to our challenge - we have an amazing team behind this challenge, and, frankly, you aren't going to get rid of us, so you might as well break out some rubber stamps and join!

I would like to enter my winter/holiday card in the following challenges:
Sweet Stampin' Christmas (M) Glitter & Sparkle
A Snowflake's Promise #31, Anything Goes
Holly Jolly Christmas Challenge - Use Snow or Snowman
Addicted to Stamps - #133, Embossing (wet or dry)

Saturday, August 15, 2015

Weddings at TWOFERS!!

For challenge #2 at Twofers, Jane has chosen the theme of WEDDINGS.  Now, at my age, most people are done getting married so I honestly don't have much occasion for wedding cards.  I made these sort of generic, so I could use them for other possibilities.

As I did with the first challenge I am going to name the two cards to make it easier to tell which card I am talking about.  Introducing my Roses and Best Wishes cards:

ROSES
What I Used to Make my Card:
Pastel Pink Card Base from Core'dinations 
Memory Box Pennington Rose Die #99143
KaiserCraft 6x6 All that Glitters Paper Pad
ColorBox Petal Point Ink Pad Enchantment
Clear Embossing Ink
Globecraft & Piccolo Embossing Enamel in Cranberry Wine
Wink of Stella Clear
Stampin' Up A Greeting for All Seasons set #100999 (discontinued)
Pre-Made White Bow 
Scrap White Card for Congratulations
If you enlarge this picture you can see the sparkle on the roses

The Roses
I actually conceived this card when I was looking at the KasierCraft paper pad. Now, those of you who know me know I am not fond of the color pink AT ALL and the fact that I made a card with lots of pink is absolutely amazing.  But these papers spoke to me, so I used them.  I first located a pink ombre paper and die cut all the roses - the die cut is just the outline of the flower.  I then used paper that had nothing on it but roses and die cut the bottom piece of the die.  Then I attached all the bottom roses to the outline roses.  I noticed I got some glue outside the lines, so I colored all the insides of all the roses with a Wink of Stella in clear.  After gluing all the flowers to the card, I embossed the greeting with Cranberry Ice Embossing Enamel, trimmed it, and attached it to the card.  

I would like to enter my ROSES card in the following challenges:
Through the Craft Room Door (Aug 11-17) - Anything Goes
In the Pink - Anything Goes. . .with Pink
Wednesday's Creative Inspirations - (ends August 25) Flowers! 
Creative Card Crew - Sparkle!
Paper Creator's Crafts - (August) Dies and/or Punches

BEST WISHES
What I Used to Make my Card:
Vanilla Card Base
Printed Designer Paper Gold Leaves (have NO idea where this came from)
Gold Paper
Best Wishes from SU! Sincere Salutations Set (discontinued but plenty to be had)
Embossing Powder in Gold
Clear Embossing Fluid
Spellbinders Nestabilities Labels 14, #S4-290 (not sure if this is discontinued, but there are lots available)
Memory Box Dianna Border, #1029
Scrap Vanilla Card for die cut & sentiment

First I stamped the Best Wishes on vanilla card and embossed it with gold embossing. Once that was cool, I die cut the sentiment, the designer paper with the gold leaves and the Dianna border.  Then all I did was attached the gold paper (after I trimmed it) to the card base and layered everything else on the card.  Super easy, but I think it looks a bit elegant.  

I would like to enter my BEST WISHES card in the following challenges:
Use Your Stuff - (runs until Sept 7) Anything Goes
Everybody Art Challenge - Emboss
Sweet Stamps - Anything Goes
The Artistic Stamper - (August Challenge) Anything Goes
Creative Ladybug Creations - (August Challenge) Anything Goes

Another look
I do hope you will pop by the Twofers blog and consider making and entering   your own wedding projects ~ just remember, you need to show us TWO pieces of art. While you are there please take a peek at what my wonderful teamies Jane & Zoe made for this challenge.  Also, I would appreciate it if you'd following me, I am trying to get 100 new subscribers in 2015 and I am really close!  Thanks SO much ~ Christi

Tuesday, December 23, 2014

Gltzy Gold Merry Christmas Card

My name is Christi and I am a paper hoarder.  I love beautiful papers.  I have some papers that are so lovely, I can't cut them - but, I have made a pledge to start to use some of my more beautiful papers, so this card was born.  The paper I used is Italian, I think it is supposed to be used used as gift wrap.  I can't recall where I purchased it from (it's at least 12 years old) but the detail is amazing! I tried to capture the richness of the paper the best I could.  I hope you get inspired to dig out some of your favorite papers & play a bit!  


What I Used to Make my Card:
Italian Paper
Vanilla Base Card
Ornamental Script Stamp from Penny Black, 3995F
Piece of Vellum
Piece of Mirror Gold Paper
Embossing Fluid
Vintage Gold Embossing Enamel from Globecraft & Piccolo
Krylon Gold Leafing Pen
2 Gold Brads
Sparkle Gold Tape from the Dollar Tree

You really need to click this!

While there are a lot of ingredients, this card was easy to make. First thing I did was match the gold in the Italian paper since that was my focal point.  I had also found this scrap of mirror gold cardstock (it was ALL the rage years ago) so I tossed that into the mix. The mirror gold caught the gold in the paper.    I took the vanilla base and outlined it with the Krylon Gold Leafing Pen and set it aside.  I then took the piece of vellum and stamped the Ornamental Script stamp on it in embossing fluid and embossed the saying in Vintage Gold Embossing Enamel. 
The embossed sentiment, attached to mirror gold card
I trimmed the sentiment to sit on the mirror gold cardstock and I used 2 gold brads to hold it in place.  Nice, but it needed a bit more pizazz.  So I used a piece of the Sparkle Gold tape at the very top.  Easy!!

Another view - complete with cat hair!
I have a few more cards to share with you so I'll be back soon.  I also want to wish you and yours a FANTASTIC Holiday Season! Thank you for taking the time out of your schedule to pop by and read my blog - without all of your comments & encouragement this blog wouldn't exist! Blessings ~ Christi

I would like to enter my card in the following challenges:
Simon Says Stamp - Wednesday Challenge - Winter Inspiration 
Crafty Card Maker - #129, Christmas
Cute Card Thursday - #352, Add Some Sparkle
Red Rubber Inspirational - #151, Christmas Cheer
Creative Inspirations - #294, Christmas/New Year
Penny Black & More - December Challenge, Special Occasions

Monday, September 1, 2014

Something Old and Something New at Craft-Room Challenges


For this fortnight’s challenge at Craft-Room Challenges, Annie has chosen the theme of “something old and something new”.  Well, I had just gotten some stamps and I actually made another card for this challenge, but, I didn’t like it.  So, I made another one – my something old is the Dresden frame (which I have had for over 10 years) and my something new is the card? Or, the DCWV paper stack which I never used before (ok, not exactly new, but. . .)? Take your pick.

The days are getting cooler and shorter and that means my very favorite holiday is right around the corner ~ Halloween!!
 What I used to make my card:
A2 White Card Base
Skull Cut File & Silhouette Cameo
Dresden Frame
DCWV "The Halloween Stack"
Ranger Archival Ink in Jet Black
Stampers Anonymous Tim Holtz Simple Sayings set, CMS155
Crafters Pick The Ultimate Glue 

I don’t have a lot of pictures for this one as it’s pretty self-explanatory – I began with an A2 white card base and went from there.  I measured the inside of my Dresden frame and started up my Silhouette Cameo. I found a skull cut file & sized it so I could fit it in my frame and cut it out of plain white cardstock.  The orange and purple papers are from the DCWV The Halloween Stack – the orange paper has a bit of texture to it, with some very fine dots and the purple is slightly metallic.  This is the first time I have used this stack and I know you’ll be seeing much more from it – it has sparkle paper in white! I can see the Holiday cards already!

I cut the orange paper to fit inside the frame and the purple paper ¼” smaller than the card base.  Then I stamped the Happy Halloween sentiment from the Simple Sayings set and trimmed that down.  My skull looked really plain so I jazzed it up with the Silver Siam embossing powder and I think it makes that skull much spookier.
Another View
That’s really about it.  The card is simple but very effective.  I hope you are enjoying the long holiday weekend we are having in the US and that you find some time to “labor” in your craft room - and, don't forget, you have 2 entire weeks to enter the newest challenge at Craft-Room Challenges!!  ~ Christi
PS: Anything But a Card is having a Design Team Call - it's SO much fun and you'd be working with an awesome team!  

I would like to enter my Something Old & Something New Halloween Card in the following challenges:
Crafting from The Heart - #34, Anything Goes
Sparkle N Sprinkle Creative Challenge Blog - September Challenge, Anything Goes
Crafts Galore Encore Challenge Blog - #9, September Challenge, Make a Card
One Crazy Stamper - September Challenge, Halloween or Christmas
Sister Act Card Challenge - #72, Anything Goes
DRS Designs - It Gives me the Creeps!
Simon Says Stamp Wednesday Challenge - Anything Goes

Friday, June 27, 2014

Mom's Birthday Card


I made this card for my Mom’s birthday – she turned 81 yesterday.  My Mom is sight impaired due to untreated glaucoma and I am always looking for ways she can use her other senses when I make her something. So, this card has a bunch of things she can feel as well as see.  Sadly, this also my last post with the Design Team for Globecraft & Piccolo.  I have had a marvelous time and I wish them continued success!  Thanks to my awesome teammates and to Stacey & Sandy for making the experience so incredibly fun!


What I Used to Make this Card:

DCWV Chalk Art Stack – card base 5 ¼ x 5 ¼
Silhouette Cameo letter cutouts
Ranger Embossing Powder in Rich Red
White Cardstock
 
Mom loves roses 


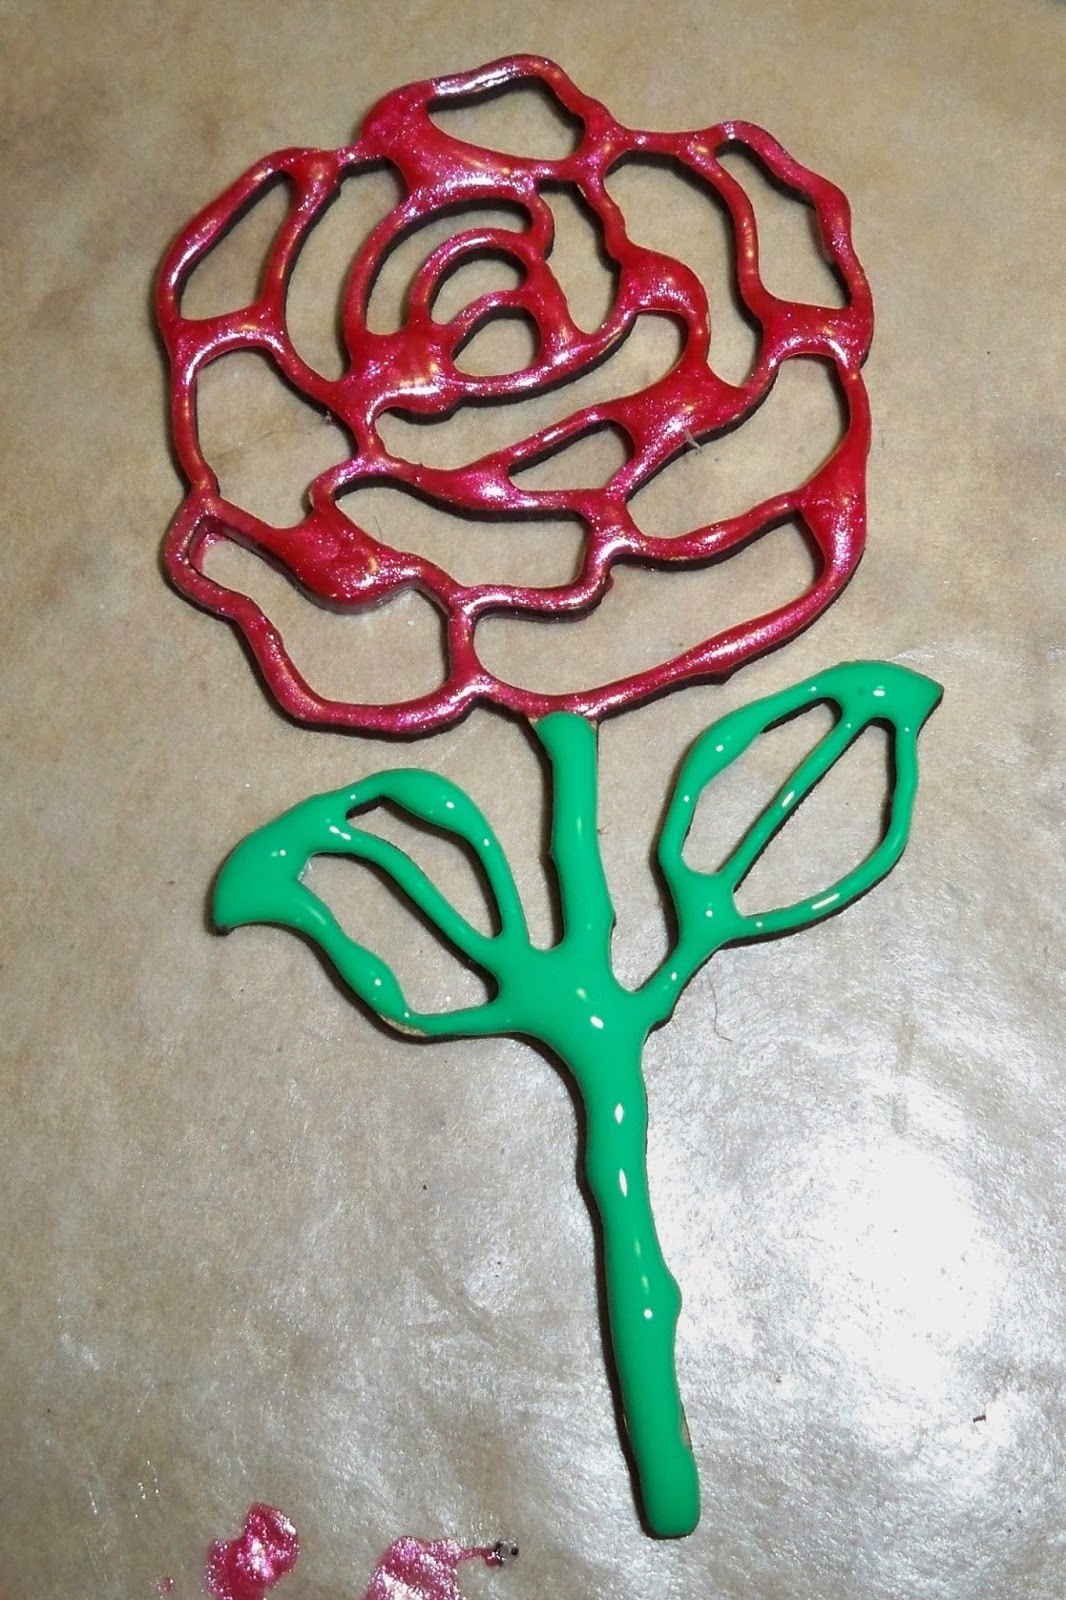
I confess I had covered the rose long before I made the card.  I knew the 3D gels would be beautiful on the chipboard and I made a few of them.  I tried to trace around the rose as carefully as I could (I can’t find my metal tip. I suspect one of the cats has taken it.  Actually, I am positive one of the cats took it) but I actually ended up covering the rose sort of like when you grout tile.  Because I didn’t need it to be absolutely perfect, I just filled in spots with more 3D gel after it dried.  Since the gel is amazing, you can’t even tell and I was open to some more texture anyway.  So, cover your rose and let it dry overnight if you can.


One of the roses

Then I discovered how brilliantly the rose fit into the French Oval Frame.  Now, the cardstock is also very bright, not neon bright, but bright. 
Close up of the French
I had no Embossing Enamel that matched, so I took some red embossing powder and covered the frame with that first.  Then I pounced my Embossing Fluid around the frame and covered that with Cranberry Ice Embossing Enamel – I love the way it came out!


I cut my card base out of the DCWV Chalk Art Stack – that paper is thick!! I made a square card since I had so much to put on it and I wanted Mom to be able to touch the cardstock; it has a texture to it so it can be used like a chalkboard (you can even wipe the chalk off). So cool! 
It's STUNNING in real life!!
To keep the theme going, I used my Silhouette Cameo to cut out Happy Birthday (I also discovered a neat trick – when your letters are still on the cutting mat, before you remove them, use a bit of washi tape that is long enough to grab all the letters, then gently use your tool to remove them.  Now, when you go to place them, they are all straight!)

Next I just traced the inner circle of the French Frame and cut it outside the trace line so there would be a little bit of paper to use to attach the it to the frame. Positioned my rose in the center of the white cardstock, and then glued the whole shebang to the front of the card.  Lastly, I put the Happy Birthday on the inside of the card since I didn’t have enough room on the outside. 


So there you have it!! Mom and I met yesterday to celebrate our birthdays over lunch & she LOVED the card (of course)! Sorry no other view of the card! I hope you have enjoyed my birthday card – I still have one more birthday to celebrate, so keep your eyes peeled! Thank you & have a lovely day! Christi


I would like to enter my Birthday Card in the following challenges:
Use Your Stuff -#141, Texture
Rhedd & Rosies - #35, Anything Goes
Simon Stamps Wednesday Challenge - Anything Goes!
613 Avenue Create - #77, Anything Goes w/ Option of Pink
Creative Fingers - #41, Anything Goes
Crafty Catz - #237, Anything Goes
A Creative Romance - (June) Anything Goes w/ optional Birthday Twist
Craft Your Passion - Bold & Beautiful 

Friday, June 20, 2014

Is it Too Early for Holiday Ornaments?


I say NEVER! For this Globecraft & Piccolo post I decided to beat the heat by making a holiday ornament.  Using one of the Ornament Kits (in addition to the kits found on the linked page, there is the DIY Portrait Ornament and the DIY Landscape Ornament) make it SO easy and really fun, but my favorite is using one of the 2 DIY kits, like I did here.  I wanted an icy feel to my ornament, hoping that keeping cool could be a bit of mind over matter!
 
The final ornament - pretty, but I'm still hot!
What I Used to Make My Project
Fishing Line or Craft Filament (I used jewelry cord, clear)
 
The kit with the piece from Bejeweled Snowflakes
First thing I did was cut my long snowflake border from the Bejeweled Snowflake Set in half – there are 8 little snowflakes on each strip, so I just snipped it into 4.  Then I applied the Embossing Fluid and embossed the strip with Aged White Embossing Enamel, both front and back.

Then I embossed the inner circle of the ornament – the inner piece is the
Inner bezel with snowflake piece
piece in the kit that has the loop on the top to hang the ornament.  I just pounced my Embossing Fluid along the outside of the ring (super easy since the Embossing Fluid uses a dauber on the top of it – you never get too much or too little! Just don’t squeeze your bottle as it will explode – or so I hear - hehehe) since I knew once the ornament is assembled you can only see a small bit of the ring; I embossed the inner ring on both sides.  Then, I threaded the cord through the very top of the snowflake strip that I had cut so that the ends of the cord could be glued to the inner ring and the strip would hang correctly.  For that I used E6000 and I did one piece of string at a time (for me that was easier than trying to line the filament up on both sides, ensure the strip was even, then try to glue both ends of the cord – it became like a game, with me fighting against everything.  So, I surrendered and did each end separately).
All the pieces embossed, attached & ready to assemble (except the globes)
While my hanging piece was drying, I embossed the 2 outer rings with Mermaid Tears, being sure to roll the Embossing Enamel to shake up the enamel.  The Globecraft & Piccolo Embossing Enamel is hand blended in the USA and each color is so unique – the Mermaid Tears is such a pretty mixture of colors!  I did one side of each of the outer rings, but I did emboss each side twice.  Then I glued the globes and the rings to the inner ring, lining it up and clamping them together with bulldog clips.  I let it dry overnight and I was done!
 
Another look at the final product (hard to get those bubbles to photograph!)
Also, another great use for the bubbles is to use them as "shields" - when you have items drying, perhaps with Glastique Gloss, you can place a bubble over the item and that helps to keep the cat hair, human hair, Embossing Enamel and all the other floaties out of your finish.  Thanks so much for stopping by – I appreciate your comments and sharing of my posts so much! Hope you have a fantastic weekend! Christi

I would like to enter my project in the following challenges:
Love to Create Challenge Blog - #120, Anything Goes
Simon Says Stamp Monday Challenge - Anything Goes!
Craft Hoarders Anonymous Challenge Blog - #10, Spray it! Ink it! Smear it! Emboss it! 
All Crafts Challenge - Anything But a Card (June/July)
Crafting from the Heart - #23, Anything Goes
A Creative Need - (June) Anything Goes

Friday, June 13, 2014

Embellishments Redo


I have many embellishments that just don’t work for me.  The main reason I don’t use them is the color.  If I don’t like the color it will never get used, no matter how nice it is.  So I decided to “fix” some embellishments that I didn’t like.  This started out as an experiment, so I was thrilled to see that it actually worked!

I have acquired quite a mix of acrylic cabochons from when I belonged to a kit club.  Every month I received a package with items pertaining to a certain theme and, although the company that put out the kits is no longer in business, I have a large stockpile of stuff.  

What I Used for my Embellishment Redo:
Acrylic Cabochons 

Vintage Gold - a bit melted :)
I wanted to try to “fix” some of these embellies so I would use them.  I took an empty medicine bottle, popped the top of the Embossing Fluid and poured some in the bottle.  Then I brushed the Embossing Fluid on the cabochon (the brushing worked better - you can work the fluid into the little nooks & crannies), poured whatever color of Embossing Enamel I wanted (after pouring the extra off) and heated it.  The first one I did melted a bit, but then I got the hang of it.  
Cranberry Wine


 As I said, this began as an experiment and I am so happy it worked! Now I can “fix” my cabochons to match my projects!

I hope this inspires you to think a bit out of the box and find ways to “fix” items that you aren’t thrilled with.  And, since I had all the items on hand already, the new cabochons are essentially free!
My Favorite One - Mermaids Tears

Thank you SO much for stopping by today! I appreciate your support ~ Christi

Friday, May 30, 2014

An ATC with a Bubble Background


I love making ATC’s.  Not only are these trading card sized beauties fun to trade with other artists, but I use them on cards as well.  It makes it simple to make a card quickly when you already have the focal point done.


In making this ATC for Globecraft & Piccolo I used the following products:
Embossing Enamel in Mermaid Tears & Royal Sterling
ATC Bubble Background,LB101 (keep the pop out pieces!)
Distress Paint & Distress Marker in Seedless Preserves
Purple Pre-Made ATC card
Ranger Archival Ink in Jet Black
Tim Holtz Simple Sayings Stamp Set, CMS155
Scrap Piece of Complimentary Color Paper

First, I covered the ATC Bubble Background with Embossing Fluid and embossed it with Mermaid Tears. 
Embossed and Raw ATC Bubble Background
 
Close up, embossed w/ Mermaids Tears
I embossed the background a few times to get the coverage I wanted. Then I chose a few of the leftover pieces I had popped out of the Bubble Background and covered them in Embossing Fluid and embossed them with Royal Sterling (HINT: mark the piece on the correct side so when you emboss the piece it will fit correctly– ask me why I suggest this!).

Once everything was embossed, I fit the pop out pieces into the Bubble Frame and glued them in.  I did this by turning the Bubble Frame over and I spread some glue over the piece and the frame.  Since I knew I was going to attach this to an ATC I wasn’t too worried about the pieces falling out.  Once they dried, I just chose some areas on the Bubble Frame, dotted some glue and glued it onto the ATC card.  I also glued my ATC card to some left over cardboard to make it a bit more sturdy and then inked around the edges with the Seedless Preserves Distress Paint & filled in any gaps with the Seedless Preserves Distress Marker.

I inked my sentiment in the Jet Black ink, stamped it on a coordinating piece of scrap paper and trimmed it down.  I glued my sentiment to my ATC and I was done! Now I am all ready to pop this on a card when I want to remind someone I’m thinking of him or her.
 
This picture really shows the sparkle!
Thanks for stopping by! Don't forget to check out the daily posts on the Globecraft & Piccolo Blog, and my blog, Art Without Anxiety.  Hope you & yours have a GREAT week! Christi

I would like to enter my ATC in the following challenges:
Crafty Girls Challenge - #19, Anything Goes
A Step in the Dark - #2, Anything Goes with some Purple
C.R.A.F.T. Challenge - #261, Paper Piecing
Simon Says Stamp Wednesday Challenge - Anything Goes
Just Inspirational Challenges - Paper Piecing