Followers

Showing posts with label Shadow Box Card. Show all posts

Wednesday, January 5, 2022

Winter's Night Shadow Box Card

I made this card for the Paper Funday January Challenge, which is anything goes or a winter landscape - not surprisingly, I went with the optional theme. I love making these Lawn Fawn shadow cards!  And the fact that they fold flat to make mailing easier {and cheaper!} is so cool.  I actually found the base of the shadow box already cut in a pile of papers on my desk so I took it as a sign and whipped up this card! 
 

What I Used to Make my Card:
White Card
Lawn Fawn Happy Village stamps, #LF1591
Lawn Fawn Happy Village dies, #LF1592
Lawn Fawn Winter Skies stamps, #LF1763
Lawn Fawn Winter Skies dies, #LF1764 
Lawn Fawn Shadow Box Card dies, #LF1486
Lawn Fawn Starry Skies dies, #LF1377
Dark Blue Shimmer Card
White Shimmer Card
Silver Glitter Card
Watercolor Paper {I use this}
Ranger Archival Ink in Jet Black
Red Liner Tape
Zig Clean Color Brush Markers

I wanted this card to have a starry night so I cut a piece of shimmer, dark blue card, cut stars out of the silver glitter card, attached the stars to the
Stars from the top of the card
background, and set aside.  I had cut the middle pieces of the card {where all the components sit} out of white shimmer card.  It's hard to see in the photos but it's very pretty.  I set all the shadow box card pieces aside.  


I stamped all of my houses and trees onto watercolor card and colored them with my Zigs.  Once they had dried I cut them out with the coordinating dies.  I then assembled the card.  I could go through step by step, but Lawn Fawn has a wonderful video that tells you exactly how to make this card so if you are wondering what the exact process is, or want to see the construction, just click HERE.   In the video they use white tape, the type you can tear, but I've found the red liner tape works the best for me.  I guess it is all what you prefer.  However, wet adhesive would really present a problem trying to hold everything together properly so you do need to use some sort of tape.

The bright colors of the houses really pop against my night sky.  I'm very happy with how this card came out especially considering I wasn't even planning on making it! Hopefully this inspires you to join in the challenge at Paper Funday!  I hope you enjoyed my card as well.  Stay warm out there and I will see you soon!  Fondly, Christi
 
I am entering my Winter's Night Card in the following challenges:
Shopping our Stash, #461 - Something beginning with S (Stars!!)
4-Season Challenge Blog, #52 - Cottages
Inspiration Station, #21 - Winter Cityscape
Dies R Us Challenge, #184 - Anything Goes with a Company they Carry
Sparkles Christmas Challenge - A Winter's Scene
Stamping Sensations - Anything Goes with Option of Dies

Saturday, April 11, 2020

A Trio of Lawn Fawn Shadow Box Cards

I know most of you are stuck in the house and the big trip of the week is to the grocery store to see if they have any toilet paper - thank goodness that is starting to get easier, at least here in Colorado it is.  I have been crafting like crazy in between doing some chores that have been put on the back burner; at least I feel that something is getting done! The entire  time I took off from crafting I still shopped, and bought crafting supplies, cause how can you not?   Once I started to look at all the goodies I have amassed I really wanted to play with these sets that go along with the Lawn Fawn Shadow Box card; I love that these cards can be folded to fit into a regular A2 envelope! I made three of them {I sense a pattern here; I seem to be making sets lately. I guess I am making up for lost time!} Here is the trio of Shadow Cards I made:

Here is the group:


What I Used for Each Card:
Lawn Fawn Shadow Box Card, #LF1486
Gina K. Amalgam Ink in Obsidian
Sturdy Cardstock for the Boxes 
Various Pastel Colored Card

Now, this is what I used to make the Waving Hello card {in addition to the items listed above}:
 

Lawn Fawn Shadow Box Ocean Add On, #LF1705
Lawn Fawn Wavy Sayings, #LF1899
Lawn Fawn Fancy Wavy Banners, #LF1923
WOW! Opaque Bright White Super Fine Embossing Powder, #WL01SF 
VersaMark Ink
 
This was simple to make, I just cut out all of the pieces, using appropriate colors of card and put the card together.  I stamped the sentiment onto the banner with Versamark ink and embossed it with the white embossing powder.  Attached the banner and the card is done!


To make the Spring Shadow Box card I used {in addition to the items listed above}:
Lawn Fawn Spring Shadow Box Add On, #LF1906
Strip of Acetate

This card was a little more time consuming; cutting out and gluing the little flowers to the hillside took a bit of time.  I cut out the bunnies, one out of grey card and one in brown, and put the card together.  I made the back brown bunny appear to be jumping using the strip of acetate.  It's so much fun to make the pieces of a car look like they are floating {it's the little things that make me laugh!!}


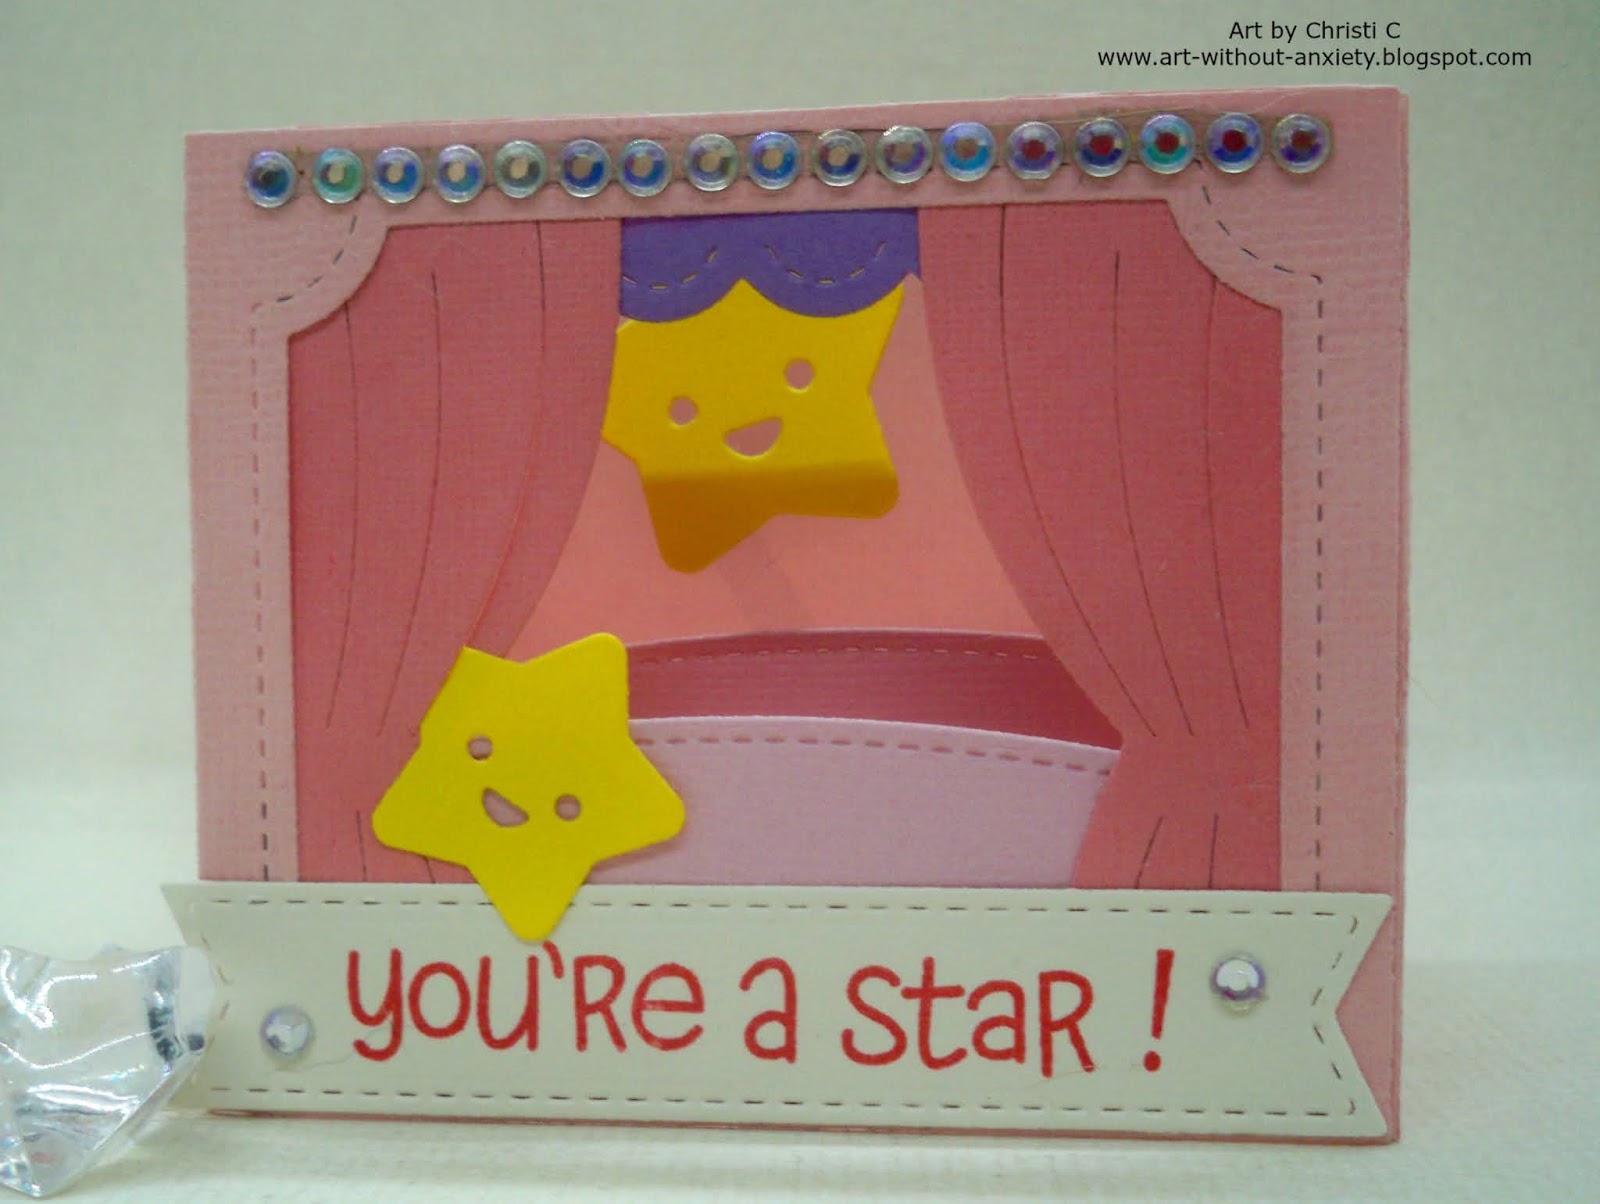
Lastly, to construct the You're a Star card I used {in addition to the items listed above}:

Lawn Fawn Shadow Box Card Theater Add On, #LF1706
Lawn Fawn Lucky Stars Stamp Set, #LF514
Hero Arts Strawberry Ink
Strip of Acetate
Die-Namics Stitched Fishtail Sentiment Strips, #MFT-1123

I like the double meaning of this card, you're a star in a theater, get it? I cut out all of the components, put the card together, again using a strip of acetate to make the star appear that it is floating in the background.  Finished it up with the sentiment and the gems.  After all, why be on stage if you can't rock some bling? 

That's it for today! I hope my 3 happy, spring cards brought you some joy; and
Another Look at all Three
I sincerely hope everyone in your world is doing fine.  If any of the cards, or projects, on my blog speak to you, please message me & if I still have it, it's yours! No worries as I will pay the postage.  I have so many cards hanging around I need to do something with them and while I do donate a bunch it would be nice to share them with other card makers.  Email me {StampinDiva at yahoo dot com} and I will let you know if I have the card(s) available.  Thank you so much for using your time to come visit me - do leave me a comment so I can visit you back! Fondly, Christi


I would like to enter my cards in the following challenges {if the challenge is specific to one of the cards, I will note which one is entered}:
Simon Says Stamp Wednesday Challenge - Spring Moodboard {see below} 
NBUS, #13 - Anything Never Been Used {schtuff} - I never used the Spring and the Theater Add On's for the Shadow Box Cards :)  
Die Cut Diva's - April Challenge - All About Animals {Spring & Waving Hello Cards}
Country View Challenges - April Challenge - Animal Magic {Spring & Waving Hello Cards}
A Perfect Time to Craft - April Challenge, Anything Goes
2 Crafty Critter Crazies, #37 - April Challenge, Anything with a Critter {Spring & Waving Hello Cards}
Southern Girls Challenge - April Challenge, Anything Goes 
Cut it Up! - Hopping Down the Bunny Trail {Easter} - {Spring Card}
Craft Rocket Challenge, #69 - April Challenge - Furry Friends {Spring Card}


Monday, July 23, 2018

Under the Water with Lawn Fawn {and a giveaway!}

Today is a VERY special day!  Challenges for Days {a challenge listing blog that I am very honored to run} is having a week long Birthday Bash celebration and YOU are invited! All you need to do to be in the running for the prize pack I have donated {picture below} is comment on on this blog post and the Challenges for Day's Monday post and you could be today's winner! We also have a Super Giveaway on Saturday so be sure to check Challenges for Days every day this week so you can enter!  Now, on to my nice, cool Happy Birthday card.

For the celebration I wanted to use my brand new Lawn Fawn goodies so I constructed this Shadow Box birthday card.


What I Used to Make my Card:
Blue Card {for shadow box}
Assorted other Color Card {for the critters}
White Card
Lawn Fawn Sentiment - Was a Freebie from Lawn Fawn
Lawn Fawn Shadow Box Card dies, #LF1486
Lawn Fawn Ocean Shadow Box Add On dies, #LF1705
Lawn Fawn You are Sublime stamp set, #LF1686
Lawn Fawn You are Sublime dies set, #1687
VersaFine ink, Onyx Black
Tutti Design Cross Stitched Rectangles, #TUTTI-410
Double Sided Tape

When I make a card like this I like to cut out all the components of the main

portion, in this case the Shadow Box, first.  I also cut out a few more of the waves in different colors of blue.  I could tell you how to construct the Shadow Box, but Kelly Marie at Lawn Fawn makes the BEST videos {and I am not a video learned - I much prefer to have instructions written out for me}, they are SO easy to follow - and of course, you can stop and start as needed! So, for instructions, I suggest you pop over to YouTube and watch.

Once I constructed the box and put the waves in the card {I decided on 3 waves and made the middle wave

a lighter blue}, I began to cut out my critters.  I used a little bit of both sets, designing where I wanted everything to go.  I have to say, I adore that little lobster - he is so cute and happy! Once everything was attached, I put the Birthday banner on the top of the card.  There you go! Each time I make one of these cards it gets easier and I think this one only took me a few hours {I'm kidding, maybe a half an hour!} and I really love the pop out factor of them - and the fact they still fit in an A2 envelope! Fantastic!

Now, don't forget to go over to Challenges for Days and comment, after you comment here, for a chance to win this AWESOME prize pack! The celebration is
You Could Win This Prize Pack!
going on all week, with a Super Saturday Giveaway where some sweet sponsors have generously donated some prizes.  Thank you so much for all your support through the years and I hope that both Art Without Anxiety and Challenges for Days are around for at least another five years {I'll be SO old then. . . } Fondly, Christi


I am Entering my Shadow Card in the following challenges:
Lawn Fawnatics - #33, Fun Folds
The Library Challenge - The Little Mermaid
A Gem of a Challenge - Summertime/Holiday
The Fairy & The Unicorn - Under the Sea
Crafty Catz - #426, Anything Goes w/ Dies and or Punches
Cut it Up - Under the Sea
Simon Says Stamp Wednesday Challenge - Use Dies and/or Punches
Die Cuttin' Divas - #378, Lots of Layers
a2z Scrapbooking - Birthday Bash
Animal Friends - #64, Underwater


Tuesday, April 24, 2018

Be Pawsitive!

I wanted to enter the 3D challenge at Lawn Fawnatics {#27} since I saw it, but things have been pretty hectic {I hate it when life gets in the way of my crafting} and I have just now gotten the card done.  Without further ado, I present my Be Pawsitive Shadow Box Card:


What I Used to Make My Card:
Momento Ink in Tuxedo Black
Light Blue Card {for the box}
Brown Card {for the hills}
Lawn Fawn Meow You Doin' Stamps, #LF1315
Water Color Paper
Strip of Acetate

Now, there is a wonderful video on how to make these adorable little cards, so I am not going to waste your time explaining how it was made; if you really want to see step by step, check out my "It's Written in the Stars" post.  I literally  offer photo step by step instructions on making a shadow box card. 


Once I had the box constructed, I realized my die cut machine had incorrectly cut the sides of the box.  At first, I was just going to trash the box and begin again, but I really didn't want to waste the cardstock so I got a bit creative.  Using some pieces of the Really Rainbow paper, I just attached them to the sides to hide the cuts and to give the box some strength.  It worked so well I decided to add some same color panels on the sides as well.  Creativity strikes again! You can see the add-on's I made in the pics above.

Ignore the spikey thing - it still folds!

Now, when it came to assembling the inside of the box, I used some kitties that I had already colored  and cut; all I needed to do was stamp and cut the ball of yarn and the mouse. I thought it would be really cute, as well as add some interest, to have the ball floating above the cat as if the cat was playing with it, so I glued the yarn onto a small strip of acetate and attached that to the cat.  

Another peek

Lastly, I stamped the sentiment and cut it out using the fishtail banner, attached that to the front, and my card was done. I think that it is SO cool that the card folds down to fit into an A2 sized envelope!  I am very pleased with how this card came out and I have one other type of 3D card to enter into this challenge, if I can get it done in time!  I'll be trying it for the first time.  Thanks SO much for your visit & I hope to see you again soon!  Fondly, Christi


I am entering my Be Pawsitive card in the following challenges:
Lawn Fawnatics - #27, 3D cards
Fashionable Stamping - #134, Animals
Crafting with Dragonflies - #102, Cards using Dies and/or Punches
Fussy & Fancy - #210, Add a Die Cut
Die Cuttin' Divas - M, Anything Goes
Creatalicious Challenges - M, Anything Goes w/ Option of Die Cuts

Saturday, January 20, 2018

It's Written in the Stars

This is only the second time I've gotten to play with the Lawn Fawn Shadow Box Card die set, but I've had this card brewing in my mind since I bought the Upon a Star Stamps and matching dies.  I've had this set for a while but I have never used it; I just couldn't get this card out of my mind! Now that it's finally made, I can move on <grin>.  Speaking of moving on, I just placed another order with Dies R Us because not only are their die prices insanely low, but they now stock paper, adhesives, Distress markers, and SO much more.  If you haven't been to the store in a while, you need to GO!  Now let's get back to my card; I truly enjoyed making it and I hope you like it.

What I Used to Make my Card:
Black Card
Lawn Fawn Shadow Box Card Die Set, #LF1486
Lawn Fawn Scripty Sayings Stamp Set, #LF844
Lawn Fawn Upon a Star Stamp Set, #LF1407 {New}
Lawn Fawn Upon a Star Die Set, #LF1408 {New}
MISTI
Lawn Fawn Starry Skies Die, #LF1377 {New}
Star/Night Sky Patterned Paper {stash}
Banner - Silhouette Cameo {but you could use these instead}
Hero Arts Intense Black Ink
Scor-Tape, 1/8" size
Embossing Ink
Simon Says Stamp Detail White Embossing Powder
Watercolor Paper
Derwent Inktense Water Color Pencils
Light & Dark Brown Card
Silver Glitter Card
Wink of Stella in Clear
Acetate 


Like all fabulous Lawn Fawn products {the Shadow Box Card is a stand alone die, which means there is no coordinating stamp set}, Kelly has produced an amazing video that you can see here.  However, I changed my card up a bit.  I was inspired by this card that Kelly created {the owner and designer of Lawn Fawn}.  She used a piece of acetate to hold up one of her constellations; she talks about it in the video I referenced above.   Click on the image and you can see where I pointed out the acetate.  Like usual for me, the bunnies I used were already colored with Derwent Watercolor Pencils and cut out.  I actually have a few pairs of the rabbits and the foxes, which come with the Upon a Star set, all colored and cut out, ready to go for when the mood strikes me.

These cards are not complicated, but I took a few photos of how I made the card and how I changed it a bit.  

 On the right hand side, here are the two panels that were cut out from the dies, all the creases and tabs are folded. 

On the left you'll see the two panels attached to each other, but it's not time to do that yet.  

The background paper of the night sky was cut out and attached to the very back panel of the box prior to attaching the hills.

 Here are the panels - I cut out three of them - two I attached as instructed and one I kept separate to cut it down.  The third panel is what I am going to use to attach the acetate components.  This where I changed up the construction of the card.  On most of the shadow box cards made with the kit, there are only two hills.  I needed the third to attach my pieces that will look like they are floating {if it comes out the way I picture it in my mind}.
On the right are all three panels attached to the shadow box on one side.  The left shows the box constructed and how the first two panels {hills} can be seen, but the third one, in the very back, can't be seen.  


I put the box aside and began to construct the banner that I wanted to use. In the photo on the right, I show how I stamped the sentiment on the banner.  I used my MISTI to hold the banner and the stamp in place.  The sides of the banner are folded and I put sticky notes under each side because the stamp is longer than the banner.  This way the over-stamp won't get on the sides of the banner.
The photo on the right shows the banner stamped.  See how there was a bit of over stamping on the sticky note?


Here is a picture of the banner completed: 


Back to the shadow box; here are the three hills attached.  This is the view from the top of the box, the patterned paper is the back and the opening is the front.  On the left are some of the pieces I wanted to use in the shadow box.  I ended up switching them up, which I do quite often when making a card.  I think I want certain things and then I think other things will look better.

As I began to build up the scene, I decided I need a few bare trees to even out the box.  I cut out the small trees with dark brown paper and attached them to the second hill.  Then I cut out the skinny strips of acetate I needed to hold up the heart constellation; at this point I wasn't sure what else I was going to put in the scene.  

I flipped through my dies and came across the Lawn Fawn Starry Skies die set and decided a few glittery stars were just what I needed.  I cut out some of the stars from silver glitter card and attached some to the back of the card {where the patterned paper is} and then I floated some using the acetate strips.  I attached the bunnies and the banner; lastly, I used Clear Wink of Stella around the exterior of the box to give just a bit more sparkle.

On the right you can see a side view of the card.  It was a trial to get a good picture not showing the acetate!  I hope you enjoyed this tutorial as much as I did making it.  Don't forget, the Dies R Us store is carrying more than dies now, check out the new and improved inventory of crafting goodies! Hugs, Christi
Another Look
Don't forget to join in on all the fun at the Dies R Us Challenge Blog.  
There's  a new challenge theme offered on the 1st and 15th of each month
 and one lucky  randomly drawn winner will receive a gift voucher prize to 
the Dies R Us Store.  For your convenience, all the important Dies R Us 
links are provided below.


I am entering my It's Written in the Stars card in the following challenges:
Lawn Fawnatics Challenge - #21, Inspiration Board {see graphic below}
Daisy Chain Challenges - #15, Something New
Simon Says Stamp Wednesday Challenge - Add a Sentiment
Die Cut Diva's - M, Use or Do Something New
a2z Scrapbooking - M, New to Me
Cuttlebug Mania - Valentines
Crafting by Designs - Out of this World
The Rubber Buggy Challenge - #10, Valentine {see graphic below}