Followers

Showing posts with label Newton's Nook. Show all posts

Wednesday, October 26, 2022

Cats & Coffee ~ Cat Lovers Blog Hop DAY 3

 What is as good as cats and coffee?? Nothing I say!! I hope you have been enjoying hopping around on day 3 of the Cat Lovers Blog Hop - I love seeing what other people have made, especially since I have most of the products they have used :) 


Today I have a card made with Newton's Nook (one of our fantastic sponsors!) - you can find the stamp here and the set I used for the sentiment here.  I colored in the kitties with my Zig markers. I used this die for the frame and I have a funny story about it.  I haven't used the frame die in a long time and I didn't realize that the die doesn't actually cut around the frame, it just cuts the inside.  Well, I found that out after I cut the watercolor panel I had already colored.  So I had this panel with these peaks and valleys in it that I really didn't want - so I cut the frame again, out of purple, and placed the panel inside the frame, trimmed it down to fit an A2 card and fixed my error.  There definitely was some panic involved!! But then I laughed like crazy at myself.  But I do that a lot :) 

Thanks SO much for stopping by ~ I'll be hopping around again today :) Hugs, Christi

I am entering my card in the following challenges:
Cat Lovers Blog Hop (day 3)
Simon Says Stamp Wednesday Challenge - Anything Goes
Crafty Animals, #66 - Anything Goes w/ an Animal
Die Cut Divas - Watercolor


Wednesday, March 2, 2022

March already? Come join us at Paper Funday with Newton's Nook!

 I can feel myself falling behind and how I hate that feeling! But yes, March is upon us and for this months challenge at Paper Funday I am using Newton's Nooks products which is generously sponsoring our challenge this month. It shouldn't be a surprise to anyone that I simply adore the cute, cuddly cats that can be found at Newton's Nook and these products were introduced just last month so everything is brand new!  Oh and this post is a 2fer!  Yes, 2 for the price of one; such a bargain! If the theme of Anything Goes doesn't work for you, feel free to enter something with the colors of Green & Gold; perfect for those St. Paddy's Day cards!   

To start with I stamped the Heartfelt Meows stamp on both water color paper and grey card.  I used the corresponding die to cut both of the hearts out and concentrated on the water color heart first.  I colored the heart with my Zigs, chose a Kraft card, then figured out the placement of the heart; which I attached to the card with foam tape.  I embossed the sentiment using white embossing powder and finally added a few homemade dots {made with Perler beads that I cut in half and baked in the oven!}


Now it was time to work on the other card.  I chose a white card base for this card and left the black ink on the grey card as is.  I did cut a few more of the Heart Frames Die, one using a darker grey and one using a shade of pink that matched the strip of the Love & Meows Paper Pad paper I used.  Lastly, I had the red Love You sentiment on my desk from a project I didn't use it for so I popped that onto the small grey heart.  And by the way, Newton's Nook has a complete product line that work with the Heart Frames Die, check it out here; everything from dogs, to fall, holidays and MORE! So cute!

I had a blast making these cards and I already have my eye on some more Heart Front stamps to get that match the die, just don't tell my credit card! I hope to see you at Paper Funday! Have a great week! Christi

I am entering my cards in the following challenges:
Simon Says Stamp Wednesday Challenge - Add a Die Cut
Addicted to Stamps, #424 - Any Occasion
Crafty Animals, #59 - Anything Goes with an Animal
NBUS Challenge, #36 - Anything Goes that is NBUS
SUYP, #76 - Anything Goes with Cats
Pammies Inky Pinkies, #2209 - Anything Goes

Wednesday, March 3, 2021

A Cat and Coffee Card

Hi everyone!

I hope you are all doing well - I never would have thought we'd still be here in this mess, but I am lucky as no one I care about has been effected by this nasty virus!  

On to the card that I am posting today; I was inspired to make this card after doing the Saturday post at Challenges for Days - I update the Saturday challenges and I saw quite a few calling for a CAS card and I haven't used any of my Newton's Nook stamps in ages, so here is my creation:


I stamped, cut and colored the adorable cat from the Newton's Nook set, Newton Loves Coffee first using my Zigs. I used a white card blank and stamped my sentiment directly onto the card; the sentiment is from a set called Mug Life from Ink Road Stamps.  I then attached Newton onto the card and I was done! Since it only took a few products to make this card I thought I would write up my post with the products directly in the post instead of making a separate "How I Made my Card" list.  I'm anxious to know what you think - should I stick to my usual way of posting or does this way work for you? Please let me know in the comments!

Thank you so much for stopping by! Even if you don't leave a comment {which I apologize for, seems since I have Anxiety in my blog name every black market pill manufacturer is leaving me comments on how I can obtain my Zanax from out of the country} I can see from the stats that I was visited.  I have been blogging for years now but, with Instagram becoming so popular, I actually considered stopping writing this blog. After much thought, I decided against it - I like writing my posts and "talking" to you all, so I am here to stay! 

Fondly,
Christi

I am entering my card in the following challenges:
Addicted to Stamps & More, #400 - Dies Cuts
SUYP, #64 - Any Furrything Goes
2 Sisters on the Blog, #48 - Coffee
Crafty Animals, #48 - Anything Goes w/ an Animal
3 Room Studio, #25 - CAS
Addicted to CAS, #192 - Animal


 Thanks :)

Friday, January 8, 2021

Happy New Year with Newton's Nook

I had made only a few cat cards for the holiday so when I discovered this set in my collection {yes, I had forgotten that I had it, have never used it and that also makes it a NBUS!}, I knew I had to put it to good use.  What better way to ring in the new year than with a cat AND champagne!


What I Used to Make my Card:
White Card Base
Watercolor Paper {I use this}
Zig Clean Color Brush Markers
Gina K Amalgam Ink Pad in Obsidian Ink
Newton’s Nook New Year Stamp set,#NN1811S05
Newton’s Nook New Year Die set, #NN1811D05
MME Joyful 6”x6” paper pad, #JYF109 {retired but available}
Dimensional Dots
Gel Pens

I started this card as I do almost all the others I make, by stamping the cat, coloring it in and then cutting it out.  I used a lot of gel pens on this design, I wanted some sparkle and I

Close up of Sparkle 
“dotted” a juicy gold gel pen to make it look like bubbles in the glasses and in the champagne exploding out of the bottle.  I pop dotted the kitty on a white panel, used some gold starred patterned paper for the top of the card, attached the white panel to the bottom of the card. 

 I am very pleased with the bubble effect, it came out better than I envisioned it.  I hope you like this card as much as I do; I think it conveys the fun and excitement that only a New Year can bring!  Thank you for taking the time to stop by and checking out my card! I hope you & yours have a fabulous New Year! Fondly, Christi

PS: Consider following me on Instagram - I am going to be having a fantastic giveaway for my Instagram followers only & you want to be a part of it, trust me! Thanks :)

I am entering my card into the following challenges:
NBUS, #22 - Stamp Set & Die have never been used :)
Moving Along with the Times, #126 - New
Simon Says Stamp Monday Challenge - Use a New or Unused Product
Make my Monday, #139 - Something New in Your Stash
Use Your Stuff, #413 - It's all about the New
Shopping our Stash, #436 - Use Something New
Simon Says Stamp Wednesday Challenge - Something New
Krafty Chicks, #541 - Stamp Act {must stamp}
Paperminutes, #673 - Happy New Year!
Creative Fingers, #199 - Anything Goes


Saturday, December 30, 2017

Christmas Has Gone to the Dogs

Settle in, dear readers, this is a slightly long story, but it is a story of miracles and things happening at just the right time.  As some of you may recall, my next door neighbor has an adorable dog named Lolly.  Well, Lolly now has a boyfriend, Bear.  Bear literally showed up next door, matted, hungry, & thirsty.  My neighbor was going out, so I took Bear into my fenced-in backyard.  I looked him up, found a rabies tag, and tried to find his owner.  The local animal shelters attempted to make contact with the information they had but, no one contacted me or the shelters.  It began to get dark and I couldn't have Bear come to my house, not knowing if he was ill and could possibly infect, or attack, the Fabulous Feline Four, so I called my good friend, Tom, to come and take Bear until his owner could be found.  Fast forward a week and no one was looking for Bear.  The Man and I even drove around the neighborhood where Bear used to live to see if there were lost dog signs.  Tom and Bear fell head over heels for each other and have been inseparable.  Tom was going through a very lonely time and Bear couldn't have showed up at a better time.  It's been about nine months and Bear is healthy, happy, and has a fabulous owner.  Bear and Lola are medium, mixed-breed dogs, but they appear to be mixes of the same breeds.  They are almost exactly the same size and they LOVE to play when Bear comes over.  They run around the yard like little race cars, yipping, following each other and sharing treats.  Both dogs have been introduced to the Fabulous Feline Four with only small squabbles, mostly due to Sylvester's temper. To celebrate how happy everyone is, for Christmas this year I made Helen, Lolly's mom, and Tom, Bear's dad the exact same cards with just a few differences.


What I Used to Make my Cards:
Blue Card Base
White Card
Vanilla Card
Gold Card
Tim Holtz Mini Cats & Dogs Stamps, CMS272
Tim Holtz Framelits Mini Cats & Dogs Dies, #661594
Newton's Nook Newton's Curious Christmas
Spellbinders Petite Labels One, #S3-205
Tim Holtz Scribbly Christmas Stamps, CMS249
Wendy Vecchi Ink in Potting Soil & Fern Green
Ranger Archival Ink in Jet Black
Derwent Inktense Pencils
Word Bubbles made with Silhouette Cameo
Tim Holtz Boneyard, TH93596
Ranger Glossy Accents
Various Gel Pens
Gold Star Sequins
Tissue Paper {Dollar Tree}
Blue Ribbon
Dimensional Dots

Bear has a silver skull charm hanging from his collar; Lolly has a festive red acrylic bow.

I had already colored and die cut the two dogs; Bear is a darker grey, with one white leg, whereas Lolly is all grey and white.  Each of their noses got a dot of Glossy Accents and they were set aside.  The cats were also pre-colored and I chose the two I did due to the similarity to my cats.
Bear's Card

I designed and cut out the word bubbles using my Silhouette Cameo and stamped the sentiments in the bubbles.    I then used the Labels die to cut out the "Dear Santa, define good" sentiment and the gold paper. I glued them together and set them aside.

To begin my scene, I stamped the tree, which I inked with the Wendy Vecchi inks, slightly off the edge of the card.  I wanted to ensure I had enough room, plus I wanted the dogs to be the focal point. I colored in the baubles with various gel pens and attached a gold sequin star to each tree.  I "wrapped" each bone with tissue paper and ripped the sides to make it seem like the dog had done it.  I used dimensional dots to pop out the dogs, adding little pieces of the tissue paper to each dog; Bear has it in his mouth while Lolly got some on her head during her ravaging of the bone.  I made sure there was enough space
Lolly's Card
between the dog and the tree so I had room to add some more tissue paper scraps.  


I attached the gold and white card sentiments above each dog's head, while using the word bubble sentiment off to the right side of the card so it appeared that someone out of the scene was telling the dog not to peek.  That little warning came a bit too late.  Now, neither dog lives with any cats, but, knowing how curious cats are, I decided to add a cat to the side of the card, with a wide eyed look.  I wanted it to seem like the cats were both amazed and appalled at what the dog was doing, and quite possibly, might tattle. 

I had a great time figuring out how I was going to get my message across; and everyone loved the cards.  You can bet you will be seeing these two rascals in more of my creations. Thank you so much for reading this post; I know it was long :) Hugs!! Christi

I am entering my Christmas has Gone to the Dogs cards in the following challenges:
Fussy & Fancy - #202, Christmas Challenge
Stamplorations - December Challenge, Stamps & Gold
Stamplorations Anything Goes - Ongoing
Kraftin' Kimmie - Anything Goes or Sketch
Sisterhood of Snarky Stampers - #100, N is for Naughty Christmas
Sweet Stampin' Christmas - Anything Goes Christmas
Simon Says Stamp Wednesday Challenge - Anything Goes
The Merry Christmas Challenge - #49, Anything Goes & Christmas

Thursday, February 23, 2017

It's irritating when. . .

A good blogland friend of mine has been struggling with some health issues so I decided to make her a get well card.  I recently bought this Newton's Nook Designs set from another blogger who was getting rid of it and ever since I got it, I've had this type of card in the back of my head.  It feels good to get it out and my head appreciates the room I've made :) 


What I Used to Make my Card:
Kraft Card Base
Tim Holtz Ideaology Motif Paper - wood grain (discontinued but available)
DCWV Chalk Stack
Ellison LetterEase Helvetica Medium White Letter Stickers (discontinued)
Distress Paint in Gathered Twigs
Computer Generated Text
Newton's Nook Naughty Newton Stamp Set
Newton's Nook Naughty Newton Die Set
Ranger Archival Ink in Jet Black
DCWV Le Tres Chic Stack 12 x 12 (Amazon link but available elsewhere)
Clean Color Markers in Mid Brown, Beige and Oatmeal
White Gel Pen

The best thing about this card, aside from the fact that it is a get well card is that I got to use something old (very. very old) and something brand new to me in making it.  The white letter stickers have got to be at least 11 years old and as I said prior, the Naughty Newton set is new to me.  I love when I can use up some old stash to make room for some new stuff.  I started this card by
Another look 
stamping the kitties on cardstock in Jet Black ink.  I set them aside and started to brainstorm how I was going to make the chalkboard; I knew there was no way I was going to write on it as I definitely would have messed up somehow, so I computer generated the front and the saying on the inside.  I don't typically write on the inside of my cards but this one kinda needed a bit more explanation.  I used the DCWV Chalk stack for the actual board and wrote the lead part of the sentiment with the Ellison stickers.  I attached the second half at the bottom ensuring I had plenty of room for the scratches.  I wanted the chalk board to look like a chalk board so I dug out the wood grain pattern from the Motif paper and colored it with the Gathered Twigs paint.  I stuck it under my trusty tile to dry and stay flat.  


While that was drying I went back to the kitties.  The kitties that I chose to use already have scratches attached to their claws but I wanted to make sure the
The inside of the card
marks were visible against the black board so after I die cut them, I carefully trimmed the scratches off.  I colored the kitties using Clear Color Markers, but, since I cut them out of regular cardstock and not watercolor paper I just colored them lightly. 


Once the Distress Paint was dry, I used my CAMEO to cut a square in a piece of the wood grain paper so it would frame the chalkboard. I attached the chalk paper behind the frame and set it aside to cut the background paper out of the Le Tres Chic paper stack.  I wanted something that would give the card some interest but not overwhelm the elements.  I think the Kraft colored flowers on the light blue is a perfect fit.  I trimmed two pieces of the background paper and adhered one to the front of the card and one to the inside of the card.  I put the chalkboard and kitties on the front of the card and used a white gel pen to ink in the scratches.  

I hope you enjoyed my little "feel better" card and I hope my friend enjoys it when she gets it :) Fondly, Christi 

I would like to enter my card in the following challenges:
Simon Says Stamp Wednesday Challenge - Anything Goes
Rubber Dance - Layers
Die Cuttin' Divas - #305, Animals
Cuttlebug Mania - It's a Zoo Out There
OLLCB - #222, Die Cuts

Tuesday, January 24, 2017

Masculine Happy Birthday

My brother's birthday is coming up and I got some new Spellbinder dies.  Those two statements caused the following card to happen (sounds like a public service announcement).

How I Made My Card:
Black, Square (5 1/4 x 5 1/4) Card Base
Spellbinders Fleur de Lis Squares, #S4-318
Newton's Nook Stamp Set, Simply Sentimental
Patterned Paper, KaiserCraft, 6 1/2 pad, Time Machine, #PP978 (disc on site)
Kraft Paper
Ranger Archival Ink in Jet Black

I was searching through some of my smaller paper pads after Bud tried to step on them and caused almost all of them to fall on the floor, searching for something to make my brother a birthday card.  My brother is a grumpy, manly man so it needed to be a man's card.  No fluffy stuff for him (although he does plant and nurture flowering plants in the summer, to the point that he will move them around on the balcony so they get the best sun. I digress. . .).  When I saw the 2 papers in the Time Machine pad a light bulb went off in my head. I wanted to piece the papers together so that they'd match, but be different and I had just gotten some new Spellbinder dies (on sale, cause I hate paying full price!)and I thought I'd use one of the new dies to cut the papers and then I
could match them up.  And, the pattern on the brown/black paper is raised and shiny - so cool! Unfortunately, the small pad is discontinued on the KaiserCraft site, but, you can find them all over on the internet (and the larger pad is still available on the KaiserCraft site).

I will spare you the agonizing details of how I discovered the easy way to do this and cut to the chase; If you ever want to match papers up like this, cut the small one out FIRST, match it up with the other paper, THEN cut out the bigger piece.  Let's just say I have only teeny bits of the patterned paper left that I used.  So, if you were using these papers, you'd cut the black layer out, match it up with the brown/black design, then position your die and cut it out.  OK once you have gotten your two layers matched up, cut and glued, then stamp your sentiment on a matching piece of paper and use the smallest die to cut that out.  It took me entirely too long to make this simple card but I think it was worth it!
You can see a bit of the shiny black raised pattern on this picture

Thank you so much for reading my post - I'd love it if you'd consider becoming a follower of mine (if you do, please leave me a comment and your blog address so I can return the favor).  I hope you are all enjoying this new year so far ~ fondly, Christi

I am entering my Masculine Happy Birthday Card in the following challenges:
Crafty Hazelnut's Patterned Paper Challenge - Anything Goes #3
Oh La La Challenge - #220, For a Man or a Boy
Incy Wincy - For the Men in Your Life
Work it Wednesday (Simon Says Stamp) - Use Something New (Spellbinders Die)
Through the Purple Haze - #116, Happy Anything


Wednesday, January 4, 2017

The Purrfect Friend

As I watch the snow fall here in Colorado, I'm thinking of how much fun snow days were. I was lucky to grow up in a neighborhood with tons of kids. And even luckier that my best friend lived right next door to me - our parents even connected our backyards for us.  I don't even remember a life before her! She is an amazing person, and loves cats as much as I do.  Unfortunately,  she has recently gotten a fairly serious health diagnosis - not life threatening, thank goodness, but painful none the less.  I have been sending her the plastic boxes from my old Stampin' Up! sets because she loves them and uses them to store her own bunch of little trinket obsessions. Since I now live halfway across the country from her we don't talk that often, but we message each other daily - actually we message each other a ton of times daily.  I am very grateful to still have her in my life as I have watched time steal away too many good friendships. I made this card to put into the next shipment of goodies:
What I Used to Make my Card:
Stampendous Set, Cat Sayings #SSC1222
Newton's Nook Newton's Antics Stamps
Newton's Nook Newton's Antics Dies
Ranger Archival Ink Pad in Jet Black
Spellbinders Labels Seventeen
Authentique Remembrance 6x6 pad, REM006 (retired but available)
Scraps of Green Paper (from the Remembrance pad above)
Corner Rounder Punch
Pop Dots

I can't recall what I used to color the cats with as I found this duo in my already colored pile, but, I would guess I used my Zig Clean Color markers judging by how they look.  I put the kitties on a scrap of green to anchor them - without the paper, they floated around and looked like they need to be grounded.  After I grounded the cats, I stamped the sentiment on another scrap of green in the same color that the cats sat on.  That is one of the many reasons I love working with coordinated paper - you can always find the exact color you need! I die cut the sentiment with Spellbinders and set it aside.
The Dimension

I trimmed a piece of the purple background paper and then rounded the corners with a corner rounder.  I glued the paper onto the card base, then pop dotted the cats and the sentiment.  That's when I realized I had put the whole thing together upside down - yup, that is what happens at 11:30 at night.  So, I cut the card apart and mounted the panel, with pop dots, onto another card base, this time right side up.  If I had a nickle for every project I've messed up on I could buy the entire Ranger company.  But, I try to look at those mistakes as opportunities to try to figure out how to solve them.  And this mistake was easy to fix and one I have done a million times. 

I really enjoyed making this card and I hope it brings a smile to her face.  I hope you enjoyed my little tutorial and I appreciate your stopping by.  Fondly, Christi

I am humbly entering my Purrfect Friend Card in the following challenges:
ModSquad - Anything but Christmas
ScrappyLand - #57, Anything Goes
Word Art Wednesday - #264/265, Anything Goes
Lost Coast Portal (Jan) - #32, Anything Goes
Craftyhazelnut's Patterned Paper Challenge (Jan) - Anything Goes w Patterned Paper

Saturday, December 24, 2016

A Meowy Christmas

Wishing You and Yours a
Very Happy Holiday Season!
~~~~~~~~~~~~~~~~~~~~~~
Thank you all SO much for your continued support of my little blog!
XO Christi

and the Fabulous Feline Four


I love how this kitty came out - he looks so warm and snugly in his scarf and his Santa hat.  My favorite color is blue and winter is the perfect time to make some icy creations with the various shades.  I found the designer background paper in my stash and I have no idea who makes it (I suspect it's from Stampin' Up! and probably discontinued) but I knew I had to use it on at least one of my holiday cards.  
What I Used to Make my Card:
White Card Base
Newton's Nook Newton's Holiday Mischief Stamp Set
Newton's Nook Newton's Holiday Mischief Die Set
Ranger Archival Ink in Jet Black
Stickles in True Blue
Distress Marker in Broken China
Spellbinders Shapeabilities Victorian Tags, S4-448
Nuvo Crystal Drops in White, 677N
Nuvo Glitter Drops in Ruby Slipper, 752N
Corner Decorative Punch
Blue Cardstock

I stamped and die cut the kitty and used Stickles to fill in every other area on his scarf.  I set him aside to dry because me & any kind of wet medium are guaranteed to make a mess. 

As the kitty was drying, I trimmed a piece of patterned paper and punched the corners.  I have had this punch for years and I have no idea where I got it from or who made it - I'm sure they are still around somewhere.  I glued the patterned paper to the white card base and put that aside (under my tile on my desk to ensure it dried flat) and turned my attention to the sentiment.

I stamped the Meowy Christmas with Jet Black ink, die cut it to fit in the middle of the decorative die cut that I had cut out of a scrap of blue that matched the patterned paper.  I glued the two die cuts together and attached them to the card.  I stamped and die cut out his Santa hat and to that I added glitter Nuvo Drops in Ruby Red and Nuvo Crystal Drops in white.  While that was drying, I colored in the empty spaces on his scarf with the Distress Marker in Broken China.
Another Look

The next day I popped his hat on, and then glued him onto the card.  It was the perfect card to make while working on other stuff since there was so much drying time.  I typically make more than one thing at a time as the mess on my table will attest to.  Now, do you think I could get one of my cats to wear a scarf and a hat? Hmmmm - maybe I should finish these posts before I attempt that! As always, I so appreciate your visiting me and I hope you'll leave me a comment so I can visit you back ~ Happy Holidays, Christi

I am entering my Meowy Christmas card in the following challenges:
Crafty Hazelnuts Christmas Challenge - #313, Use a Sentiment
CAS-ual Fridays - #163, Christmas & Hanukkah 
Cute Card Thursday - #457, Anything Goes
Crimbo Crackers - #122, Animals (entry #2)
SUYP - (December) #13, Krimbo Kats

Friday, December 23, 2016

Light up the Holidays

Wishing You and Yours a
Very Happy Holiday Season!
~~~~~~~~~~~~~~~~~~~~~~
Thank you all SO much for your continued support of my little blog!
XO Christi
and the Fabulous Feline Four


I bought myself a bunch of holiday goodies since there were so many fantastic sales.  I admit it, I'm weak when I can get a good deal.  If you are a regular reader of my blog you know I adore cats (especially my Fabulous Feline Four, in fact, Sylvester now has a bed right beside my computer monitor so he can feel a part of and keep quiet while I attempt to write these witty posts) and I am in love with the kitties at Newton's Nook.  I think Newton is adorable and I swear that Jen (the owner) is watching all the craziness that my cats create and bases the stamp sets (and the coordinating dies!) on them! But, if you have ever been owned by a cat, you probably can't look at any set of cat stamps and not chuckle, or cry.  Enough of me going on and on, here is one of my newest creations:


What I Used to Make my Card:
White Card Base
Newton's Nook Newton's Holiday Mischief Stamp Set
Newton's Nook Newton's Holiday Mischief Die Set
Watercolor Paper
Ranger Archival Ink in Jet Black
Derwent Inktense Water Color Pencils
Nuvo Glitter Drops in Emerald City, 760N, and Ruby Slippers, 752N
DieNamics Stitched Oval Stax, MFT-521
Tim Holtz Paper Stash, Tidings, #TH93325
Blender Pen
Silver Gel Pen
Embossing Powder in Detail Black
Embossing Fluid

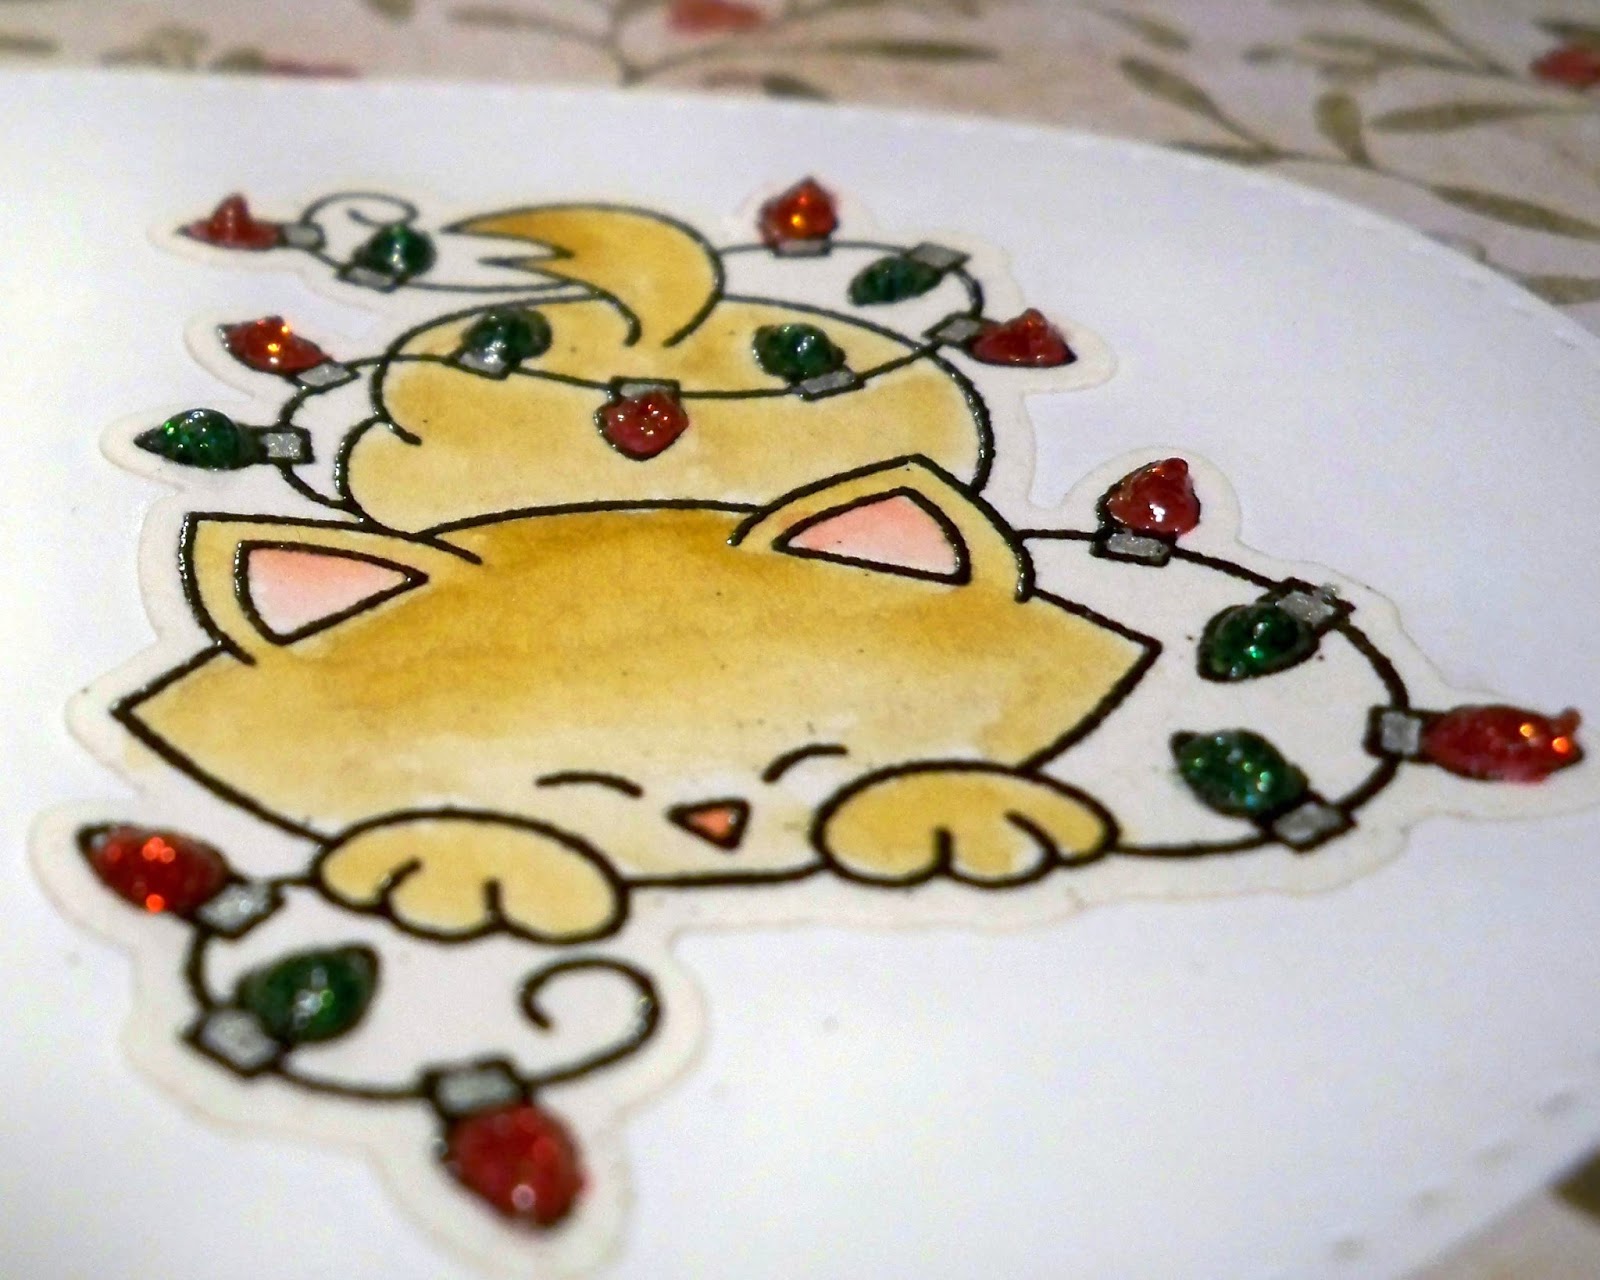
The first step in making this card was to emboss the image of Newton, all tied up in the lights, on watercolor paper.  I found out how difficult it is to do that, and, in hindsight, it makes sense.  The watercolor paper just absorbs the embossing ink so you have to be fast! I did manage to get a few of the images
Close Up of the Glitter Drops
embossed, so once that was done I used the coordinating dies to cut them out. I colored in the bulbs with Nuvo Glitter Drops, alternating green and red.  Once they were dry (I let them sit overnight) I colored in the kitty with Derwent Inktense water color pencils and a blender pen.  I used a silver gel pen to color in the ends of the bulbs where they screw into the socket.  I stamped the sentiment onto the oval die cut using Jet Black ink and then attached the cat image next to it.


I used some designer paper from Tim Holtz, specifically the Tidings stash, trimmed it down and glued it onto the white card base.  Lastly, I adhered the oval die cut with the sentiment and the kitty onto the card.  The pictures I took of the card don't do it justice (I really should learn how to take better pictures), the little bulbs sparkle and shine when you move the card around.  I am so happy I purchased this set and there are more cards to come!  I hope your holiday season has been full of love and laughter ~ Christi

I'd like to enter my Light Up the Holidays card in the following challenges:
Crimbo Crackers - #122, Animals
Not Just Cards (December) - #39, Anything Goes
Simon Says Stamp Wednesday's Challenge - Make it Sparkle (entry #2)
Work it Wednesday - Use Your Dies (entry #3)
Show Us Your Pussies - #13, Krimbo Cats
Lost Coast Portal (December) - Christmas or Winter
Holly Jolly Christmas Challenge (December) - #86, Christmas Card or Anything But a Card
Jingle Belles - Christmas Card

Thursday, December 22, 2016

A Joyful Card

I recently got Newton's Holiday Mischief Stamp and Dies set (you will see more of that set in a bit - I love those kitties!) from Newton's Nook, and I wanted to try something new.  I try to "stretch" my stamps, find other ways to use them other than their intended use and as soon as I saw the adorable little holly stamp and die I had an idea - now as some you know having an idea and executing it are two very different things - but, I think I did ok with this one! 


What I Used to make my Card:
White Card Base
KaiserCraft Yuletide Decorative Paper, #PK484
Newton's Nook Newton's Holiday Mischief Stamps
Newton's Nook Newton's Holiday Mischief Dies
Ranger Archival Ink in Jet Black
Tim Holtz Distress Watercolor Paper
Blender Pen
Distress Markers in Festive Berries and Pine Needles
Red Glitter Gel Pen
Red Glitter Cardstock
Tim Holtz/Sizzix Alterations Holiday Words:Script, #660058
Tim Holtz/Sizzix Movers & Shakers Magnetic Die Mini Wreath & Bow, #658267
Hand Punch - 2 1/2" Circle


Close Up 
First, I stamped (on watercolor paper) and die cut a bunch of the holly leaves and berries and then I colored them in with Distress Markers, first washing the Pine Needles color over the leaves, by scribbling the color onto my craft mat and then picking it up with a blender pen.  Once they dried, I  sort of outlined them, in a scribble kind of way - I hope this close up makes it easier to see what I'm talking about. The berries were just colored in direct to paper with Festive Berries, then colored over with a red glitter gel pen to give them a bit of sparkle. I tried to maneuver the holly leaves into a circle, but,
static cling had other things in mind and they kept moving.  So I punched out a circle from some scrap paper using one of those old Marvy punches (remember when that was all we had to make shapes with!?!? - how did we ever make anything? 😉) and glued each section onto the circle - Ta Dah! The little holly sprigs couldn't move all around once they were glued! There was a teeny gap that was too small for another sprig so I cut the bow from the Mini Wreath out of red glitter cardstock and covered the gap.  

Next I cut "joy" out of red glitter card as well (here is a tip - when you cut out a word that has an "i" in it, use removable tape or washi tape to keep the dot from the i with the i - they are teeny tiny and NOT fun to try to find.  At least not fun to try and find on my desk) and adhered that to the center of the wreath made from the holly leaves and berries.  I then glued the wreath onto a piece of decorative paper from the KaiserCraft set called Yuletide.  I love how this card is simple but festive and this idea is going on my card making list for next year. Thanks so much for visiting and I hope your holiday season is a happy one ~ Christi

I would respectfully like to enter my Joy card in the following challenges:
The Artistic Stamper, December - Christmas
Card Mania Challenges - December, #87, Anything Goes
Christmas Cards All Year Round - December, Anything Christmas/Holiday
Country View Challenges - December, Christmas
Crafty Hazelnuts Christmas Challenge - Christmas (month long)
Simon Says Wednesday Challenge - Make it Sparkle
Alphabet Challenge Blog - U is for Use Something Red
Cards in Envy - Celebrate the Season
Southern Ridge Trading Co. - December, Christmas and/or New Years
Happy Little Stampers - December, Anything Goes with Dies

Saturday, December 17, 2016

Happy Fall ~ Always Use Rubber, Challenge #6

Hello friends! I'm presenting a card for the Always Use Rubber Design team, challenge #6, in the theme of summer or autumn.  We would be THRILLED if you joined us! In fact, if you'd like to check out my teamies creations, Jane & Zoe, I'll wait here. 

And, as always, once the challenge ends (two whole weeks from today) we will choose a top 3.  Then, at the end of the month all of our top 3 winners have the chance to win a gift certificate from our fabulous sponsor, Alleystamp. 

Unfortunately this is our last challenge.  A few of our members will be pursuing other adventures and I hope to be able to keep in touch with them.  I wish them both the best of luck!  I want to thank all of our guest designers and participants XO

Our faithful & generous sponsor:


If you are looking for something, be it the newest goodies, or perhaps something that hasn't been around for a while, I urge you to go to Alleystamp.  If what you need isn't in stock they can get it for you SO fast - and the prices can't be beat! 

If you are familiar with me you know I love cats (truthfully, I love all animals, but I have a special place in my heart for cats) and I am amassing quite the collection of cat stamps.  The stamp company Newton's Nook makes some of the cutest cat stamps, well, adorable stamp sets in general, but I totally fell in LOVE with Newton when I saw him.  Plus, the stamps are easy to color!

What I Used to Make my Card:
Brown Card Base
Newton's Nook Newton's Antics Stamp Set
Newton's Nook Newton's Antics Die Set
Watercolor Paper
Derwent Inktense Watercolor Pencils
Tim Holtz/Sizzix Alphanumerics, #660056
Spellbinders Nestabilities Labels 17
Glitter Cardstock
Vanilla Cardstock
Adirondack Archival Ink by Ranger, in Jet Black
Bag of Fall Leaves 

The very first step I took in making this card was to stamp & color the kitty. You can see how I altered him a bit so he'd sit in the leaves:

I basically just cut him out of his box. I used the matching die cut to cut him out and then just snipped off the box.  I can SO relate to this stamp because Bud (one of my four current fabulous felines) is a total box kitty.  He will try to get into any box, no matter the size.  And it's your typical "buy them $1,000 worth of toys and all they want to do is play in the box" situation.  He does favor the square USPS Priority boxes the best.  Anyway, I could seriously talk about my cats all day and I will blather on if I am not careful.

So I stamped, colored and cut my kitty.  Then I set him aside and began to glue each leaf on the card to build the pile of leaves.  For some reason I have a hell of a time getting these to stick to the card base - it's almost as if they resist the glue, so I have to go very slowly and let each leaf that is glued on dry before I pile more leaves on or they will just stick to each other and all come off (ask me how I know this!).  I've had this bag forever and there are plenty left.  I wish I could recall where I purchased them from, but, nope.  I re-bagged them ages ago so I can't even recall what company they came from, but I do know they were made to make model train landscaping and they are made from fabric, but are a stiff fabric and a bit shiny.  

While I was in between leaf gluing, I cut out my letters for the sentiment.  I am really lacking in sentiment stamps so if anyone has a good set that they use over and over, please let me know!  I used glitter card in a copperish brown color for the letters and glued them onto a label from Spellbinders cut out of the vanilla cardstock.  I went back and forth between leaf gluing and trying to get
those letters straight for a good while.  I finally decided to use removable tape on the letters (with the letters on the sticky side, backwards, so I could glue them down while keeping them straight - I hope that makes sense) and then when the glue was dry, I carefully peeled the tape off.  I actually use a lot of removable tape, I've been using it long before washi tape became a thing and the removable tape is much cheaper (and I didn't get the "fall" as straight as I would have liked, but, like I always say, that's the charm of handmade!).

Finally, the card was finished.  I am very pleased with how it came out, even if the letters are a bit wonky.  Thank you so much for reading my very long, full of information that I told you about even if you didn't ask, blog post.  Please consider joining us at Always Use Rubber but PLEASE check out our very reasonable rules first! I hope you all have a very happy holiday, however you choose to celebrate! Hugs, Christi

I would like to enter my Happy Fall Card in the following challenges: 
Crafty Catz - #351, Anything Goes
Through The Purple Haze - #115, Anything Goes
Crafty Gals Challenge - #101, Anything Goes
Simon Says Stamp Work it Wednesday - December - Use Dies
Tuesday Throwdown - #323, Anything Goes
Try it on Tuesday - Celebrate!