Followers

Showing posts with label Graphic 45. Show all posts

Saturday, September 29, 2018

Celebrate!

This month at Die Cut Divas we are using the color "Yellow" as well as some adorable digis from Kinda Cute Digis.  

You still have a little time to join in the challenge if you wish!


What I Used to Make my Card:
Square {5 1/4" x 5 1/4"} White Card
Black, Yellow and Light Blue Cardstock
Graphic 45 Artisan Style Paper, Patterns & Solids, 8" x 8" {available online}
Border Die - Dotted Line {unknown manufacturer}
MFT/Die-Namics Wonky Stitched Circle STAX
Lawn Fawn Celebrate die, #LF1429
Big Rose Image by Kinda Cute Digi's
Alcohol Ink Marker in Yellow

The lovely Arlene sent me this image {as she did for the image I used here} and I used the wonky stitched circle die to cut it out.  I colored the image with alcohol ink markers.  That was my mistake.  I typically try to get all the supplies I need together before I put a project together {or I at least know in my head what I am going to use} and this time I colored the rose before I had anything else to go with it.  The hunt begins for the perfect background paper with me first going through all my 6" x 6" pads, 8" x 8" pads, as well as any odd sized pads.  Then I move on to my 12" x 12" papers.  Well, I overlooked the Artisan pad that I finally used and it took me DAYS to figure out what else I could find to match this rose.  I am so new at working with alcohol markers that I was afraid to try and blend any other shades of yellow in the flower {watercolor I can handle,
Another Peek
alcohol ink, not so much} because I was certain I'd ruin it and I only had this flower left.  Yes, I had other images I could have used, but give a girl a break!  Honestly, I was so invested in the rose at this point that using another image didn't even cross my mind.


Finally, I found the paper I decided to use.  I think the yellow matches nicely.  I cut the paper using a dotted line border die I have; it's literally a metal line of dots. Unfortunately I don't recall where I acquired it but it's pretty handy when you don't have a die large enough to cut what you want, as long as what you want is straight edged.  I mounted the rose onto the background paper.  Then it was time for the sentiment.  I typically stamp in black ink, but I wanted to pick up some of the other colors in the background paper so I decided to use the celebrate die.  The word was cut three times, once out of light blue card, then once each out of yellow and black card.  I layered the cuts and there have been quite a few times where my eyes played tricks on me and I thought the word was 3D.  I didn't plan on that effect but hey, I like it! 

There you have it!  My square Celebrate card.  I hope you liked my little tutorial and if you can't make the challenge at Die Cut Divas this month, be sure to check back tomorrow!  Thanks for visiting ~ Christi


I'd like to enter my Celebrate card in the following challenges:
Art Impressions - #242, Vibrant Colors
Addicted to Stamps & More - #311, Anything Goes
Simon Says Stamp Wednesday Challenge - Anything Goes {entry #2}
Tuesday Throwdown Color Challenge - Use Complimentary Colors
Pause, Dream, Enjoy - M, Anything Goes
Daring Cardmakers - With a Flourish {flourishes on the word}
Creative Knockouts - #265, Anything Goes
Retarte - #128, Anything Goes


Saturday, April 1, 2017

Follow Your Bliss at House of Cards

Hello everyone and thank you for joining me today as I share my take on the House of Cards April challenge:


You can use feathers, the color palette or both!  

I was inspired by my good friend Jane's recent card (see it on the right) and I decided to CASE it (too bad it's too late to enter this card in the challenge; it fits perfectly in my opinion!)

What I Used to Make my Card:
Vanilla Card Base
Turquoise, Dark Turquoise, Medium and Light Brown Scraps
Graphic 45 Artisan Style Collection, 8x8, #4501113
DCWV Linen Closet Stack (old version click here for info)
Memory Box Stamp "Follow Your Bliss" #B2060
Distress Ink in Faded Jeans
Darice Nested Craft Dies, Classic Circles, #2014-74
Household Twine, enough for bow


I have no feather stamps or dies, so I went and Googled 'feathers' and traced the ones I liked using my trusty Silhouette CAMEO.  I also used the Silhouette to cut the feathers out of the turquoise scraps I had.  Once I had cut a few feathers, I moved on the the circles.

Using the Follow Your Bliss stamp, I stamped the sentiment on light brown card and then used the circle dies to cut the first circle.  The second circle is cut from medium brown card, the third from the DCWV stack and finally the fourth is cut
Colors are closer to real life in the above card,
but here is another look
from the coordinating paper I found in the Artisan Style Collection.  I attached all the circles together, then placed the feathers on the side. The finishing touch for this card is the bow I made using plain old household twine.  I hope the card I made inspires you to come and play along at House of Cards!  I honestly wasn't crazy about the color scheme this month but it grew on me.  Look through your stash and see if you can find any patterned papers that match the scheme; you'll be surprised how often blues & browns are used -- at least I was.  Off to catch up on my other design team commitments {and figure out a special announcement! Don't you just hate love surprises? }~ Fondly, Christi


I am entering my Follow Your Bliss card in the following challenges:
Crafty Friends Challenge - M, #54 - B is for. . Bliss!!
Making Memories Crafting Challenge - M, #3 - Add Some Layers
Die Cuttin' Diva's - #310, Anything Goes
AAA Cards (CAS Challenge) - M, #86 - Use Die Cuts
Crafty Hazelnut's Patterned Paper Challenge - Anything Goes
Classic Design Team Challenge - M - Anything Goes 
Aud Sentiments - #176,  Anything NOT Birthday
Simon Says Stamp Wednesday Challenge - Anything Goes


I found these challenges, and MANY more, at Challenges for Days!

Friday, October 23, 2015

If the Broom Fits. . .

I am so sad that Halloween is over for another year, but, I take heart in knowing I can create Halloween stuff all year round!  Don't be surprised if you see a card or a project pop up here on occasion. So, here is my last hurrah for Halloween 2015:

How I Made this Card:
Square (5 1/4 x 5 1/4) Card Base
Tim Holtz Bird Crazy Stamps
Tim Holtz Sizzix Bird Crazy Dies, 660954
Tim Holtz Crazy Things Stamps
Graphic 45 Rare Oddities Paper
Carta Bella All Hallows Eve, 6 x 6 pad
DCWV Dark Romance Paper Stack (discontinued?)
Tim Holtz Idea-Ology Small Talk, Occasions
Ranger Archival Ink in Jet Black
Distress Markers
Purple Paper
Brown Paper (for the broom)
Pop Dots


This tutorial is going to be a bit different. Since this card is busier than my typical creation, I am going to move from the focal point, the bird, out.  So, I stamped the bird from Bird Crazy using Jet Black ink and colored it in using Distress Markers and a watercolor brush. Unfortunately, I made this bird so long ago, I can't remember which colors I used and I didn't make note of them. In fact, I didn't even like the way this bird came out and wasn't going to use it at all.  But, she hung around my desk and grew on me.  And once I added the witches hat and broom, well, I fell in love with image.  I made her when I first got the Bird Crazy die set, so I pop dotted the wings, since I could. I fussy cut the hat and the broom before the Crazy Things die set even came out, so that gives you a sense of how long ago I made the bird. And, note to Santa, I still need the Crazy Things Die Set - got my eyes peeled for a good bargain.


I cut the frame the bird rests on out of Rare Oddities Paper (the hat also was cut out of this paper) and then backed the frame with paper from All Hallows Eve from Carta Bella.  I had originally put the bird and the frame on a dark purple card, but the next day realized it was completely crooked - that's what I get for trying to create in the dark! So the purple card was turned into another layer.  I made my square card out of a paper from Dark Romance (which I could not find on DCWV's website, but it is available in ton's of places), and I edged the card using Ripe Permission Distress Marker 'cause the inside of the card is white and I hate those white edges!

Lastly, I used a Small Talk Sticker, from the Occasions set, as my sentiment.  I lightly colored the sticker with Shaded Lilac Distress Ink; smushed a bit on my
craft mat and watered it down to death, I didn't want the purple ink to overwhelm the saying. I almost had to use another sticker since this one got so wet, but I salvaged it, who doesn't like distressed a bit more distressed? Since it's difficult to read in most of the card pictures, here is a close up of the sentiment sticker.

I hope this tutorial was easy to understand. I couldn't think of a better way to write it up for you and I am under a time crunch as I will be away when this posts.  Please, feel free to ask me any questions by leaving a comment or using the contact me form on the side. Thanks for flying stopping by and I hope you have a frightfully fantastic All Hallow's Eve! Fondly, Christi
Another Look
I am entering my "If the Broom Fits" card in the following challenges:
Fussy & Fancy Challenge - (October) #150, Orange, Black and/or Purple
Morgan's Art World - #10, Halloween
Vintage Stamping (Flonzcraft) - #37, Use a Die/Dies
Fusion Card Challenge - All Hallow's Eve (used photo inspiration)
Eureka Stamps - Halloween
Lawnscaping Challenge - Too Cute to Spook
Animal Friends Challenge - (October) Halloween - 2nd Entry
That's Crafty! - Haunted Halloween

Sunday, August 16, 2015

CELEBRATE with Anything But a Card's Final Challenge

It's with mixed feelings that I write this post.  I'm thrilled to have been on the Design Team for Anything But a Card since November of 2013; it was my first design team ever and due to my fellow teamies and Susan Brown's encouragement, humor, help (lots and LOTS of help) I have been blessed with designing for a few more manufactures and such.  I have always loved making things other than cards and this experience definitely enabled me to learn, experiment and grow as a person and a crafter.  So, before I get started on my project I want to shout out to all my fellow DT's, both past & present and to all the beautiful creations that people have entered! Now, as you see, the theme for this last month is Celebration.  I hope you can make a Celebration project and join us. You still have until September 6, 2015 to whip something up and join us (and keep checking the Anything But a Card blog, I hear there may be some surprises in the works!). My favorite holiday is Halloween, so I made this wall hanging to celebrate my favorite holiday:


What I Used to Make my Project:
White Memory Tray - postcard sized squares (I painted it black)
Graphic 45 Papers in Steampunk Spells & Rare Oddities
Rare Oddities Journaling & Ephemera Cards
Retro Art Cafe - Pumpkin pods, paper skeletons, skull cameo, chipboard feather, acrylic black cat & bat 
Prima Resin Frames #572372
Tim Holtz Sizzix Small Bird & Cage Die Set #657207
Tim Holtz Simple Sayings Set, #CMS155
Blood Drip stamp is from Viva Las Vegas!
Potion Bottles from The Porkchop Show
Plastic Bone, Black Cat Kittens & Fiber (stash)
Distress Ink in Frayed Burlap (colored embossed bone & edged sign)
Wendy Vecchi Archival Ink in Potting Soil (colored resin frame)
Ranger Embossing Powder in Rich Red
Homemade Embossing Powder (SU! Black & Hologram Highlights mixed, used on feather)
SU! Antique Ivory Embossing Powder (on the bone)
Clear Embossing Powder

I figured it would take me too long to explain this piece step by step, plus, I worked on it for about 3 weeks (on and off) and can't recall them all, so, I am just going to explain some of the embellishments.  Every square uses either Steampunk Spells paper, Rare Oddities paper or Rare Oddities Journaling & Ephemera Card for the background. 

Square #1 "Ravens" - I used a piece of flower stem from my backyard for the tree & mixed my own embossing powder for the feather. Also, the Raven Feathers advertisement is a Rare Oddities Journaling & Ephemera Card.

Square #2 "Cats" - I think the little blood drip is awesome. I admit, I was nervous that I would mess the paper up (I hoard Graphic 45 papers like crazy), but it came out fine. Whew!
Square #3 "skull" - I antiqued the Prima frame with Frayed Burlap ink, but I was concerned about it drying, so I threw a bit of clear embossing powder on it. 

Square #4 "Happy Halloween Sign" - it took me forever to get the plastic bone covered with the embossing powder, but I am really happy how it came out.  I had originally wanted the sign to hang freely, but the fiber was creased, so the sign is glued to the background. This is what the bone looked like when I started next to the finished bone. 

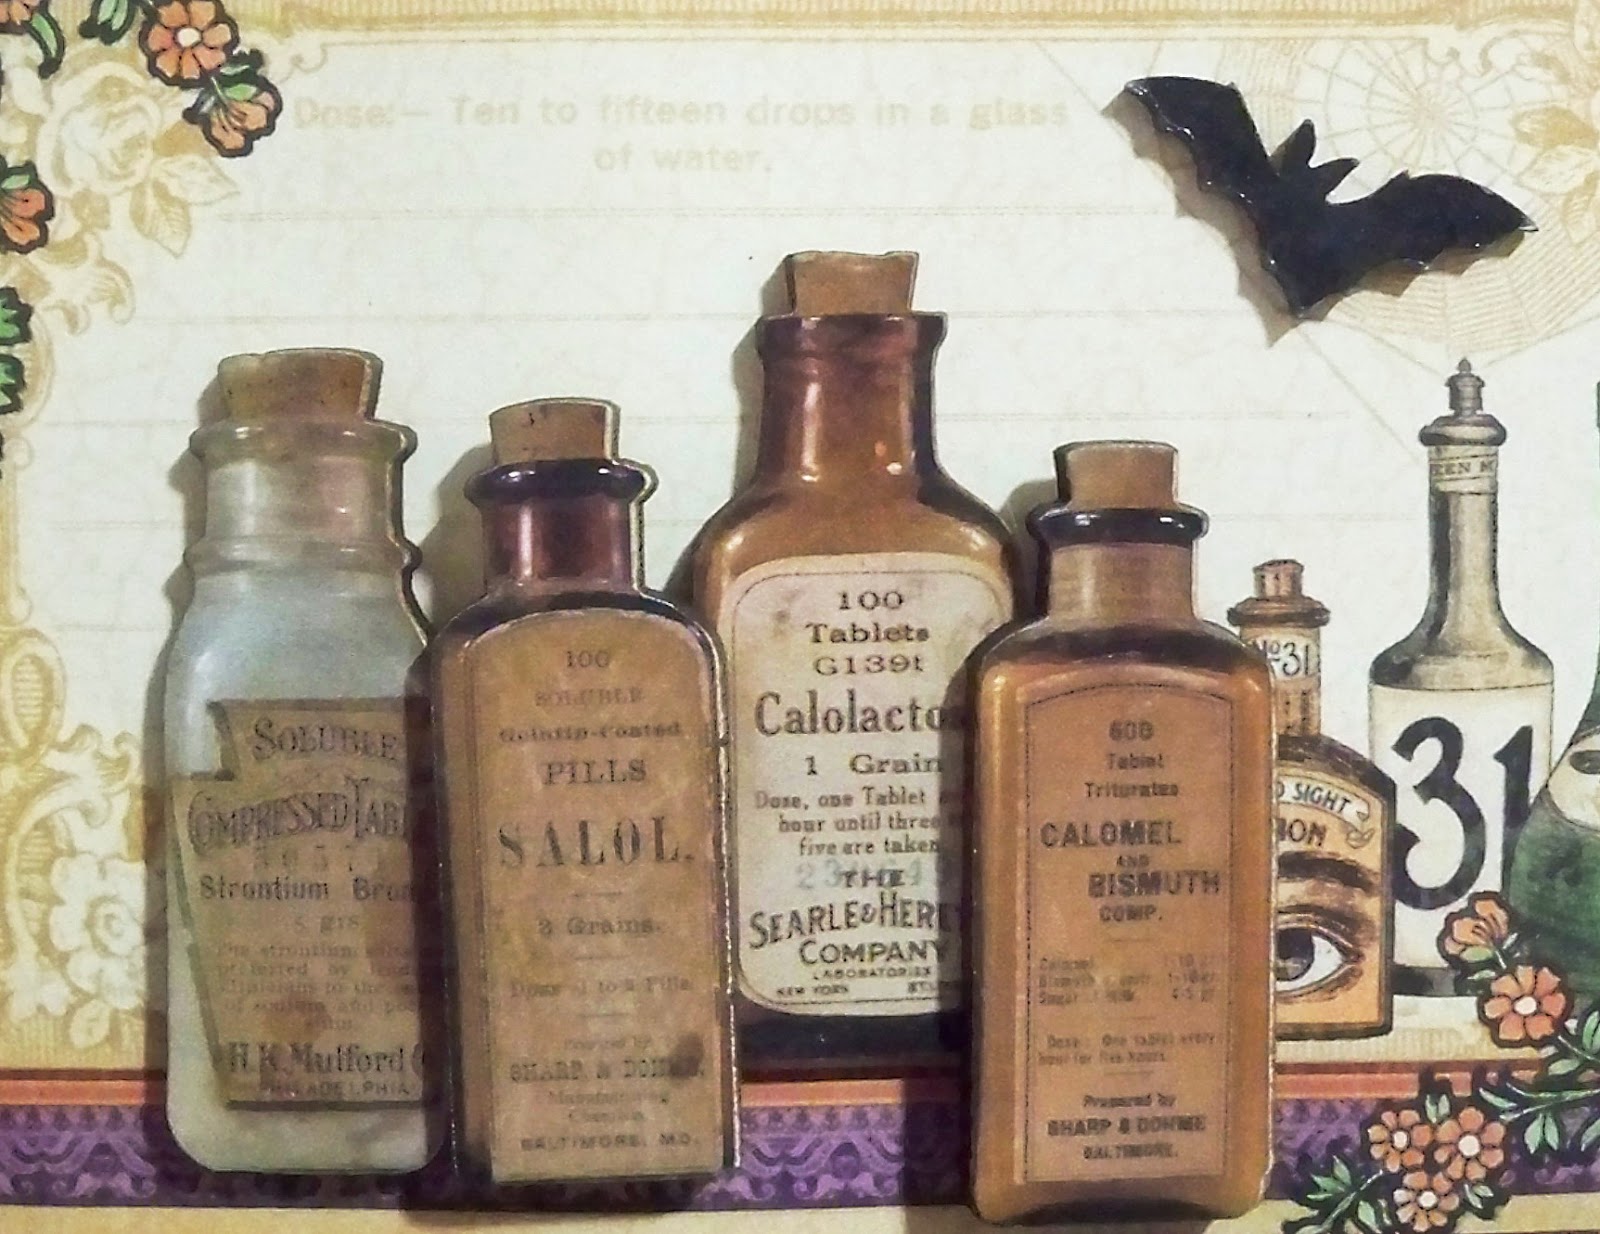
Square #5 "Potions" and Square #6 "Skeletons" are fairly self explanatory.  I loved making this to celebrate Halloween - it's never too early to get your freak on! 


Another Look
Thank you so much for stopping by & please consider following me. I am on a mission to get 100 new followers in the year 2015 (i'm almost there!).  I hope you have many reasons to celebrate! ~ Christi

I am entering my Halloween Wall Hanging in the following challenges:
My Sheri Crafts - #163, Show Me Your Decor
Simply Create, Too - #92, Anything Goes
Simply Papercraft - #11, Anything Goes
Quoth the Raven, Nevermore - #47, Pick Any 3
Decorate to Celebrate - #106, Anything Goes
Crafty Gals Corner - #32, Any Holiday