Followers

Showing posts with label Flowers. Show all posts

Friday, February 18, 2022

The Robin's Nest Creatives and Hope All is Well Card

Before I get to my post let me say I am delighted to announce I am now a part of The Robin's Nest Creative team and will be posting the 1rst & 3rd Fridays here as well as on the blog.

 So many people in my life lately seem to be going through some tough times.  All sorts of issues that are throwing a wrench in their daily lives.  I made this card to send to a friend who just had brain surgery; luckily he is doing fine, but a card never hurts to perk someone up!

I started this card by stamping the flowers, from Pinkfresh Just a Hello Floral stamps and matching dies set, with my favorite black ink on some water color paper.  I colored the flowers with my Zig markers, then adhered them to a white card.  I stamped the sentiment in black ink, cut it out and placed it in the center of the two floral pieces - it's a brilliant set because you can use the separate pieces so many ways and the flowers aren't too complicated, at least not for me.  Plus it comes with a fantastic range of sentiments.  I finished the card off with some Mini Dew Drops in light blue and medium blue {these blue mini dew drops can be bought in many of the mini dew drops collections such as Belgian Chocolate, Hillside, Rubber Ducky, Skies and Riverside}

Thank you for stopping by to see my card & I am looking forward to many fantastic creations using The Robin's Nest Creatives products ~ Fondly, Christi

I am entering my card in the following challenges:
Craft Rocket Challenges, #89 (M) - Sparkle & Bling
Tic Tac Toe Challenge, #149 - I used the middle horizontal row (white, Friendship Sentiment, 2 of the Same Thing)
The Paper Shelter, #499 - Shades of Blue
Penny's Paper-Crafty Challenge, #515 (M) - Anything Goes
World Wide Open Design Team Challenge, #02 (M) - Anything Goes
Happy Little Stampers Watercolor Challenge (M) - Anything Goes w/ Watercolor


Thursday, July 22, 2021

Happy Everything!

 Hi everyone!! I felt the need to make a happy card and since I adore the Simon Says Stamp "All the Feels" release, especially the Slimline Florals stamp and die, it was the perfect set to turn to.   


What I Used to Make my Card:
White Slimline Card Base
Light Blue Card for Background
Simon Says Stamp Slimline Florals Stamps, #SSS202299c
Simon Says Stamp Slimline Florals Dies, #SSSD112349c
Lawn Fawn Scalloped Slimline w/ Hearts, Landscape, #LF2476
Watercolor Paper {I use this}
Simon Says Stamp 
Fine Detail White Embossing Powder
Zig Clean Color Brush Markers
Gina K Amalgam Ink Pad in Obsidian Ink

The first step to making this card was to make the slimline base.  I found a phenomenal cardstock to use for my card bases, suggested by Jennifer McGuire, called Accent Opaque White 8.5" x 11" Cardstock Paper, 120 lb. - I get mine through Amazon and I LOVE it! My cards are much sturdier now and the paper isn't too pricey; at least I don't think so.  So I used that paper to make my slimline base.  I cut the blue background paper with the Lawn Fawn die and set it aside.  I then stamped and colored the florals, die cut them once they were fully dry {I typically wait over night} and used them to figure out where I wanted to put my sentiment.  I heat embossed the sentiment onto the blue panel, glued the floral line to the panel and then the panel to the slimline base.  

I hope my post finds you and yours well and maybe brought a bit of color to your day.  Thanks SO much, Christi

I am entering my card in the following challenges:
Addicted to Stamps and More #410 - Die Cuts and/or Stencils
The Sisterhood of Crafters - Embossing
Simon Says Stamp Wednesday Challenge - Out with the Old, in with the New
Alphabet Challenge Blog - Use Happy in your Sentiment
Pammie's Inky Pinkies, #2129 - Anything Goes

Sunday, May 30, 2021

Sending Smiles

Hi there,

I made this card to try coloring on Kraft card with alcohol ink markers and honestly, I felt like coloring without trying to shadow or die cut.  I think this is a beautiful background stamp and perfect for this sort of technique. 


What I Used to Make my Card:
Kraft Card Base
Simon Says Stamp Spring Flowers Background, #SSS102281
Simon Says Stamp Sending Smiles Die, #SSSD112179
Simon Says Stamp Fine White Embossing Powder
Alcohol Ink Markers
Vellum
Purple Shimmer Paper

This was an easy card to make; my only wish was that the white heat embossing came out cleaner but I guess when you have a bunch of animals their hair really does get everywhere!  The first step was stamping and embossing the background stamp {I love this stamp and it was about time I used it!}. Once that had cooled, I colored in the flowers and leaves with alcohol ink markers and set the card aside to explore how {and if} I was going to add a sentiment. I decided to use the sending smiles die, which I cut from purple shimmer paper and glued onto some vellum.  I trimmed the vellum into a strip and glued it onto the inside of the card so the adhesive wouldn't show.  There you have it! Despite the embossing I love the look  of this card.

Thank you so much for stopping by and taking a look at my card! I hope all is well with you; I'm happy to report things are calming down from the move {I'm still not settled but I can see improvement} and looking up here at my house.  Hope to see you very soon! 

Fondly, 

Christi

I am happily entering my card in the following challenges I found at Challenges for Days :)
NBUS, #26 - Anything Goes this is New {background stamp and die are brand new!}
Sisterhood of Snarky Crafters, #186 - K is for Kraft
Cut it Up, #226 - Nature
My Time to Craft, #458 - Floral
The Sisterhood of Crafters - Flowers as the Focus {hope this counts!}
Frilly & Funkie - Anything Goes
The House that Stamps Built, #2621 - Embossing, wet or dry
Simon Says Stamp Wednesday Challenge - Anything Goes
Little Red Wagon, #603 - Say it with Flowers


Tuesday, May 4, 2021

You Are So Much More to Me

Hi everyone!

I hope this post finds you all well! I have been insanely busy for what seems like forever, I found out that moving is not as easy as it used to be! In addition to moving all of my stuff, I have been helping a friend pack his home to prepare for his move back to the East Coast and then I got hit with a horrible sinus infection!  Finally things are settling down and I made this card to remind me that there are new beginnings all around us as Spring has Spring, which just so happens to be the May Twist {all of our challenges are always Anything Goes, but feel free to use the twist} at The Paper Funday Challenge this month!


What I Used to Make my Card:

5" x 7" White Card Base
Simon Says Stamp You Have My Heart Bundle, #
SET382YMH
Pinkfresh Studios Simply Sentiments: You, #PFSA0120
Pinkfresh Studios Sentiment Suite You Die Set
Watercolor Paper {I use this}
Zig 
Clean Color Brush Markers

Gina K Amalgam Ink Pad in Obsidian Ink
Distress Ink in Hickory Smoke
Grey Cardstock

Once I had stamped and colored the flowers I realized I wanted them both on one card but they wouldn't fit on the standard A2 cards I typically make; so, this is my third 5" x 7" card in less than a month. It's strange because I rarely make them t his size. Anyway, after the flowers were cut out and I had figured out the placement I wanted, I stamped the sentiment on white card using grey ink before die cutting the "you" from grey card.  I trimmed the sentiment down to fit where I wanted, glued it on and attached the word die cut above it. 

As I said in my opening I have been crazy with both moving and helping my friend move back to the East Coast.  By the time you read this he will have gone home and I hope to have gotten my new space in some order.  At least now I can open the windows and let the breeze in! This card is one of my favorite cards ever; it really says spring to me! I adore the flowers, the sentiment, the coloring, everything. I am going to be sending this to my sister, just because she does mean the world to me. Thank you all for stopping by, and for reading my post! I appreciate you more than you know!

Fondly,
Christi

I am proudly entering my card into the following challenges:
Simon Says Stamp Wednesday Challenge - Feminine
The House that Stamps Built M521- All About Moms
Addicted to Stamps, 404 - Any Occasion
Double D Challenges - Flower of the Month {honestly, I have NO idea about flowers LOL}
Simon Says Stamp Monday Challenge - Feminine
Dare 2B Artsy - Flowers
Allsorts, 622 - Flowers
Happy Little Stampers Watercolor Challenge - Anything Goes
Moving Along with the Times 130 - Bouquet


Wednesday, January 27, 2021

You are The Best

I made this little card to send out with a giveaway I had a while back but I had forgotten I never posted it!  Better late than never!  Hope you enjoy it!


What I Used to Make my Card:
White Card Base
Hero Arts Ink in Light Teal, Feather, Mint Julip, Tide Pool, Summer Sky, Deep Ocean and Teal Topaz {all were used in the floral portion and the sentiment was stamped using Teal Topaz. All of these inks came from My Monthly Hero kits and may not be available as stand alone inks}
The Stamping Village Thinking of You Set, #TSV_0420 {I used the Gina K Designs sentiment}, and Spellbinders Nested Fancy Edged Circle Dies, #S4-903 {retired but available.}  

This was a fast and easy card to make.  I cut out the smallest circle from the Spellbinders die and used it as a mask for the floral arrangement.  Once I was done, I stamped the sentiment and cut it out using the same circle, added dimensional dots to the center of the flowers and I was done!  The recipient loved the card as well as her prizes so this was a win win.  I rarely use a mask making my cards and I don't know why.  I think it is because back in the beginning of my stamping, it was much more difficult than it is now with all of the products made especially for masking easily.  Also, I might be a touch too lazy.  :)  

Thank you all for stopping by and all of your comments of encouragement!  I appreciate them so much!  I want to remind you that very soon I will be having a giveaway on my Instagram account so if you are a part of that social media, I urge you to begin following me; don't worry, I will happily follow you back!  If you aren't yet on Instagram, well, you don't know what you are missing!  There is more content, crafters, ideas, and things to inspire you than anywhere else I have seen.  And you can use your computer!  Just go to Instagram.com and make an account. Thanks again!  Fondly, Christi

I am entering my card in the following challenges:
Simon Says Stamp Wednesday Challenge - Anything Goes
Watercooler Challenges, #306 - All About Occasions
CASology, #382 - Unite
Unicorn Challenge, #61 - Clean and Simple
Make my Monday Challenge, #140 - Hello
Stamps + Fun = Creativity - Anything Goes
Allsorts, #608 - Beautiful Blooms


Wednesday, May 27, 2020

Floral Thank You Cards

I can't seem to stop making more than one card and these cards are no exception!  The floral panel is SO pretty {and I just got the stamp, first time using it!} I had to cut it in two to make double the cards.  Plus, super easy cards are fantastic and I can never have too many thank you cards {the trick is actually sending them out!}


What I Used to Make my Card:
White Card Bases
Gina K. Amalgam Ink in Obsidian 
Watercolor Paper {I use this}
Zig Clean Color Brush Markers 
Water Brush
Simon Says Stamp Pretty Peonies Background Stamp, #SSS101961
Simon Says Stamp Thanks & Leaves Stamp Set, #SSS101894 
Simon Says Stamp Fine Detail White Embossing Powder
VersaMark Ink 
Matching Dark Pink Cardstock

I stamped the peonies onto a piece of water color paper, using the Obsidian ink and used my Zigs to water color the image in.  I cut the paper in half, attached
One of the cards

each piece onto white card bases. Then, I was lucky enough to find some dark pink card that I think matched the peonies very well, so I used that to emboss the sentiment on.  I attached the sentiment and now I have 2 more pretty Thank You cards to add to my stash.

And the other card

As I am trying to use up the cards I make I think I will fill this out with just a Thank You saying on the
inside and put it in my purse so that the next time I go to the grocery store, or to get gas, or anything where I depend on others to work so I can get what I need and give them the card.  Maybe it will bring a smile to someone's face.  Thanks so much for visiting and I'd love to visit you back - leave me a comment so I can pop over to your crafty space and leave you some love ~ Fondly, Christi

I am entering my cards in the following challenges:
NBUS - Challenge 14
TTCRD - Anything Goes
Addicted to Stamps and More, #391 - Anything Goes
Arty Divas, #22 - Anything Goes
Stamping Sensations - Say it with Flowers


Thursday, April 16, 2020

Something a little different. . .

Hi all! I hope everyone is doing well & keeping busy.  I'm happy to say all the people in my life are doing well and I am crafting up a storm!  This card is a little different than what I normally create; I didn't use any ink or coloring on it.  I'd love to know what you think! Also, if you'd like to see the photos bigger, just click on it ~ thanks!


What I Used to Make my Card:
White Card Base

Pink, Lavender and Light Green Scrap Paper
Memory Box Springtime Tulips Die, #94216
Spellbinders Nestabilities Fancy Edges Circles, #S4-903 {available online}
Various Small Half Pearls in Green, Pink and Yellow


The very first thing I did for this card was I cut the Springtime Tulips out of
heavy duty white card. I had gotten a large bag of mixed colors of half backed pears and used the second to the smallest size on this {I repackaged the pearls and neglected to write down the sizes.} I started to stick the half pearls with a wax holder pencil; the type that has a small metal tube in the front and you pick up a bit of the wax and then your item and then place it on your substrate.  Well, I got SO frustrated that I could not continue and I searched for a solution. I even tried the actual "wax pencils," that you sharpen as a real pencil, that supposedly
work the same way but the "lead" is a sticky substance with no luck. I found all of those items while searching and most of them were in the Nail Art section - perhaps they'd work better if you were placing a gem onto wet nail polish?  Finally, I had read about the Marvy Uchida Jewel Picker - this thing is GREAT! I was never good using tweezers and I have no trouble using this product! You can buy the Jewel Picker with one tip or two tips {the one I used}.  I breezed through the rest of the design in no time!

Close Up of the Tulips
When the die was covered with the pearls I cut the background circle out of lavender paper, the leaves out of light green paper and the pink strip.  I assembled the card as you see in the pictures.  I honestly wasn't expecting the project to come out as well as it did; fighting with embellishments is one of my least favorite things to do! But I really liked how the half pearls fit perfectly on the tulip die and I am glad I persevered and finished the card.  I hope you enjoyed my small write up; I'd love to hear what you do with your embellishments that might be a little different.  Feel free to leave me a message letting me know you were here as well as a link back to your blog so I can leave you some love.  Fondly, Christi
Another Look

Outside The Box - Memory Box Die Challenge, April, Spring Fling
Crafty Gals Corner, #206 - Easter/Spring
Double D Challenges - Showers & Flowers 
Happy Little Stampers - Anything Goes with Dies 
Not Just Cards - April, Anything Goes
TTCRD - Anything Goes 
Shopping Our Stash, #418 - Happy Spring, Easter and/or Passover 
Make My Monday, #120 - Spring Flowers 
The Paper Girls, #197 - Florals 
Dragonfly Dreams - Add a Flower


Thursday, February 14, 2019

HAPPY VALENTINE'S DAY! Sending Love and Hugs

💖💗💘💝 Happy Valentine's Day! 💝💘💗💖

One layer cards are not easy for me; I think my fear is a throwback to the old days when we had no choice but to use rubber stamps on wooden blocks.  You couldn't see exactly where you were stamping, and then if the image didn't come out, well, there were no MISTI's or Platforms, so unless you could use a stamp positioner, you got one chance at a good image and if that image missed a line, or an entire section, your one layer card now became a two layer card so you could cover your mistake.  Or, even more often for me, trash.  

I could never make them work. - I still can't understand them.  I have 2 of them; one is the good old L shape and the other is like a prototype of the platforms, but we had no magnets and you had to have set it up beforehand.  I think you use acetate somehow.  

Since it is possible to over stamp on an image now without all the fuss, I can actually make one layer cards like this one and not have to pray that I've inked the images perfectly!  Here is my card:    


What I Used to Make my Card:
White Card Base
Simon Says Stamp Beautiful Flowers Stamp and Die set, #set330bf
Prismacolor Pencils
Studio Katia, Clear Round Dots, Mix 1, #SK2410
Ranger Archival Ink in Jet Black
Tim Holtz/Tonic Stamping Platform

I am very pleased with this card.  Making one layer cards is still something I struggle to do, even with all the help the new stamp positioners give you.  I stamp the image, color it, and then stamp my sentiment, often times to notice after it's stamped that the words are crooked.  Maybe that is because I'm crooked {I am literally crooked - I suffer from scoliosis, it reared it's ugly head very late in life and, while I had major surgery about 7 years ago, I've noticed that my upper torso, shoulders and such, are starting to get crooked again.  Guess it's time to go back to the doctor!} or maybe because I don't pay enough attention to the grid on the positioner.  Anyway, this card is fine!  I stamped the flowers, colored them with colored pencils, added some clear dots, then stamped the sentiment.  I didn't use any blender, I just kept coloring over and over and I am tickled by the flowers.  Not a lot of highlights but still very nice in my book!  

What do you think?  Were you stamping back when every stamp was wood mounted and you had to use one of those impossible old stamp positioners? What do you think of the new positioners? Do you have one and, if so, which one?  I'd love to hear your comments on how you insure everything is straight on your creations.  Have any tips?  Please leave your answers in the comments.  I do read each and every one of them and I thank you for taking the time.  Until I see you again, take care!  Fondly, Christi

I am entering my card in the following challenges:
Creative Inspirations - M, Love
TTCRD - Anything Goes
Mod Squad - Floral
The Flower Challenge - #29, Use Your Latest {this is the latest floral stamp}
Crafting by Designs - Love is in the Air
DL Art - M,  Always Anything Goes
Crafty Cardmakers - #227, Love, Love, Love


Saturday, August 11, 2018

Mom's Birthday Card

This month for Not Just Cards Anything Goes theme, I decided to use my Happy Birthday card for my mother. I can't sleep so I figure maybe I will write up some long overdue posts.  If you are a regular reader, you know my mother is essentially blind; she can see shadows and a bit more on a good day.  In case you aren't familiar with my mom's sight issues, here is a quick rundown: she has advanced glaucoma and macular degeneration.  She stopped using her glaucoma medicine after she retired thinking Medicare wouldn't pay for the drops. By the time she let me know there was a problem, she had already lost a good bit of sight in her left eye.  For her birthday this year I made her a card she can touch and actually feel the layers of the flowers and leaves and, if it's a good day, hopefully see.  By the time you read this she will already have the card since her birthday is June 27th. I'm sure she loves it!   


What I Used to Make My Card:
Vanilla Card Base
Altenew Layered Rose Die, #ALT1787
Coordinating Shades of Red Card
Coordinating Shades of Green Card
Memory Box Happy Birthday, Upright Script, #99684
Dimensional Dots

I also wanted to share the versatility of this rose set - so I am going to show you some different combinations you can make with the dies.  Here is a little "cheat sheet" I made.  The dies are in this order; the outline, the detail, and the base die.  Don't forget, if you want to make the picture bigger, just click on it!


For example, this sample uses the base die and the detail die.

This rose uses the base and the outline die.


This leaf uses the outline die layered over the detail die.


The base die and the outline die were used to make this leaf.


And, finally, this leaf uses the base and the detail dies.
I'd say you get a good value with this set!  When I made the card, I used different shades of red for the roses and green for the leaves.  I began by cutting my lightest shade with of the base die, the middle color is a bit darker and I used the detail dies, and finally the darkest shade was used for the outline.  I glued all the pieces together and let them sit overnight under my
Another Peek
drying tile just to ensure they'd be nice and sturdy.  I layered the roses on a 
vanilla card blank, moving them to the left hand corner so I'd have room for my sentiment.  Also, I used dimensional dots to mount the last rose {it's the one closest to you} just to give the card a little pop.  Then I attached the leaves around the flowers.  Lastly, I cut out the sentiment from the same card I used for the outline of the roses.  The computer seems to have dulled the two darkest reds a bit and it's difficult to see the difference in them.  You'll just have to trust me on that!  I hope to see you at Not Just Cards; it's an easy Anything Goes theme and you have all month to play :) 

Hope you are having a wonderful day and thanks for stopping by. ~ Christi

I am entering Mom's Birthday Card in the following challenges:
Always Happy Birthday - M, Anything Goes
Happy Little Stampers - M, Anything Goes with Dies
Let's Craft & Create - #140, M, Anything Goes, option: Lots of Layers
Cardz TV - #60, Anything Goes
The Cat's Pajamas - #349, M, Birthday


Sunday, June 24, 2018

I Love Your Face!

One of my recently acquired stamp sets is from Neat & Tangled and it's called "Friendly Florals."  I just cannot stop coloring this fantastic set!  My boss is going through a terrible time at work right now and I really think she could use a cheer up; plus, we always say "I miss your face" to each other, so this is a perfect card for her!


What I Used to Make my Card:
White Card Base
Zig Clean Color Markers
Neat & Tangled Friendly Florals Stamps
Neat & Tangled Friendly Florals Dies
Spellbinders Vintage Pierced Banners, #S4-820
Hero Arts Ink in Amethyst
Ranger Archival Ink in Jet Black
Dimensional Dots 

I stamped the flower arrangement on watercolor paper using archival ink in Jet Black and then colored with Clean Color Markers using a detail water brush.  I've been doing so much water coloring lately I've noticed it really does matter what paper you use;  the inexpensive paper will pill and even rip if you rework your color a few times, whereas the more expensive paper will put up with a lot more 'abuse.'  The expensive paper also seems to make my colors flow more easily, but I'm not sure if that is the truth or just my mind justifying the cost <smile>.
Another Peek

Anyway, once the flowers were dry, I cut them with the coordinating die.  Setting them aside, I stamped the sentiment on some plain white card and die cut it.  I positioned both where I wanted and used dimensional dots to attach them to the white card base.  As a finishing touch, I stamped some little dots {the stamp is included with the set} in a coordinating purple.

I really love how pretty this card is; it just seems so happy! It's just what the doctor ordered for someone who is struggling.  Thank you so much for stopping by; I really appreciate your views and comments. ~ fondly, Christi

~~~~~~~~~~~~~~~~~~~~~~~~~~~~~~~~~~~~~~~~~~
Just a reminder - my giveaway end on June 30, 2018 - you can get all the details here.
    ~~~~~~~~~~~~~~~~~~~~~~~~~~~~~~~~~~~~~~~~~~    
  I am entering my "I Love Your Face" Card in the following challenges:
Addicted to CAS - #139, Girl Power
Sisterhood of Snarky Stampers - #112, Q is for Quotes
Crafty Catz - #422, Anything Goes w/ the Option of Beautiful Blooms
Aud Sentiments - #206, Anything Goes w/ a Sentiment
Simon Says Stamp Wednesday Challenge - Bright & Cheerful {entry 2}
Moving Along With the Times - #74, June Blooms
Crafting by Designs - Flowers, flowers, flowers!
Calling all Sistahs -#14, Encouraging Card
The Flower Challenge - #21, Use a Previous Challenge, I used Challenge 1 {anything goes}
 

Tuesday, April 3, 2018

April is Simply Made at Stinkin' Inkers

When I found out that the April Stinkin' Inkers challenge was Simply Made {a one layer card}, I knew it was really going to be a challenge for me.  I never make one layer cards, ever.  So, I went to Pinterest and found this amazing card by Wanda Guess.  I literally bought my Prismacolor pencils because of her beautiful coloring. I want to be able to color like that!  I recently was gifted the Altenew "Adore You" set, so, I CASED Wanda's card.  I practiced a few cards on Kraft cardstock, but I couldn't get the vibrancy that Wanda achieved.  So I switched to a Bristol vellum cardstock; a smooth, white card.  Now, I researched this a bit because I couldn't wrap my head around the vellum part - all the vellum I knew was the regular, no good way to attach to your card, see through vellum.  Well, I learned that apparently vellum is a very smooth texture as well as a paper.  After all of the trials, I produced this card:


What I Used to Make my Card:
Strathmore Bristol Card Base

Altenew Adore You Stamp set
Prismacolor Pencils
Ranger Archival Ink in Jet Black
MISTI

I first made masks of all the flowers and leaves from the set that I wanted to use.  I just used plain old sticky notes, like we used to before there was all these fancy masking products.  I cut the masks out using the matching Adore You dies and set about placing the images.
Another Look

Once I was done stamping the flowers and leaves in Jet Black ink, I just colored.  I didn't use any blender except the colored pencils.  Once the coloring was done, I finished the card by stamping the sentiment.  That's it.  A simple, uncomplicated card.  Honestly, I wasn't expecting much from the colored pencils; I'd had a cheaper set I bought years ago and didn't have any luck coloring, or blending, with them.  This is a clear case of you get what you pay for.  I'm very pleased with this card and you will be seeing more Prismacolor coloring from me in the future.

Now, do you make one layer cards? Regardless if you an old pro or, like me, new to the one layer card, now is the time to enter them into the Stinkin' Inkers April challenge - who knows, maybe you'll be one of the winners!  Thanks so much for the visit, I really appreciate it ~ Christi

I am entering my Simply Made card in the Following Challenges:
Calling All Sistahs - #11, M, CAS Challenge using Photo {I used flowers}
DL Arts Thankful Thursday Challenge - #225, Thank you or Flowers
Altenew Challenge - Best Altenew Project {my first one actually!}
Emerald Creek Dares - Spring has Sprung!? 
Creative with Stamps - #25, M, CAS w/ a Sentiment
The Sisterhood of Crafters - Spring Flowers
Incy Wincy - Nature and all of it's Beauty

Wednesday, March 21, 2018

Pansy Petals

I am so glad spring is on the way; we had a relatively mild winter here in Colorado but there is nothing more relaxing to me than to watch the birds at the feeder doing their thing.  Not so much watching the cats watch the birds but I digress.  This card is inspired by the pansy die {actually, this set is Pansy 2} from Elizabeth Craft Dies.  Be gentle as it is one of my first tries at these 3D flowers; mine don't look quite as good as most, but it was fun to try!

What I Used to Make my Card:
White Card Base

Yellow Card
Watercolor Paper
Distress Oxides
Distress Markers in Picked Raspberry, Seedless Preserves and Blueprint Sketch
Die-Versions Whispers, Fence Background, #DVW-314
Elizabeth Craft Designs, Garden Notes - Pansy 2, #1488
Hero Art Fancy Word Dies, Thank You, from My Monthly Hero Kit for March 2018
Shimmery Dark Pink Card
Light Green Card
Distress Sprayer

I know I should have written down what Distress Oxide Inks I used but I've got
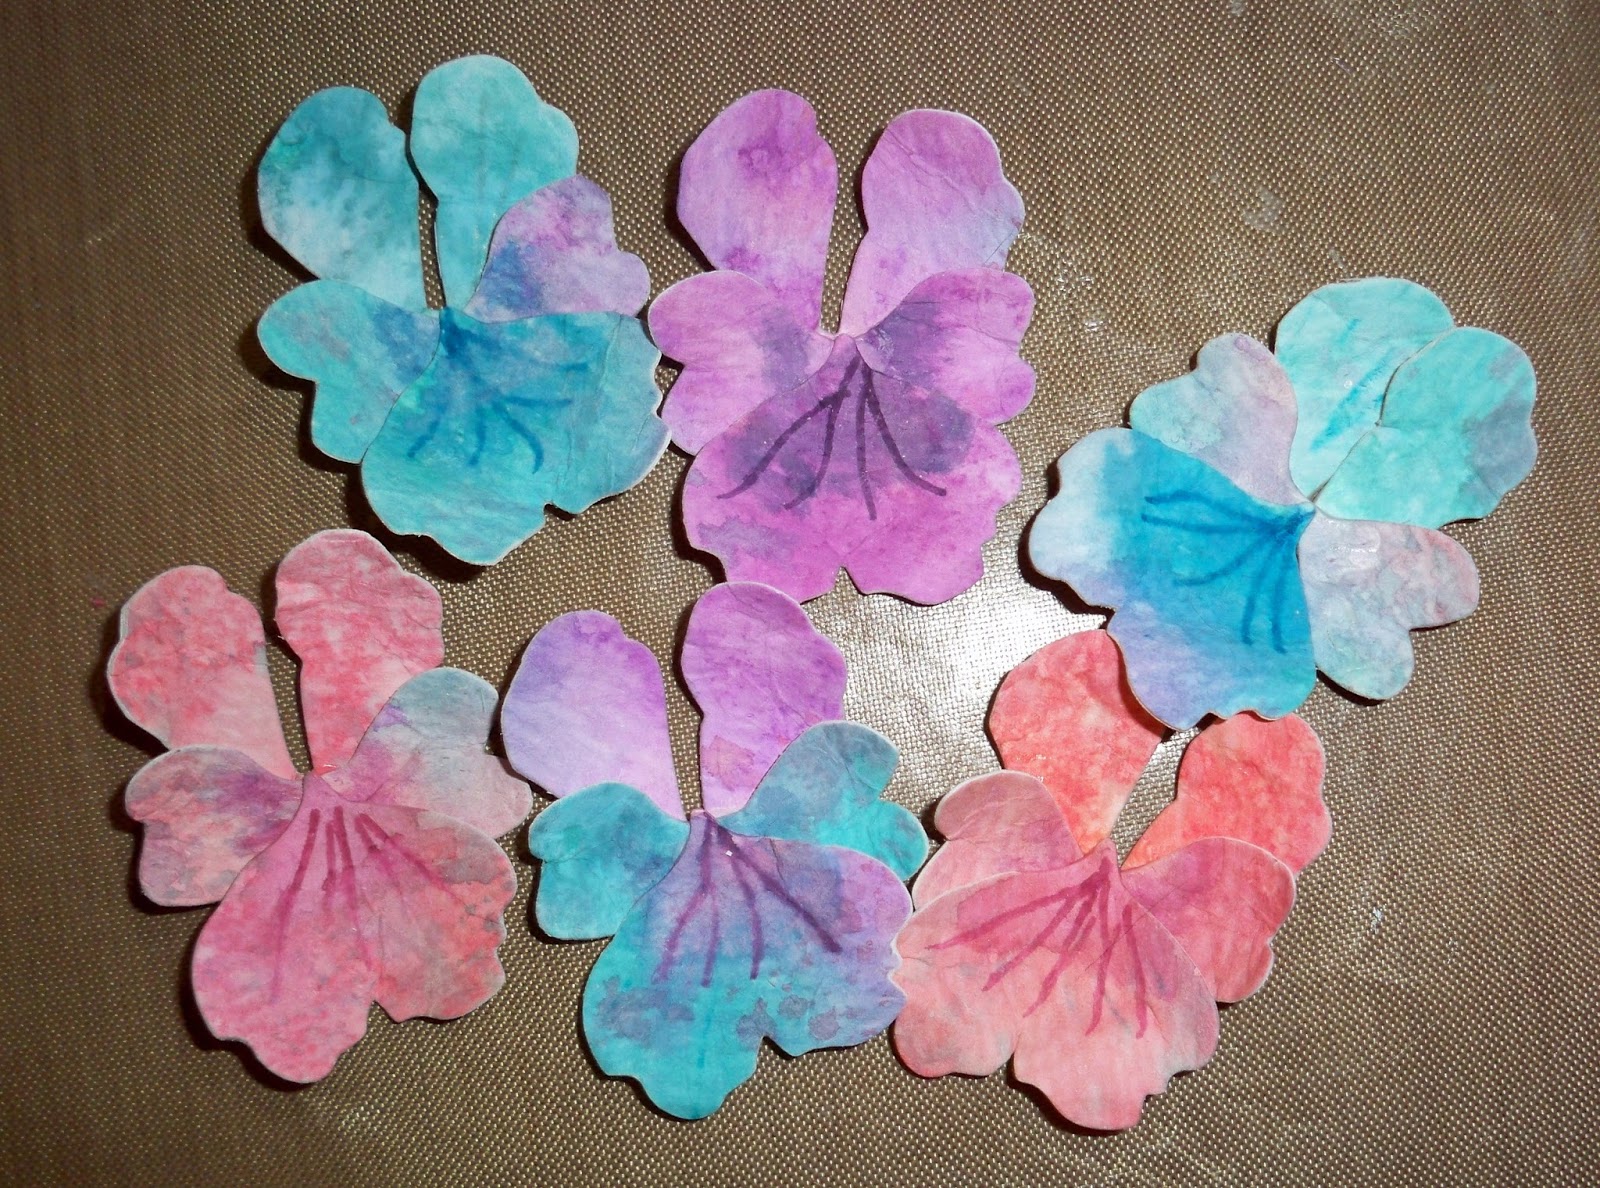
so many now I just grab and go.  I wanted the flowers to be a bit whimsical, color wise {and mostly since I know there is no way I could color my pansies to look like real ones!} so I just smooshed all the pink, blue and purple Oxides I had onto a piece of watercolor paper, spritzed them with the sprayer, and kept it fairly easy.  I did color certain parts of the paper with certain colors but, as you can see, some of the colors blended together.  All the colors are pretty and I used all of the paper I'd made.  After all, when you're the designer, your flowers can be any color {or shape} you want them to be!

Once the colored paper was dry and all the pieces were cut, I began assembling the flowers.  I did find a video on YouTube that shows the first pansy set being
made, so I did try to emulate the true style of the flower a little bit.  I put the flowers together by what colors worked together and then used Distress Markers to add little "veins" on the petals.  Honestly, I'm wasn't overly thrilled with them and I almost scrapped the whole thing, but I muted the lines down with a few washes of water and that helped me to like them more.  I cut the leaves out of a pretty, light green, card and then proceeded to fuss and fool with them and the flowers.  I think watercolor card is a bit too thick to properly shape but, if you look closely, you can see where I did bend the flowers.  I only had one stylus {and I've promptly bought a "flower kit" and made my own rubber pad out of two mouse pads glued together, so watch out - I'm ready now!} and actually did most of the shaping with my hands.  

Meanwhile, I cut out the background and attached that to a white card.  After a few days of fussing with the flowers and leaves, I decided they were the best
they were going to be and glued them around the perimeter of the card.  This led me to the dilemma of what to put into the middle.  I had chosen the dark pink shimmer card from my stash already but had no idea what I wanted the card to say.  Then I remembered that Hero Arts My Monthly Hero was sending out some fancy dies, so I rushed to the website, caught a glimpse of the word dies and decided this card would be a thank you card.  The kit didn't arrive until a few days ago and, as soon as I got a chance, I cut the dark pink shimmer card with the pretty Hero Arts dies.  I attached the 'thank you' to the middle of the card and I had my finished card!

I'm not thrilled with the flowers but, for a first time effort {I'm sure I've tried to shape flowers before, but who knows when!}, I think I did OK.  I've since talked to an Instagram friend who has basically told me practice makes perfect; I hate that!  I want to be an expert at shaping flowers, at coloring, at coloring with Copics, and at any other crafty thing I try!  I'm sure you feel the same way.  I want everything to come out like it looks in my head! I think the key is not to expect anything, that way you will like whatever you create.  Thanks for visiting, Christi

I am entering my Pansy Petals card in the following challenges:
ModSquad Challenge - Ready for Spring
Simon Says Stamp Wednesday Challenge - Floral Frenzy
Create a Smile - Springtime
a2z Scrapbooking -M, Anything Goes
Happy Little Stampers Dies Challenge - M, Anything Goes
Inspiration Destination - #146, Anything Goes, Twist: Use Pastel Colors
Die Cuttin' Divas - #361, Flowers
Cuttlebug Mania - Springtime
My Time to Craft - Easter/Spring

Die Cuttin Divas