Followers

Thursday, May 23, 2019

I know I haven't been around. . .

but I wanted to assure you I will be back very shortly! 


Unfortunately, I've had a bit of family drama and it is taking a while to sort itself out - but it is sorting!  I am adjusting to a new situation and setting up my crafty goodies {and brutally cutting through my stash - I'm sure a few giveaways are on the horizon!}  

I've been meaning to let you all know I didn't disappear forever and stay tuned for some more cards and art by me :)

Thanks for hanging in there with me; I appreciate all of you so very much!

Hugs!
Christi

Sunday, April 21, 2019

Happy Easter

The newest Lawn Fawn release has cleaned out my tax refund, but the images are just SO cute I had to have most of them!  I'm actually proud that I didn't buy them all!  My family isn't religious at all, and most of my friends aren't either so I had no Easter stamps (except one other Lawn Fawn set, which is also SO cute) but you know we have to use the NEW stuff!  I love the bunnies in this set; you'll see them later.  This adorable Easter basket called my name for the first card I've made with all of my new Lawn Fawn goodies.  I hope you like it as much as I do!


What I Used to Make this Card:
White Card Base
Lawn Fawn Watercolor Wishes Petite Paper Pack, #LF1355
Lawn Fawn Outside In Easter Egg Stackables,  #LF1627
Lawn Fawn Eggstra Amazing Easter stamps, #LF1884
Lawn Fawn Eggstra Amazing Easter dies, #LF1885
Lawn Fawn Mushroom House dies, #LF1920 {I used the butterfly die out of this set}
Watercolor Paper {I use this}
Ranger Archival Ink in Jet Black
Zig Clean Color Brush Markers
Hero Arts Ink in Lavender {came with a MMH kit, but available in these sets}
Lavender Bow {from stash}

I started this card by using the egg shaped die cut to make a window on the front of the white base card.  I backed that opening with the watercolor paper {there are two shades of paper in this pack; I used the lighter shade} and set it aside to dry.  While my card base was drying, I stamped the basket, bunny, and
Another Look
eggs on water color paper, colored them in with my Zig markers, and cut them out.  I also cut the butterflies out of pastel colored paper.  I dug through my bows and found the lavender bow that matched my color scheme and fussed with it until I was happy with the size.


Once my card base was dry, I assembled the basket, added the bow, and glued it onto the card along with the butterflies.  I stamped the sentiment with matching ink, cut it out with the fishtail die, and adhered that to the front of the card, trimming off the ends since it was a wee bit too long.  I'm not a pastel type of person but I love the softness of this card.  It's going to my wonderful neighbor and I think she will just love it - mostly because she loves everything I make.  She's like a second mom to me, which is wonderful since my mom is blind and can't really appreciate the cards & gifts I give her.  I still make them for my mom, but I know it frustrates her that she can't see them.  Anyway, this card is all ready to hop on over to Helene's and wish her a Happy Easter! Thanks for reading & have a great day! Fondly, Christi

I am entering my Easter card in the following challenges:
Creative Friday - #228, Rabbit, eggs, Easter fun
Simon Says Stamp Wednesday Challenge - Spring Mood Board


Paper Funday - #4, Anything Goes, Option: Easter
The Card Concept - #113, Spring Celebration


Cuttlebug Mania - Make a Card w/ and Easter Egg on it
Dragonfly Dreams - Include an Animal

Friday, April 19, 2019

Thank You Gatefold Card with Hero Arts

Hi everyone! The challenge at a2z Scrapbooking this month is Fun Folds so I decided to make a gatefold card.  I've never made one before and I am seeing so many beautiful new dies that are coming out that can be used as the flaps for gatefold cards I thought that perhaps I should try my hand at one!  I hope you enjoy my creation!


What I Used to Make my Card:
Water Color Paper {8 1/2 x 11"}
White Card {4 1/4 x 5 1/2"}
Scrap Light Blue, Dark Blue, & White Card
Oxide Inks in Shades of Blue & Purple
Hero Arts White Detail Embossing Powder, #PW122 
Versamark Watermark Ink Pad, #VC250
Hero Arts Lucky Star stamp set, #CM315
Hero Arts Lucky Star die set, #DI586
Hero Arts Ink in Intense Black, #AF345 
Hero Arts Thanks Stamp & Cut, #DC152
Die-Namics Stitched Fishtail Sentiment Strips Dies

Watercolor Paper {I use this} for stamped images
Adhesive & Watercolor Brush of Your Choice
The first step I took when making this card was making the gate-fold out of watercolor paper.  I cut the card to fit on an A2 base, which was cut out of white card.  I left the folds long, so the dimensions of the gatefold are 4 1/4" high by 11" long.  I just folded the panels around the piece of white card I used for the base {where I eventually attached the watercolor gatefold.}  I used Oxide Inks in shades of blue and purple to make both sides of the watercolor paper look like a night sky.  This took me the longest as I would add the ink to the paper, spritz with the Distress Sprayer and then either use my heat gun to dry, or leave the paper to dry on its own.  Since I hadn't used this watercolor paper before {in fact, I'm not even sure of the brand; it was just mixed in with my loose card stock}, I didn't want to take the chance of the paper pilling or ripping from too much work, so I took about three days to build up the color to match a summer night sky.  The paper also cracked some when I folded it so I filled in the white with a few of the same inks to have it blend in as much as possible.  Like I said, I did both sides of this paper so I think it was important to take my time to get the colors just right.

Inside the Card
While my gatefold paper was drying in between building the colors, I stamped the people and the cat onto watercolor paper and colored them with my markers.  Once they were dry, I figured out where I wanted to place them and stamped the stars and the saying with Versamark Ink, embossed them with white detail embossing powder, then attached the figures so they would appear to be looking up at the sky.  The set comes with an adorable dog as well as the cat but I wasn't happy with how it came out when I colored it.  Next I attached the watercolor panel with all of the people and embossing inside to the single piece of white card.  I really wanted this card to fit in an A2 envelope so I could mail it without it costing too much.  While all the card construction was done and sitting under the tile to dry, I made the band that holds the gatefolds closed.  This band is called a belly band {I have absolutely NO idea why} and I made mine out of a strip of white card that I had lying around.  There are no absolutes for the band and, while a lot of folks use ribbon, I wanted to add a word die as sort of the reason I was sending the card.  I cut the word thanks out of dark blue card, made a fishtail banner out of white card and used a bit of light blue scrap to add some interest {and to separate the white banner from the white of the band}, then attached all of that to my band.  I like that I can always make another band for this card if I decide to send it for another reason and that was the main reason I used the sentiment inside the card that can be used for any reason.  

That's how I made my first gatefold card.  I'm excited to try and make one with the fancy gatefolds now that I've gotten over my fear {I fear every new technique I try; I find if I just don't think about it and dive right in, my fear goes away regardless of how the project comes out.}  I hope you will join us at a2z Scrapbooking this month and show off your favorite Fun Fold card!  Thanks so much for reading all of my ramblings.  
Don't forget to use my discount code CHRISTI15 to get 15% off your purchases of $25 or more before shipping cost.  Also we are the exclusive retailer of Hero Arts digital stamps {and we also carry Sugar Tree Digital Stamps}, so if that is your preferred method of stamping, please go take a look.  Thank you so much and see you soon!  Fondly, Christi
 
I am entering my Thanks Gatefold Card in the following challenges:
Creative Fingers Challenge - #162, Anything Goes
Penny's Paper Crafty Challenge - #426, Anything Goes
Happy Crafter - M, Anything Goes
Little Red Wagon - #493, Look Up, Way Up
Ike's World - #119, Die Cuts
Classic Design Team Challenge - #4, Anything Goes

Monday, April 8, 2019

April Showers

Hi everyone! I've been getting used to my new job and then I got hit with some sort of sinus thing, so I haven't been as creative as usual!  THEN my Blogger account got hacked - nothing vicious, no one stealing my identity {the joke would be on them anyway, I'm poor!}, but they added an email address to my account and deleted my real email.  It has been a HUGE struggle to try to get my email back as the email for this blog; in fact, it still isn't correct, but I'm working on it - I suspect an April Fool's "joke" as it was compromised on 4/1/19 - ha ha ha - NOT!  However, this card is perfect for the Die Cut Diva's April challenge!  The theme this month is WATER and you can interpret that however you see fit.  We have the fabulous Altenew sponsoring us and I'll be sharing a card made with their products later in the month.  In the meantime, here is my card:


What I Used to Make my Card:
White Card Base
Watercolor Paper {I use this}
Ranger Archival Ink in Jet Black
Zig Clean Color Brush Markers
MFT BB Rain or Shine Stamps
Die-Namics BB Rain or Shine Dies
Hero Arts Ink in Soft Granite
Dimensional Dots

I began this card by adding the rain all over the card, leaving a space for the sentiment.  I literally laid the sentiment on the card and stamped the rain and the raindrops all around it so I'd be sure to leave enough room.  I also added the puddle in which my sweet girl seems to be dancing. 
Another Peek

Then I stamped the girl onto watercolor paper and colored her in.  I also stamped some clouds on a piece of white scrap, then cut out everything.  I used my Tim Holtz Platform to add the sentiment, using black ink so it would stand out.  Lastly, I added the clouds and the girl, attaching them with dimensional dots.  I am thrilled with how this card came out - I am happy with everything about this card!  I love that it's just a "thinking of you" type of card; I never have enough of them!  I hope you get your water elements out and join us for the Die Cut Diva's April Challenge - see you there! Fondly, Christi

I am entering my card in the following challenges:
Emerald Creek - M, Inspired by water, rain, etc. 
Country View Challenges - M, Easter and/or Spring
Cute Card Thursday - #576, Anything Goes
Crafty Catz Challenge - Use Your Dies

Monday, April 1, 2019

Gnome Home ~ Dies R Us Guest Post

Hello everyone! I am THRILLED to be a Guest Designer on the Dies R Us Challenge Blog! I was on the Inspiration Design Team a while ago and it was hands down one of the very best design teams!  So when Darlene asked me to Guest, I said, "Of course!"  Here is my card for their April Challenge Theme, which is Anything Goes; a perfect theme to help you hop into spring!


What I Used to Make my Card:
White Card Base
Cardstock in variations of Green and Brown
Light Blue card 
Watercolor Paper {I use this}
Ranger Archival Ink in Jet Black
Lawn Fawn Oh Gnome! dies, #LF1881
Lawn Fawn Mushroom House dies, #LF1920
Lawn Fawn Leafy Tree Backdrop, Landscape, #LF1237
Lawn Fawn Stitched Cloud Backdrop, Landscape, #LF1423
Scrap Red Card

Don't let the long list of items deter you - these stamps and dies are beyond adorable! Plus, you will use them again and again; I can't tell you how much I've used the Leafy Tree die; it's the perfect background for all your critter stamps, Lawn Fawn or not!  The first step to making this card was stamping, coloring, and cutting the gnomes, flowers, and mushroom.  As always, wait until your images are completely dry before you die cut them; go ahead, ask me how I know this!  While my gnomes were drying, I cut the Mushroom House.  Once it was cut, I realized that the light brown paper wasn't quite perfect.  I had used it prior and thought the base of the house fit.  I didn't notice that the right edge had a gap in it until I was assembling the cuts.  No worries!  A sweet blue mushroom to the rescue!  In addition to the mushroom, I used the little grass tuft and stem {I think it's a stem anyway} cut out of green card to add a bit of color and dimension.  

Next, I set about assembling the background.  I cut the Stitched Clouds out of
The Gnomes
light blue card and glued them to the white card base.  Then I cut the Leafy Tree out of a different light brown than the Mushroom House along with a gazillion leaves in shades of green.  The leaves are in a row of six, which are all cut at the same time, so it wasn't too tedious cutting out the different leaves.  I have a bit left over so I put them in a tiny zip bag and stored them with the die so I could find them easily AND remember to use them!  I added a pop of red to the door, propped the door open, and placed the female gnome in the house, looking out to the male who has come to visit.  I added the last bit of decoration and the card was finished.  I intentionally left the card with no sentiment so I could use it anytime I want.  Plus, I don't think I left enough room; maybe a tiny cloud that says "hi"?  At least there is plenty of room inside the card!


I had so much fun playing with these stamps and dies, but Lawn Fawn is one of my favorite companies.  I rarely buy just a stamp set; the matching dies open up endless possibilities for creating!  That is one of the main reasons I adore Dies R Us; if there are matching dies for a stamp set, it is going to be in the store with the stamps!  While they occasionally run out of an item, they get stock in as quick as the manufacturer can make them, so the wait time is minimal.  And the prices!  Let me just say anywhere I can get the best deal is where I want to shop and everything in their store from dies to paper to stamps to foil is priced far lower than anything else I have found and, trust me, I shop around!  

Well, thank you for reading this far down!  I hope you will take this opportunity to join in the Anything Goes Challenge at Dies R Us.  Who knows, you may win the challenge!  Have a great day!  Fondly, Christi

I am entering my Gnome Home in the following challenges: 
A Perfect Time To Craft - M, #4, Anything Goes
Simon Says Stamp Wednesday Challenge - Anything Goes
Time Out Challenges - M, #132, Home Sweet Home
Art Impressions - M, #225, Outdoor Scenes 
Cardz TV - #86, Always Anything Goes
Scrap from Your Heart - M, #32, Use Dies

Badges


Friday, March 15, 2019

Die Cut Divas and Morgan's Artworld

Hello, crafty peeps!!  How is the month of March going for you?  We just had a MAJOR storm here in Colorado with winds up to 70 mph; some places it reached over 100!!  I hope you are getting some signs of spring where you are and, if you are in the path of the storm, get ready!  Enough weather related stuff.  Here is my card using a Morgan's Artworld digi.  Goodness do they have beautiful stamps, but I knew there was NO way I could do them justice!  Hope you like the card!


What I Used to Make my Card:
Yellow Top Fold Card
Skinny Orange Yellow Washi Tape {manufacturer unknown}
Morgan's Artworld Sunflower Image {join the FB group to purchase}
Frantic Stamper Elementals #11, Bracket Coved Label, #FRA-DIE-09468
Prismacolor Pencils
Pebbles Family Ties Paper Pad {discontinued - available at many stores}
Strathmore Bristol Paper, Series 300
Gamasol {sometimes referred to as Gamsol, readily available}
Blender Stumps {I got mine through Amazon, but readily available}

I had the image of the sunflower printed on Bristol paper and colored it in with Prismacolor pencils, blended with Gamasol using blender stumps and generally putzed around with it until I was satisfied with how the sunflower looked.  I die
Another Peek
cut yellow paper and patterned paper using the Frantic Stamper die.  I noticed the card base itself, which is really old, was sort of cracking at the top, like they sometimes do when the paper is old.  I had already attached everything to it and I like the summery yellow so I thought of a way to "save" it.  I have a pretty good collection of washi tape {that I rarely use} and I found a skinny, orangey-colored tape so I edged the entire card with that.  


So, there is my card; I hope it brings a little spring cheer to you!  You still have a while to enter the challenge at Die Cut Divas "Anything Goes" Challenge for March.  We'd LOVE to see what you have created so please be sure to enter!  Fondly, Christi

I am entering my sunflower card in the following challenges:
A Gem of a Challenge -  Anything Goes
A Bit More Time to Craft - #88, Anything Goes
Crafty Hazelnut's Patterned Paper Challenge - M, Anything Goes
The Rainbow Card Challenge - M, Yummy Yellow
Colour Crazy Craft Challenge - Anything Colored Goes
Creative Friday - #226, Spring is Coming!
Morgan's Artworld - M, #3, Anything Goes
The Creative Crafters - #14, Anything Goes

Tuesday, March 12, 2019

Hello

Hello, crafty people!  Today I am sharing a card I made using a layering color set by Hero Arts.  They have so many new sets out now with the new catalog; I'm just waiting to get my new goodies!  Have you seen the new catalog yet? You can check it out by clicking this link HERE.  For this card I used a set that's been around for a bit, read on for more information. 


What I Used to Make my Card:
White Card Base
Purple Panel
White Card {panel and scrap}
Hero Arts Color Layering Nasturtium stamp set, # CM266
Hero Arts Color Layering Nasturtium die set, # DI472
Hero Arts Inks in Passion Flower, Amethyst, Mint Julep, Moss and Lavender
Hero Arts Hello Stamp & Cut set, #DC151
Dimensional Dots

For this type of set having a stamp positioner is invaluable, regardless of the type.  I used my Tim Holtz platform and stamped the flower onto white card using passion flower ink and then filled in the details using amethyst.  Then I stamped the leaves beginning with mint julep ink and detailing with moss ink.  One of the wonderful things about this particular set is you don't have to align the stamps perfectly. I can never seem to get them lined up properly, even though the stamps are clear and I use my platform.  But it sure beats when I used to stamp using Stampin' Up! two step stamping!  Those stamps were wood mounted and it was literally a hit or miss if I got them even close!  Do you have any tricks that you use when layering stamps?  I'd love to hear them!  All of the inks I've used I've gotten from the My Monthly Hero kits; I've checked out a LOT of subscription services and I think that My Monthly Hero is by far the best deal out there! {I get no compensation from saying this; I just think it's true!}

I then stamped "hello" right onto the white card panel, stamped the butterfly using lavender and amethyst inks, and cut it out.  I wasn't going to use the butterfly but I got a spot on the card that needed to be covered up and the butterfly ended up being handy!  Just to add a bit of interest, I mounted the butterfly on a dimensional dot.  Lastly, the white panel was adhered to the purple card, then the purple card was trimmed and mounted onto the white card base.  To me this card just screams spring and, since we have had more snow now than in years, I am longing for some warmer weather!  I hope you enjoyed my card and I'd love it if you'd become a follower - I am on almost every social media except YouTube {I just can't make a good video yet!} and which ever you choose, let me know in the comments so I can follow you back.  Have a GREAT day. ~Fondly, Christi

I am entering my card in the following challenges:
Shopping our Stash - #391, Celebrating Friendship
Unicorn Challenge - M, #41, Spring
Simon Says Stamp Monday Challenge - Feminine/Girly
Creativ Fusion Arts & Crafts - M, Spring
Crazy4Challenges - #474, Flowers
CARDZ TV - #84, Anything Goes
Cut it Up! - #169, Hello Spring!
Craft Rocket Challenges - #57, Flowers
The Flower Challenge -#30, Anything Goes


Wednesday, February 27, 2019

Some Cherub Love

Hi everyone!  While Valentine's day might be over, you can still enter your LOVE project over at Die Cut Divas!  I made my card full of Hero Arts goodness.  They are generously sponsoring the challenge this month and I'm hoping you can squeak into the challenge before it ends.  We'd LOVE to see your creations!


What I Used to Make my Card:
White Card Base
Pink Shimmer Paper
Hero Arts Heart Confetti Fancy Die, #DI348
Hero Arts Cherubs, stamps, #CM211
Hero Arts Cherubs, dies, #DI442
Die Namics Fishtail Sentiment Strips
Hero Arts Ink in Pink Tourmaline, Strawberry, Bubble Gum and Red Royal 
Colorbox Petal Ink - Alchemy {any shimmery gold will work}
White Card

I began this card by stamping a whole bunch of cherubs on some plain white card.  Them I cut them out and chose the best ones for the card.  I tend to be a hard stamper and sometimes the little details get lost when I'm using clear stamps {while Hero Arts uses photopolymer for their stamps, it honestly doesn't seem to matter what material is used to make the clear stamps; I just stamp too darn hard!} the words inside the cherubs kept getting smooshed away and I had to really be aware of the pressure I put on my stamp platform.  I have to get over that feeling that the harder I stamp the more ink will stick to the paper; it's simply not true!  It's a leftover issue from using the old wood mounted, red rubber stamps and only having one chance at making a good impression.   

Once I had all my angels cut, I stamped the sentiment.  I stamped it first in a very light pink and then over-stamped it with gold.  You can't really tell in the photo but in person it looks really cool, in my opinion.  I tried to capture the dual tone in a photo, but it didn't come across the way it looks in real life  I hope you had a fantastic Valentine's Day and I hope to see you soon! Fondly, Christi

I am entering my Cherub Love card in the following challenges:
A Blog Named Hero - M, Love is in the Air
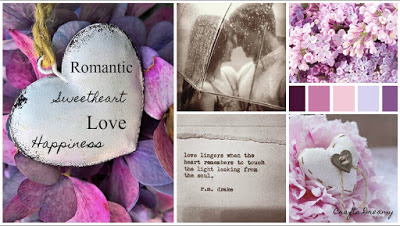
Crafts Dreamy Mood Board Challenge - M, See Board Below
Creative Crafty Cottage - #115, M, Valentine
Simon Says Stamp Wednesday Challenge - Anything Goes
Little Red Wagon - #486, Love It!
Crafting by Designs - Silhouettes
Double D Challenges - Pink & White
Shopping our Stash - February