Followers

Friday, March 2, 2018

Final ATCs for Janis' Birthday {And Then. . .Chocolate}

All good celebrations must come to an end, and so here we are, the last week for Janis' Birthday Celebration.  For this last challenge, Janis chose the theme "And Then. . .Chocolate" - yummy little party we've had!

What are ATC's? ATC stands for Artist Trading Cards.  There are no requirements to make them {unless you are participating in a swap or, in this case, Janis' fourth and last, theme And Then. . . Chocolate} EXCEPT they must be 2 1/2" x 3 1/2", the same size as a standard playing card or trading card.

Here are all the links for where you can still enter, but be quick! It's a good thing you can make an ATC in no time! {ends March 3, 2018}
Be sure to enter Janis' Blog Badge giveaway HERE!!!
WEEK 1 Theme - "All Those Cats!!"  You can still enter HERE
WEEK 2 Theme - "And The Chickens." You can still enter HERE
WEEK 3 Theme - "Adorable Teapot Collection"  You can still enter HERE
WEEK 4 (FINAL) Theme - "And Then.....Chocolate!"  Enter HERE
I've called my ATCs "Chocolate 1" and "Chocolate 2" and since I am really under the gun here, I'm going to be quick & just tell you what I used to make them.

Chocolate ATC #1
Heavy Weight White Card cut into ATC Size
Background made from Oxide Ink {scrap}
Sentiment from Riley & Co., Funny Bones, #RWD-564 Six Million Dollars
Tiny Money {stash}
Brown Card for Sentiment
Black Detail Embossing Powder, Hero Arts, PW-119
Embossing Ink
Shrink Plastic
Sharpie Markers
Gold Sparkle Gel Pen


The best part of this ATC was making the little candy bars out of Shrink Plastic. You can't really read them, but the candy bars say Hershey, Bite Me, YUM and Candy. I thought for SURE I had something with chocolate on it and I literally searched my entire stash {I did find the paper I used on Chocolate #2, as well as some other cool stuff I pulled out}, but I have nothing regarding chocolate except that sentiment.  Oh, well.  On to #2.

Chocolate ATC #2
Heavy Weight White Card cut into ATC Size
Image cut from Collage Sheet {out of business}
Words punched from a VERY old paper from SU!
Two Scalloped Oval Punches from My Family Treasure {out of business}
Beautiful Background Paper {stash}

I love this background paper and I have a small bit left, so you'll be seeing the end of it very soon.  I got it, along with the collage sheet, from a kit club I used to belong to that has since sold their business {about 9 years ago!}.  So this is a sort of vintage chocolate ATC.

That's it kids.  You only have about 24 hours to join in the fun, but I do hope you find some time - at the very least go and check out everyone's creations.  You can see each week by clicking on the above links.  And you can still join each week; but the whole shebang ends 11:55 pm on March 3, 2018.  Thanks for stopping by and checking out my ATCs - I appreciate your visit! Christi

I am entering my And Then... Chocolate ATCs in the following challenges:
Janis' Birthday Celebration 
Word Art Wednesday - #325, Anything goes
Simon Says Stamp Wednesday Challenge - Anything Goes
Crafting with Friends - #62, Anything Goes

Thursday, March 1, 2018

Stinkin' Inkers Wishy Washi Challenge

** Yes, this posted early.  Yes, it is my mistake.  Yes, I'm sorry.  Please do join the challenge, due to begin Tuesday, March 7.  Meanwhile, Love is in the Air is still going until March 6!

Hello everyone! Let me just say I am not a washi tape person.  I didn't go crazy {unbelievable, but true!} and buy tons of tape when it first came out.  In fact, for the longest time all I had was the first batch made by Tim Holtz.  But, the more I saw the creative ways people used washi tape, the more that helped me slowly collect more.  I still don't have very many {not compared to some of you!} but I did score these beautiful glitter washi tapes at my Dollar Tree.  And then I saw the sequins that matched and had to buy those, too!  Out of those two supplies was born my "Wishy Washi" card for the March Challenge at Stinkin' Inkers. 


What I Used to Make my Card:
White Card Base
Scrap Paper
Washi Tape, Glitter Purple & Pink
Spellbinders Nestabilities, Curved Rectangles, #S5-006
Distress Ink in Wilted Violet
Sentiment by Riley & Co., Funny Bones, Supermodel, #RWD-399
Sequins
6mm White Craft Foam {Michael's}
Acetate
MISTI
Copic Markers that Match the Frame

Before I get into the card, I need to share this ENABLER alert! The dies I used to make this card are on sale at Spellbinders for $6.99! Regular price is $19.99, so that is a SUPER deal, even if it is getting discontinued!

First, I used a piece of scrap cardstock to layer the washi tape, alternating
the two colors.  The only issue with Dollar Tree glitter washi tape is that the
glitter isn't that great at staying on the tape.  I got glitter everywhere; and I am still finding glitter in places it has no business being.  However, the loss of glitter didn't effect the tape at all, so I guess that makes up for it. I looked on the Dollar Tree website and couldn't find any glitter washi but it's readily available elsewhere or you may be lucky and find some at your local Dollar Tree store.


I thought I'd show you how I make sure the frame of my shaker card matches up with the acetate.  Now, you don't have to be exact; I could have cut out a plain rectangle for the shaker window but I think it adds to the construction of the card if everything is as close to the same shape as can be.  What I did was use removable tape to hold the dies together so when I cut the frame and then the foam the dies stayed in the same place for both.  You can't really see the removable tape but I use it SO much I have a dispenser on the same table as my Big Shot.  It's cheap and I typically don't have an issue with it sticking when it isn't wanted.  I used the dies three times {the frame, the foam, and the acetate} and the removable tape worked wonderfully.  I know some crafters use washi tape to hold their dies in place; I tried that but promptly lost misplaced the roll I'd designated for that purpose in the mess on my die cutting table. Like I said, I have a dispenser - one of the old, heavy ones that teachers used to use in the classroom, and that's fairly hard to lose.


Once all my pieces were cut, I stamped the sentiment on the white card base, using my MISTI and the dies to ensure I placed it correctly.  I adore the whole Funny Bones line of Riley & Co.; they are just as snarky as I am!  Besides, who doesn't love a good giggle?  Before I assembled the card, I colored the edges of the craft foam cut out so the edges wouldn't stick out like a sore thumb.  I used Copic markers, but any alcohol ink marker will work {note: if you decide to do this step, make sure you are wearing latex gloves.  The alcohol ink takes a bit to dry on the foam and you don't want to end up with pastel finger tips like I did.} 
Another Look
As you can tell if you are a follower of mine, I love making shaker cards, and this one was a blast to make.  I hope you enjoyed my little tutorial and you should be breaking out your washi tape RIGHT NOW so you can join us at Stinkin' Inkers! Fondly, Christi

I am entering my Shaker Card in the following challenges:
Frilly & Funkie - Get in on the Action

Scrapy Land - Anything Goes
Craftaholics R Us - #9, Sequins
Simon Says Stamp Wednesday Challenge - Anything Goes (#2)
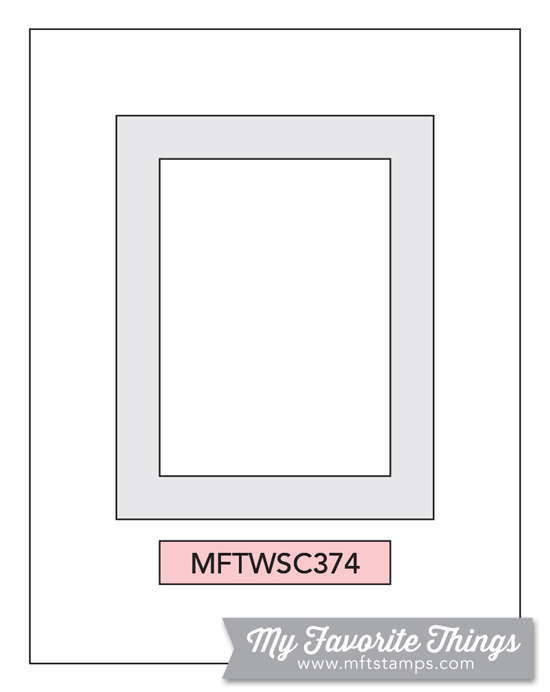
My Favorite Stamps - #374, Sketch Challenge
Die Cut Divas - M,  Monochrome
Stamps & Fun - Glitter
Time Out Challenges - Be Bold!
4 Crafty Chicks - #392, Anything Goes TWIST: Add a Sentiment